> ## Documentation Index
> Fetch the complete documentation index at: https://cal.id/docs/llms.txt
> Use this file to discover all available pages before exploring further.
# App Store
> Browse 70+ integrations in the Cal ID App Store to connect calendars, video tools, payments, and automation platforms to your booking workflows.
In **Cal ID**, the **App Store** allows you to connect with 70+ direct integrations, from video conferencing tools like Zoom to automation platforms like Zapier. This helps you automate your workflow and keep all your tools in sync. The whole idea behind **Cal ID** is to make scheduling easy, we want it to be an effortless process, and we want everybody to be able to access it.
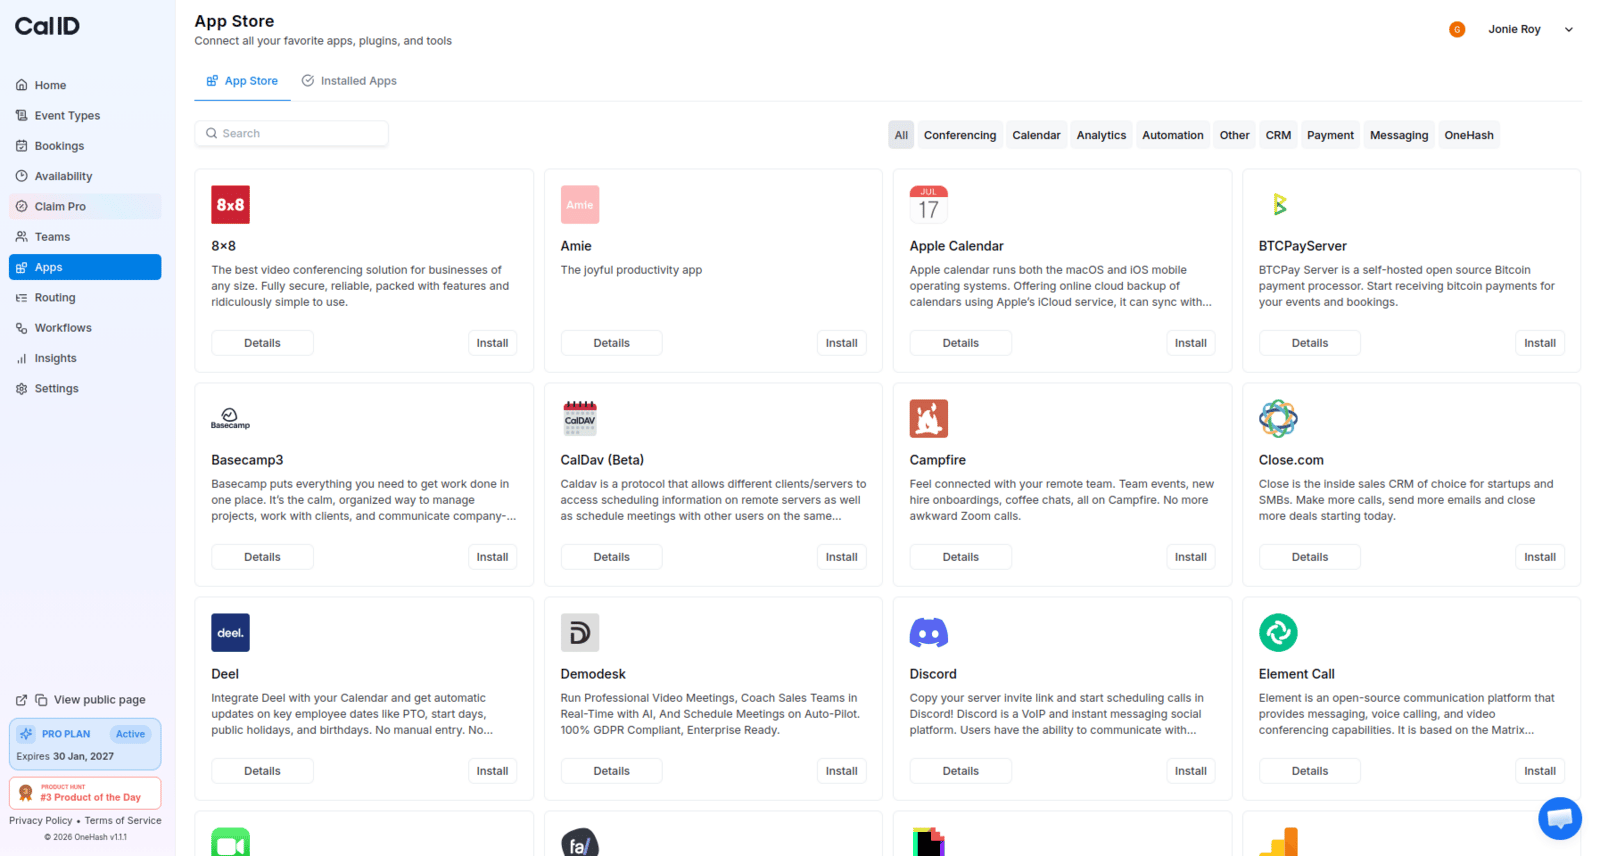
The App Store is where you discover and connect integrations. To browse and install an app, open the **Apps** section in your Cal ID sidebar — then enable each app on the specific event types where you want to use it.
## Integrating apps via the app store
Connecting an app to Cal ID is a straightforward process that allows you to extend the functionality of your scheduling platform.
### How to integrate an app
Log in to your Cal ID account.
Navigate to the **Apps** section in the left-hand sidebar.
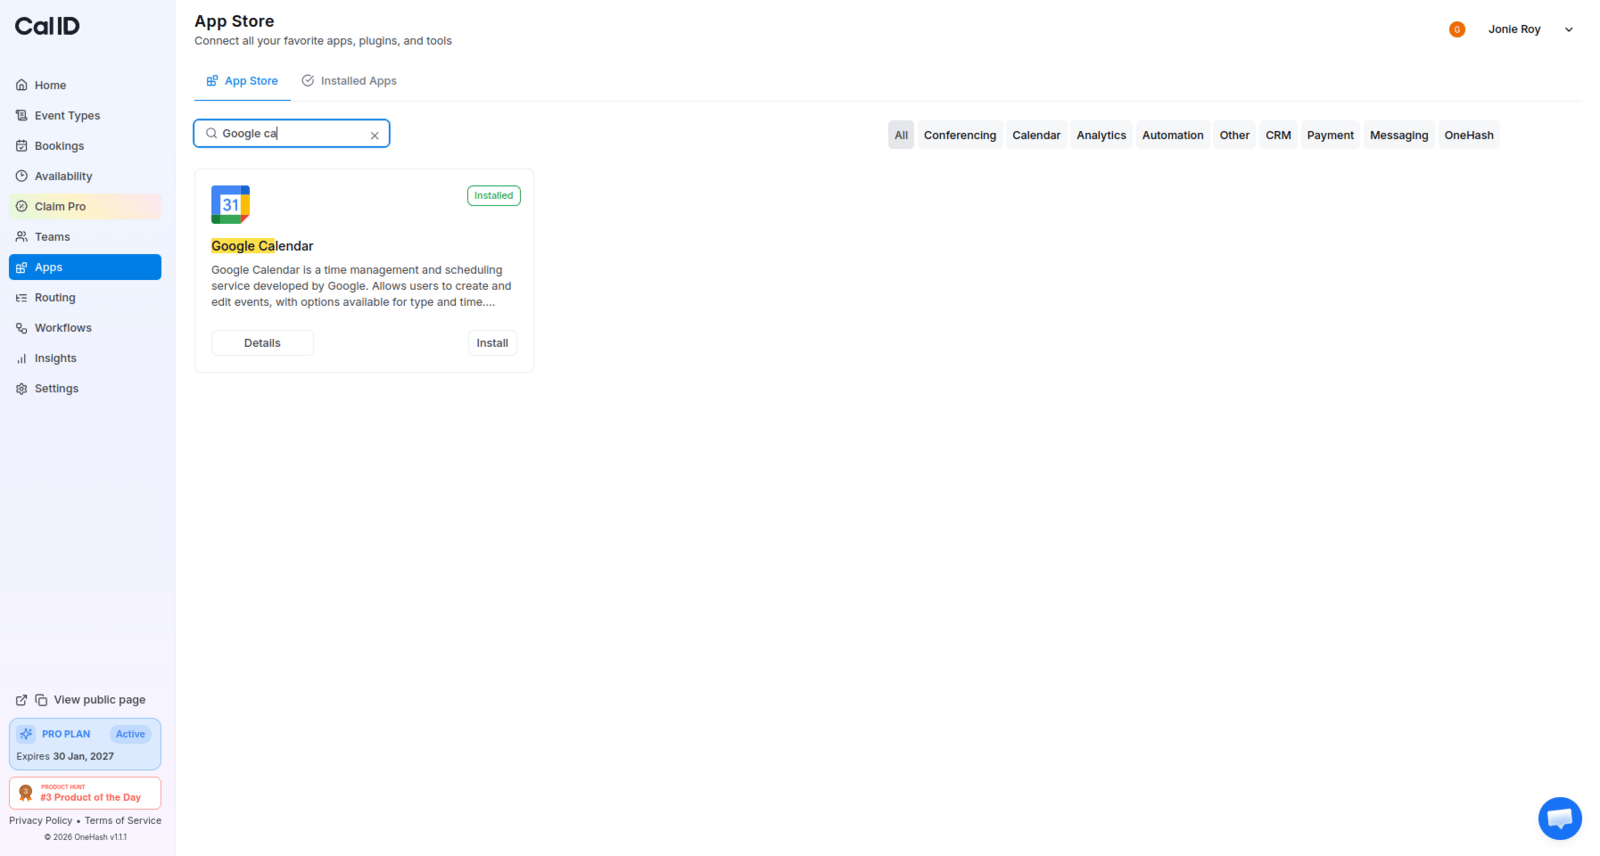
Search for the specific app you want to integrate (e.g., Google Calendar, Zoom, or HubSpot).
Once you find the app, you have two options:
* **View Details**: Click the **Details** button on the app card to read more about how the integration works.
* **Install Directly**: Click the **Install** button to start the connection process immediately.
 ### Choosing the right account (team vs. personal)
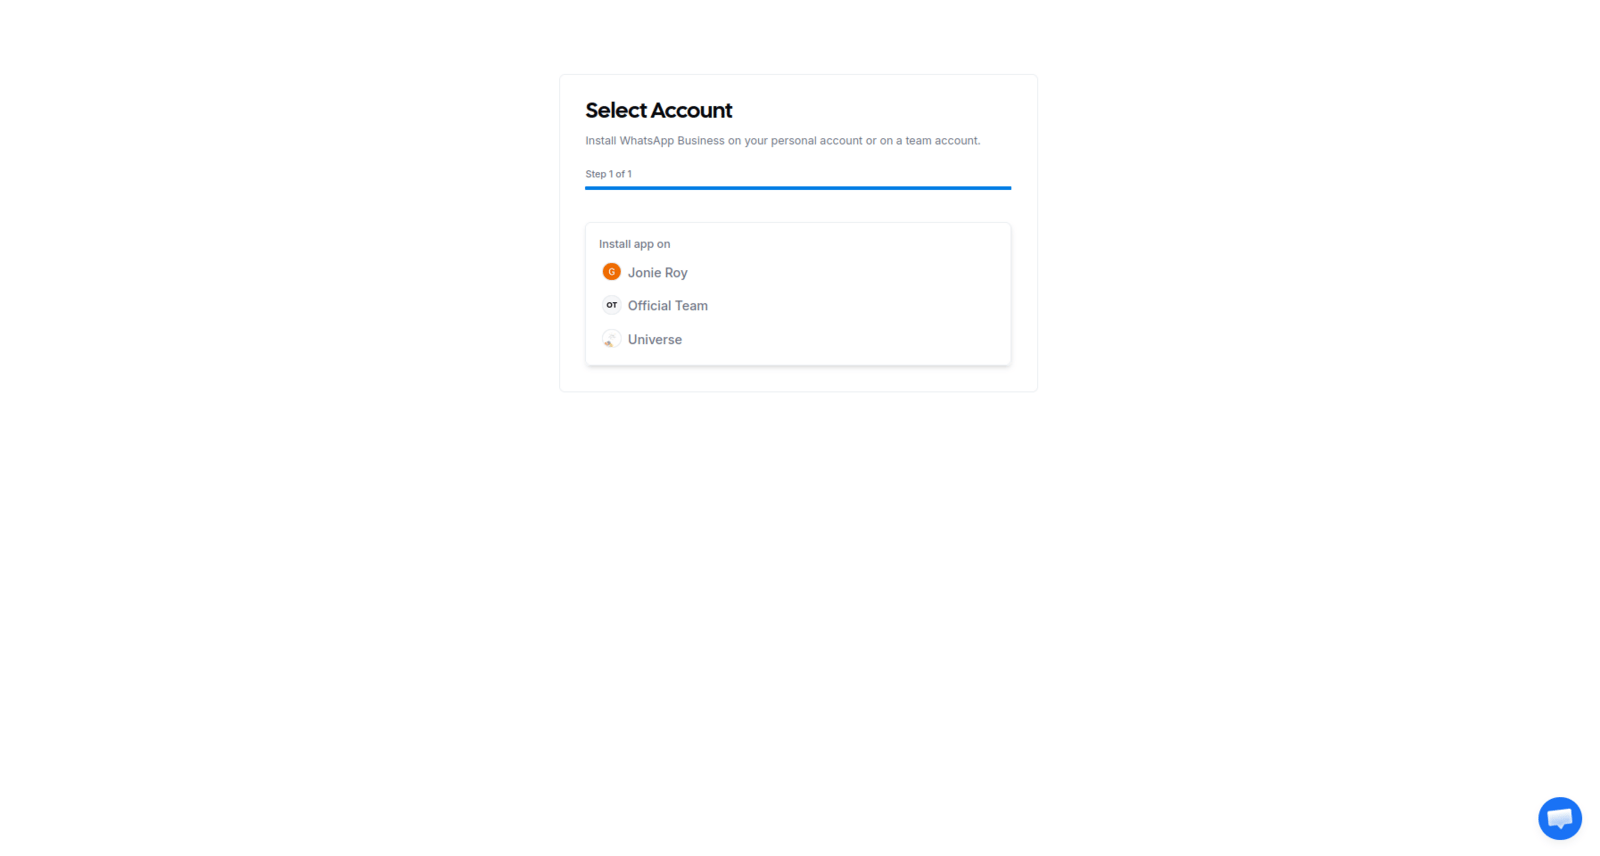
After clicking Install, a popup will appear asking where you want to add the integration:
* **Team Account**: If you are part of a team or organization, you will be prompted to select whether to install the app for your **Team Profile** or your **Personal Profile**.
* **Personal Account**: If you are not part of any team, simply select your personal account to proceed.
### Choosing the right account (team vs. personal)
After clicking Install, a popup will appear asking where you want to add the integration:
* **Team Account**: If you are part of a team or organization, you will be prompted to select whether to install the app for your **Team Profile** or your **Personal Profile**.
* **Personal Account**: If you are not part of any team, simply select your personal account to proceed.
 ### Completing the setup
* After selecting the account, a dialog box will open for authentication (e.g., logging into your Google or Zoom account).
* Follow the required steps to authorize Cal ID to access the app.
* Once finished, the app will be listed under your **Installed Apps**, and you can begin using its features in your event types.
## Enabling apps for specific event types
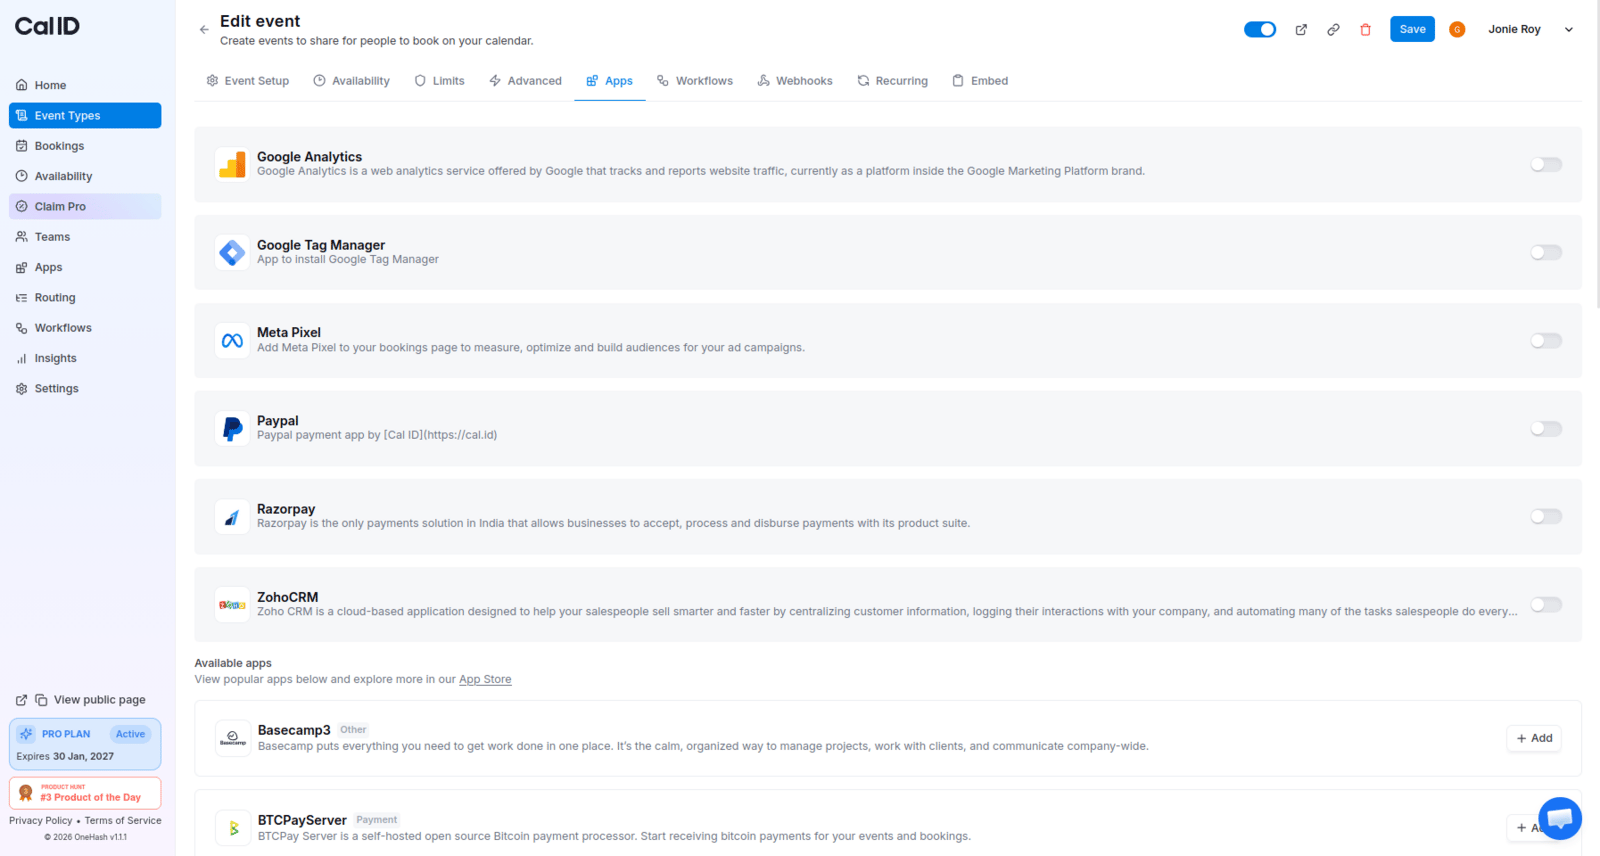
Once an app is installed, you must enable it for the specific event types where you want to use it:
Go to the **Event Types** tab and click **Edit** on your chosen event.
Click on the **Apps** tab within that event's settings.
Toggle the switch for the installed app to **ON**.
Configure any specific settings required for that app (e.g., selecting a specific video room or CRM folder).
Click **Save** at the top of the page.
### Completing the setup
* After selecting the account, a dialog box will open for authentication (e.g., logging into your Google or Zoom account).
* Follow the required steps to authorize Cal ID to access the app.
* Once finished, the app will be listed under your **Installed Apps**, and you can begin using its features in your event types.
## Enabling apps for specific event types
Once an app is installed, you must enable it for the specific event types where you want to use it:
Go to the **Event Types** tab and click **Edit** on your chosen event.
Click on the **Apps** tab within that event's settings.
Toggle the switch for the installed app to **ON**.
Configure any specific settings required for that app (e.g., selecting a specific video room or CRM folder).
Click **Save** at the top of the page.
 **App Management** — You can manage your global integrations at any time by going to **Installed Apps** in the main sidebar. From there, you can adjust settings, change linked accounts, or uninstall apps you no longer need.
## Next steps
Add an integration from the App Store and authenticate it for your account.
View, filter, configure, and disconnect the apps you've already added.
## Related topics
- [Install New App on Cal ID](/docs/apps/install-app.md)
- [Managing Installed Apps](/docs/apps/manage-installed.md)
- [Setting Necessary Permission for Google Calendar Integration](/docs/apps/google-calendar.md)
- [Cal ID to Zoom Integration](/docs/apps/zoom.md)
- [Integrate Cal ID with Stripe](/docs/apps/stripe.md)
**App Management** — You can manage your global integrations at any time by going to **Installed Apps** in the main sidebar. From there, you can adjust settings, change linked accounts, or uninstall apps you no longer need.
## Next steps
Add an integration from the App Store and authenticate it for your account.
View, filter, configure, and disconnect the apps you've already added.
## Related topics
- [Install New App on Cal ID](/docs/apps/install-app.md)
- [Managing Installed Apps](/docs/apps/manage-installed.md)
- [Setting Necessary Permission for Google Calendar Integration](/docs/apps/google-calendar.md)
- [Cal ID to Zoom Integration](/docs/apps/zoom.md)
- [Integrate Cal ID with Stripe](/docs/apps/stripe.md)