> ## Documentation Index
> Fetch the complete documentation index at: https://cal.id/docs/llms.txt
> Use this file to discover all available pages before exploring further.
# Connect Apple Calendar with Cal ID
> Step-by-step guide to connecting Apple Calendar to Cal ID using an app-specific password so your iCloud events sync with your booking availability.
Connect Apple Calendar to Cal ID so your iCloud events sync with your availability and prevent double-booking. Because Apple does not offer a standard OAuth flow, you'll sign in with an **app-specific password** instead of your regular Apple ID password.
An app-specific password is a one-time code generated at [appleid.apple.com](https://appleid.apple.com/account/manage) that lets a third-party app access your iCloud data securely. You'll create one in the steps below and paste it into Cal ID, so your real Apple ID password is never shared.
Go to [**Cal ID's App store**](https://cal.id/apps) and click on **Details** under the Apple Calendar card.
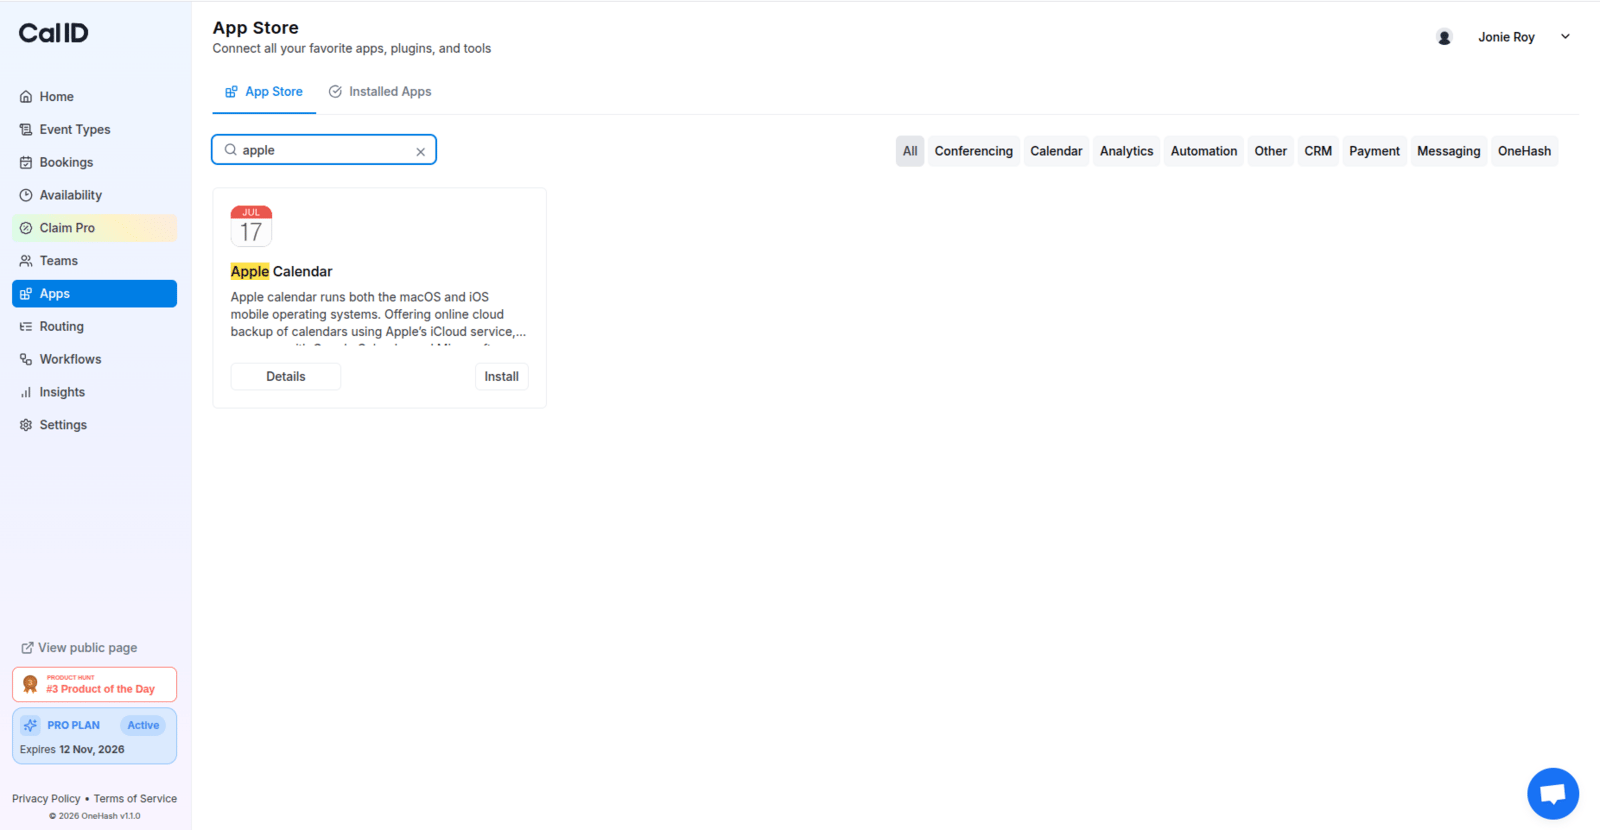 Click on the **Install** button or, if you already have an Apple Calendar connection, click on the **Install** button. In the Apple Calendar connection setup page, click on the link and sign in to your Apple ID.
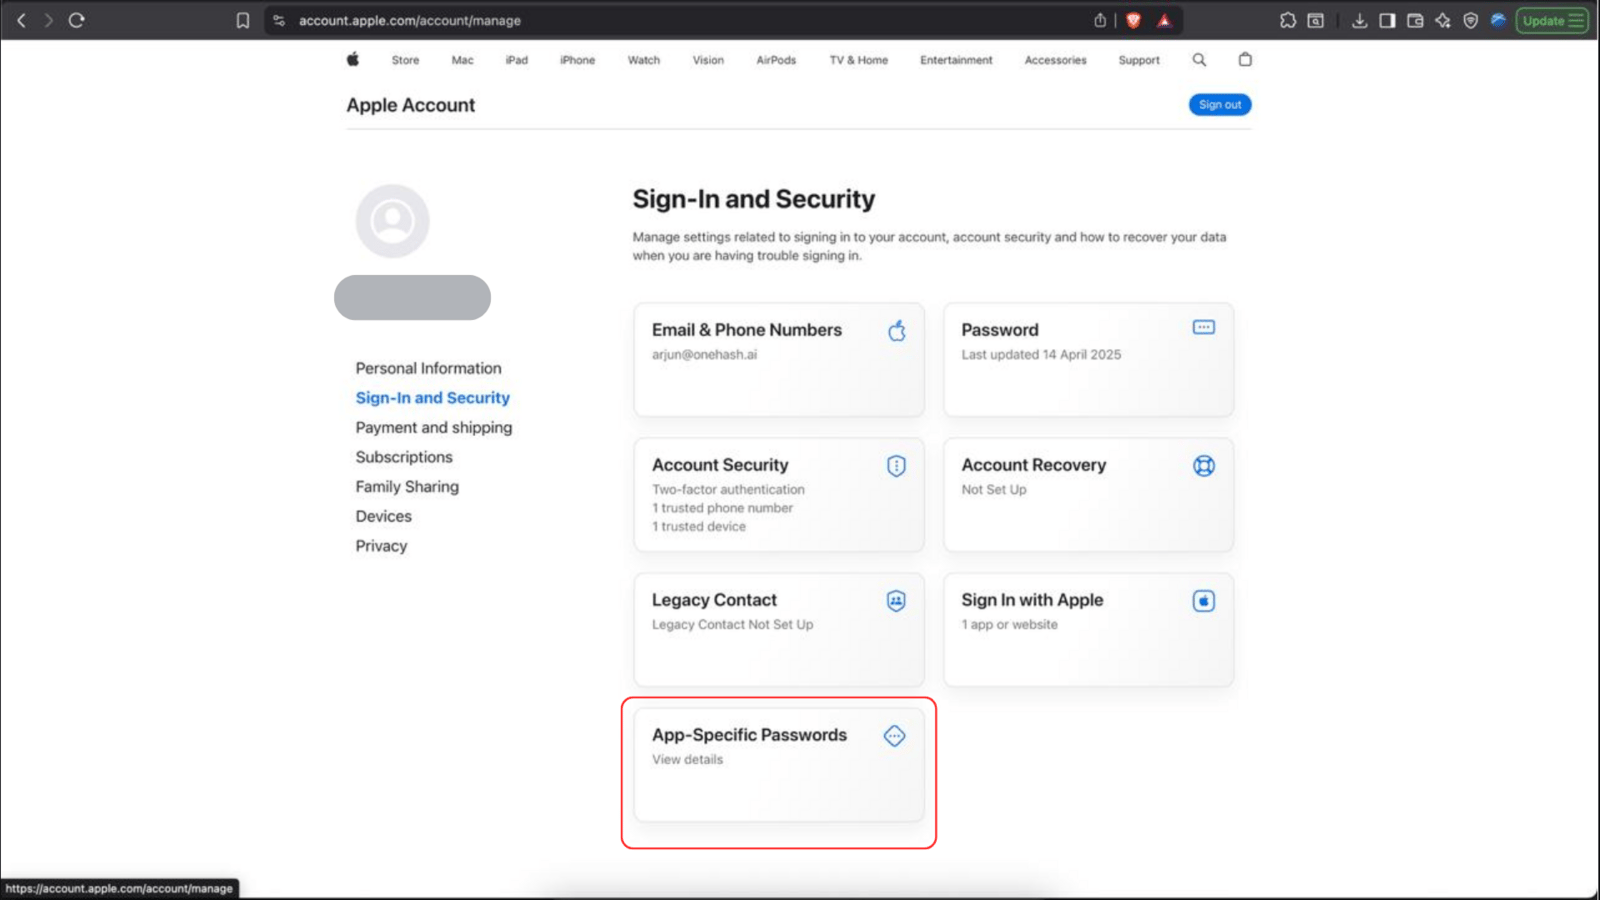
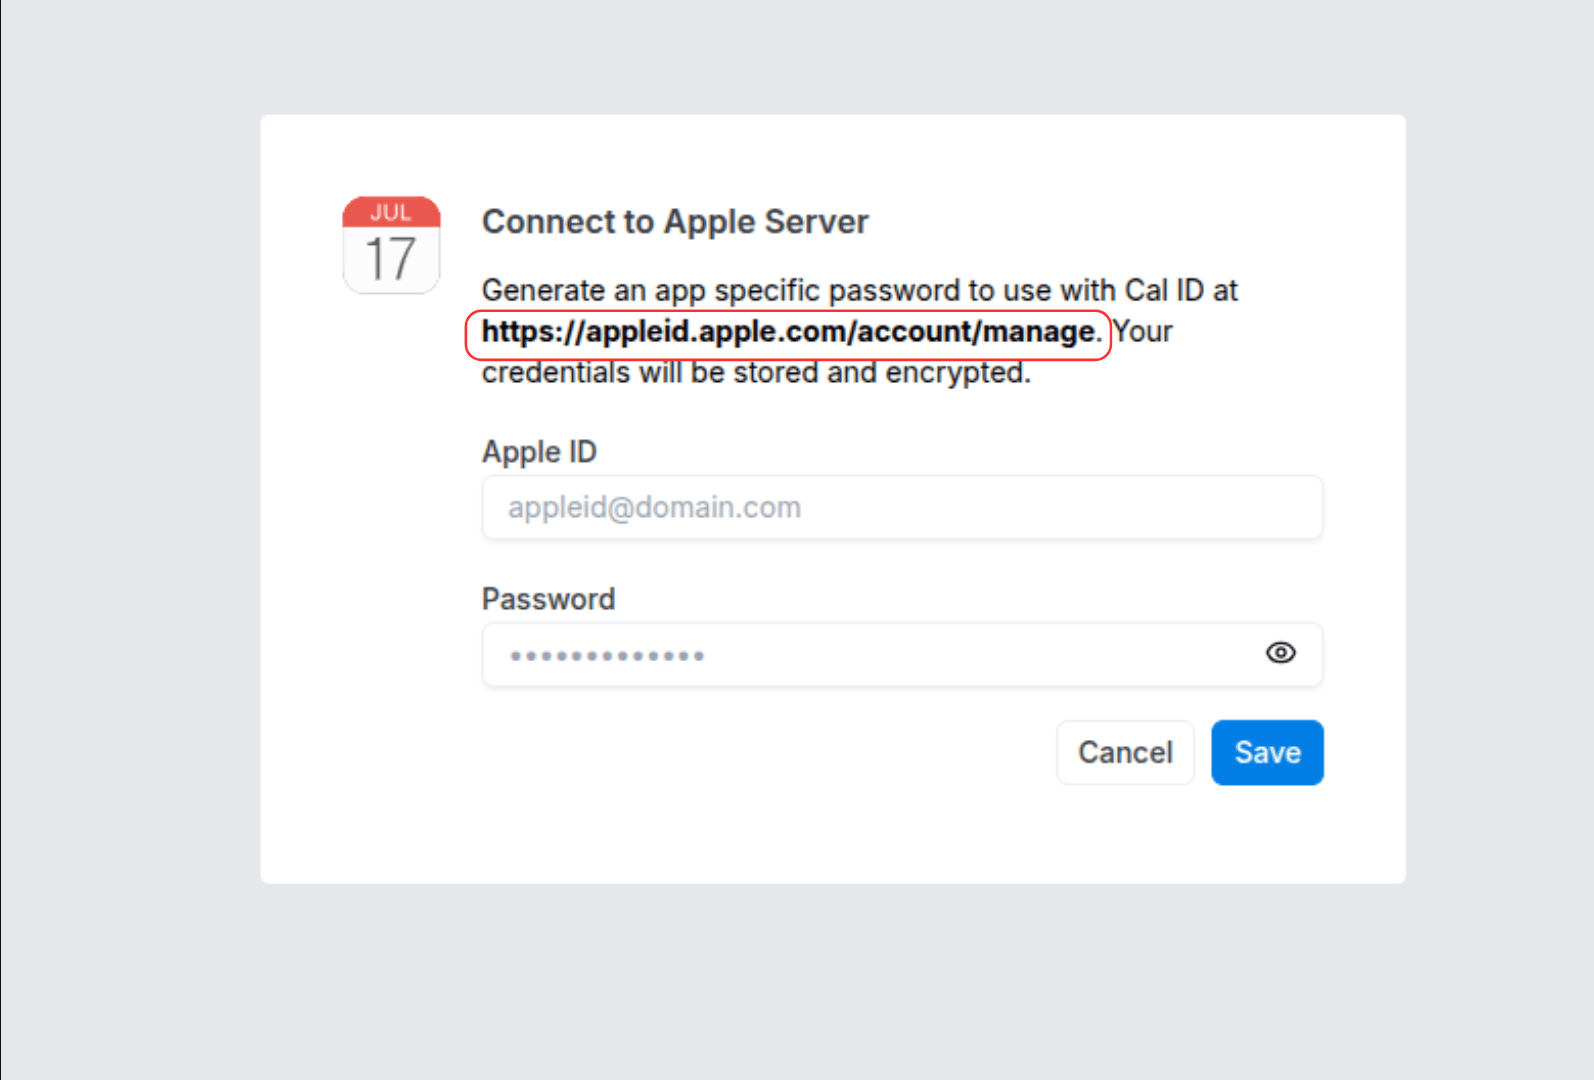 Once signed in and on the `https://appleid.apple.com/account/manage` page, click on **App-specific passwords**.
 Now, click on the plus sign to add a new App-specific password to your account.
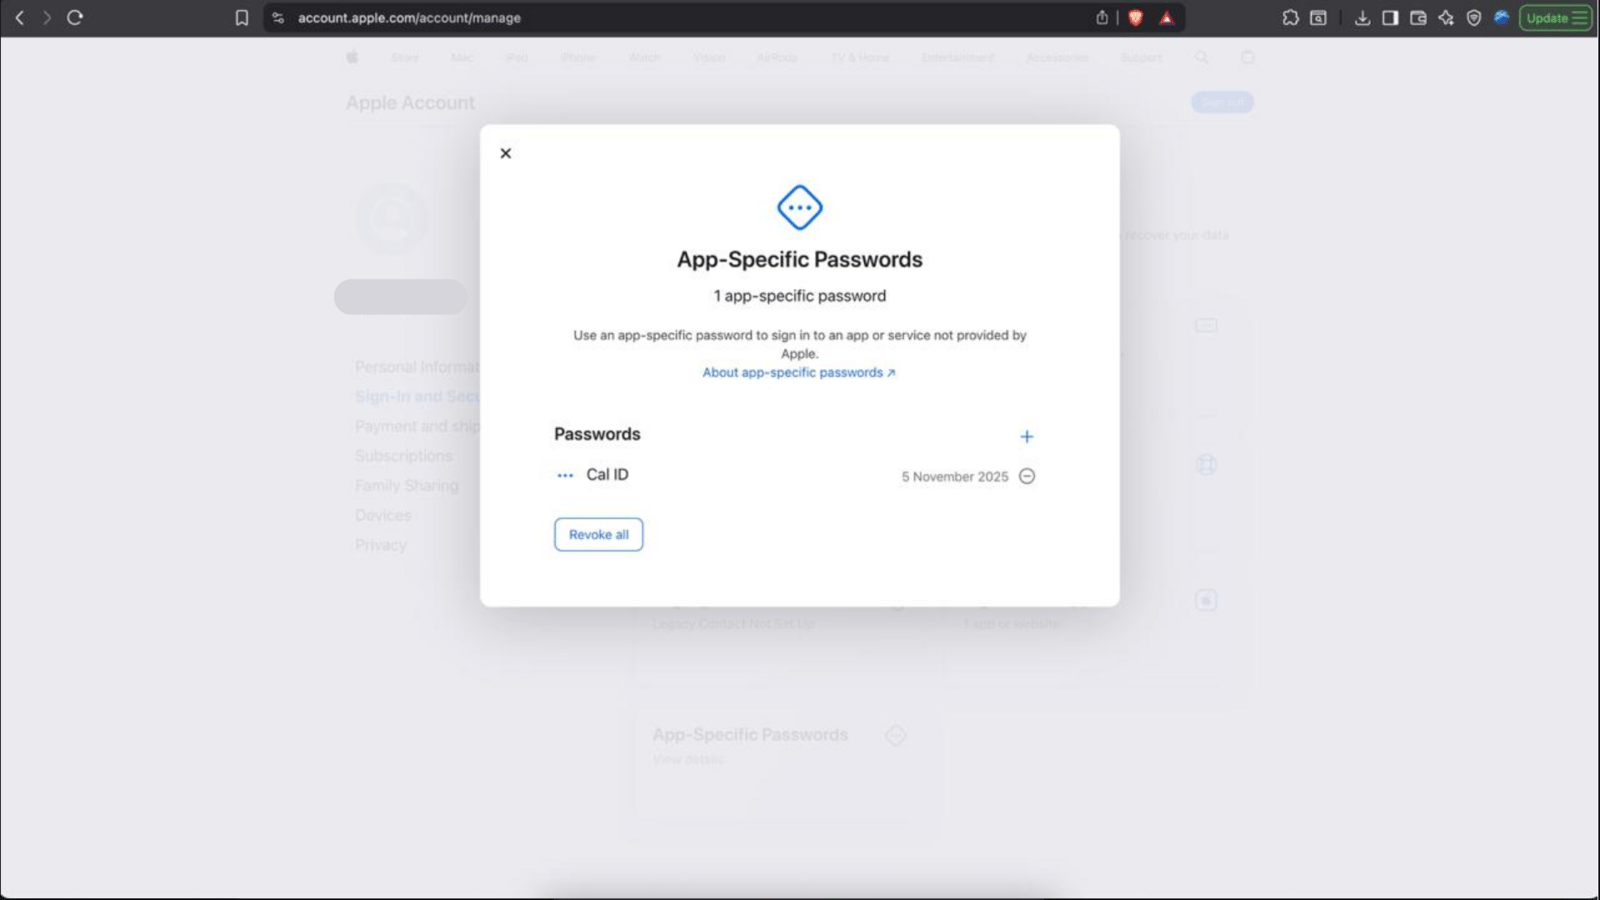 Next, provide a name for your new App-specific password. You should now have a new app-specific password showing on the screen. Simply copy this password.
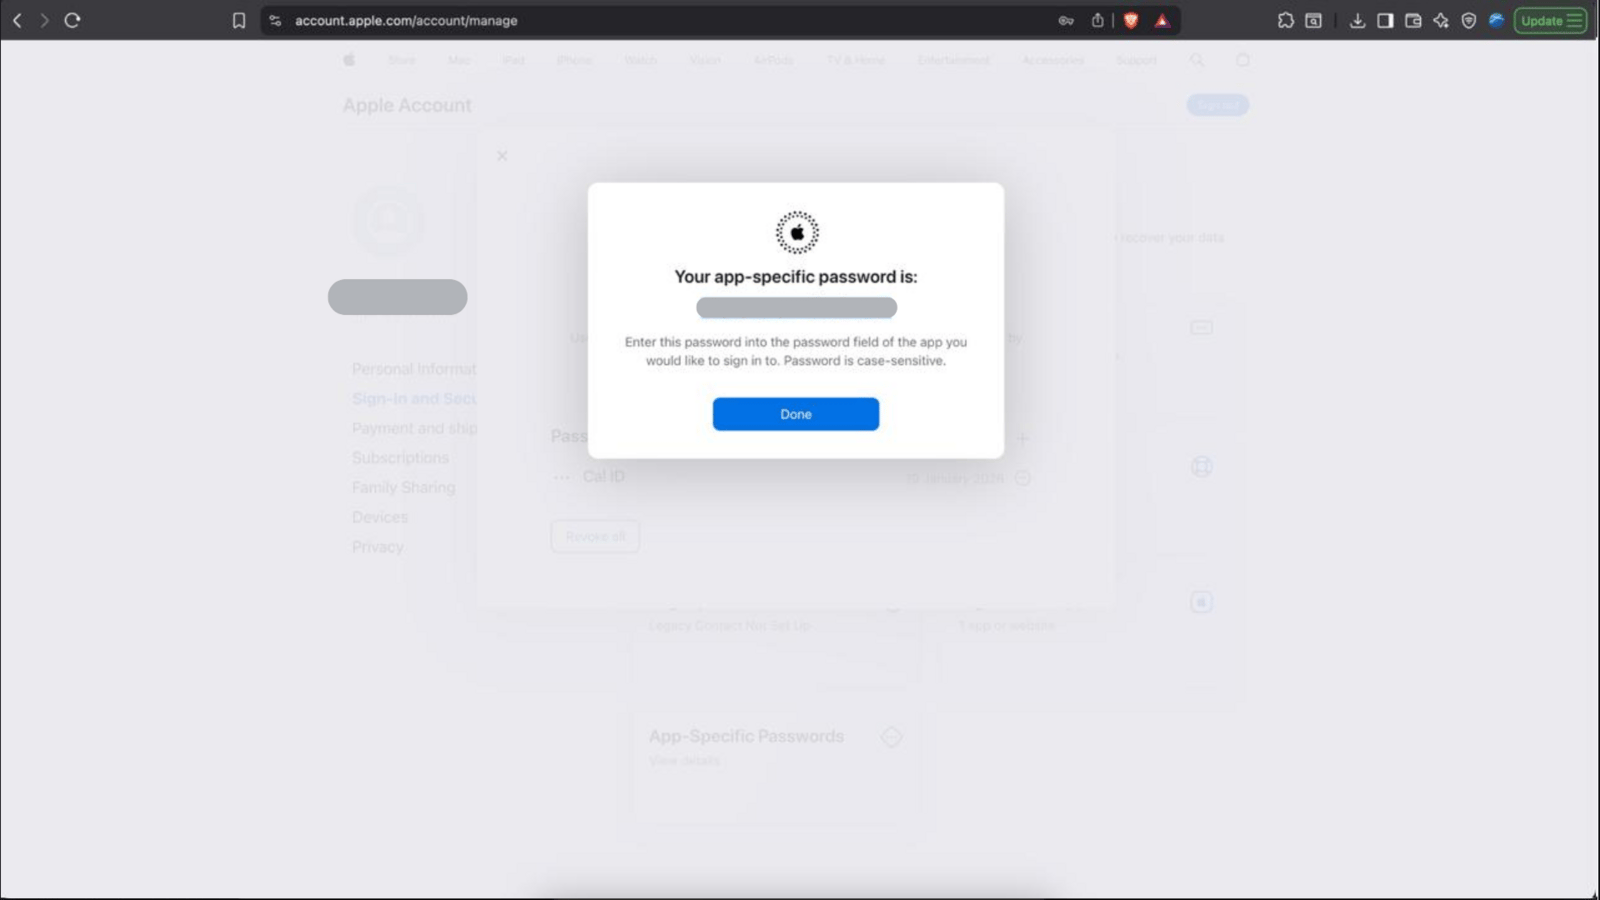 Now enter your Apple ID and the newly generated app-specific password (you copied this in the previous step) in the Cal ID [Apple Calendar Setup](https://cal.id/apps/apple-calendar/setup) page. Finally, click on **Save**. You should now be redirected to the `https://cal.id/apps/installed/calendar` page showing your recently added Apple Calendar.
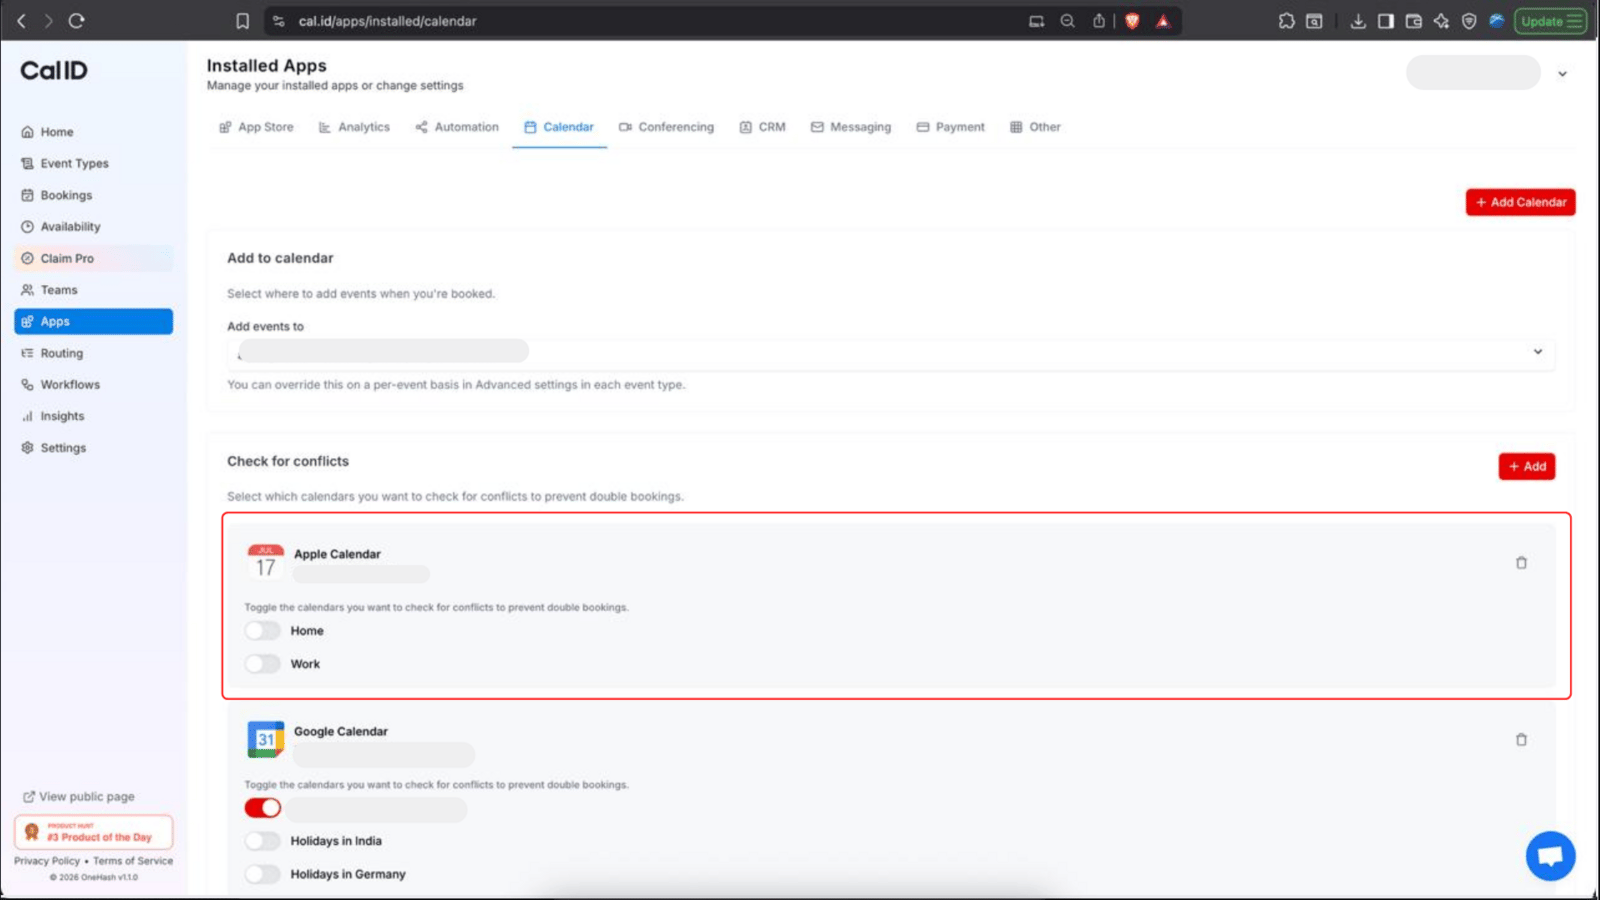 That's it. Your Apple Calendar is now connected to your **Cal ID** account.
## Next steps
Review the permissions Cal ID needs to sync Google Calendar.
Set Zoom as the meeting location for your event types.
## Related topics
- [Setting Necessary Permission for Google Calendar Integration](/docs/apps/google-calendar.md)
- [Cal ID to Zoom Integration](/docs/apps/zoom.md)
- [App Store](/docs/apps/app-store.md)
- [Mastering the Unified Calendar in Cal ID](/docs/getting-started/unified-calendar.md)
- [Add Events to Calendar](/docs/event-types/advanced/add-to-calendar.md)
That's it. Your Apple Calendar is now connected to your **Cal ID** account.
## Next steps
Review the permissions Cal ID needs to sync Google Calendar.
Set Zoom as the meeting location for your event types.
## Related topics
- [Setting Necessary Permission for Google Calendar Integration](/docs/apps/google-calendar.md)
- [Cal ID to Zoom Integration](/docs/apps/zoom.md)
- [App Store](/docs/apps/app-store.md)
- [Mastering the Unified Calendar in Cal ID](/docs/getting-started/unified-calendar.md)
- [Add Events to Calendar](/docs/event-types/advanced/add-to-calendar.md)