> ## Documentation Index
> Fetch the complete documentation index at: https://cal.id/docs/llms.txt
> Use this file to discover all available pages before exploring further.
# Integrating Cal ID with Make
> Connect Cal ID to Make with a webhook so new bookings automatically trigger scenarios that send data to thousands of connected applications.
**Make** is a powerful automation tool that lets you connect Cal ID to thousands of other apps like Google Sheets, Slack, or your favourite CRM. By setting up this integration, you can automatically send booking data to other platforms the moment a meeting is scheduled.
## Step 1: Get your API key from Cal ID
To connect to Make, you first need an API Key from your Cal ID account.
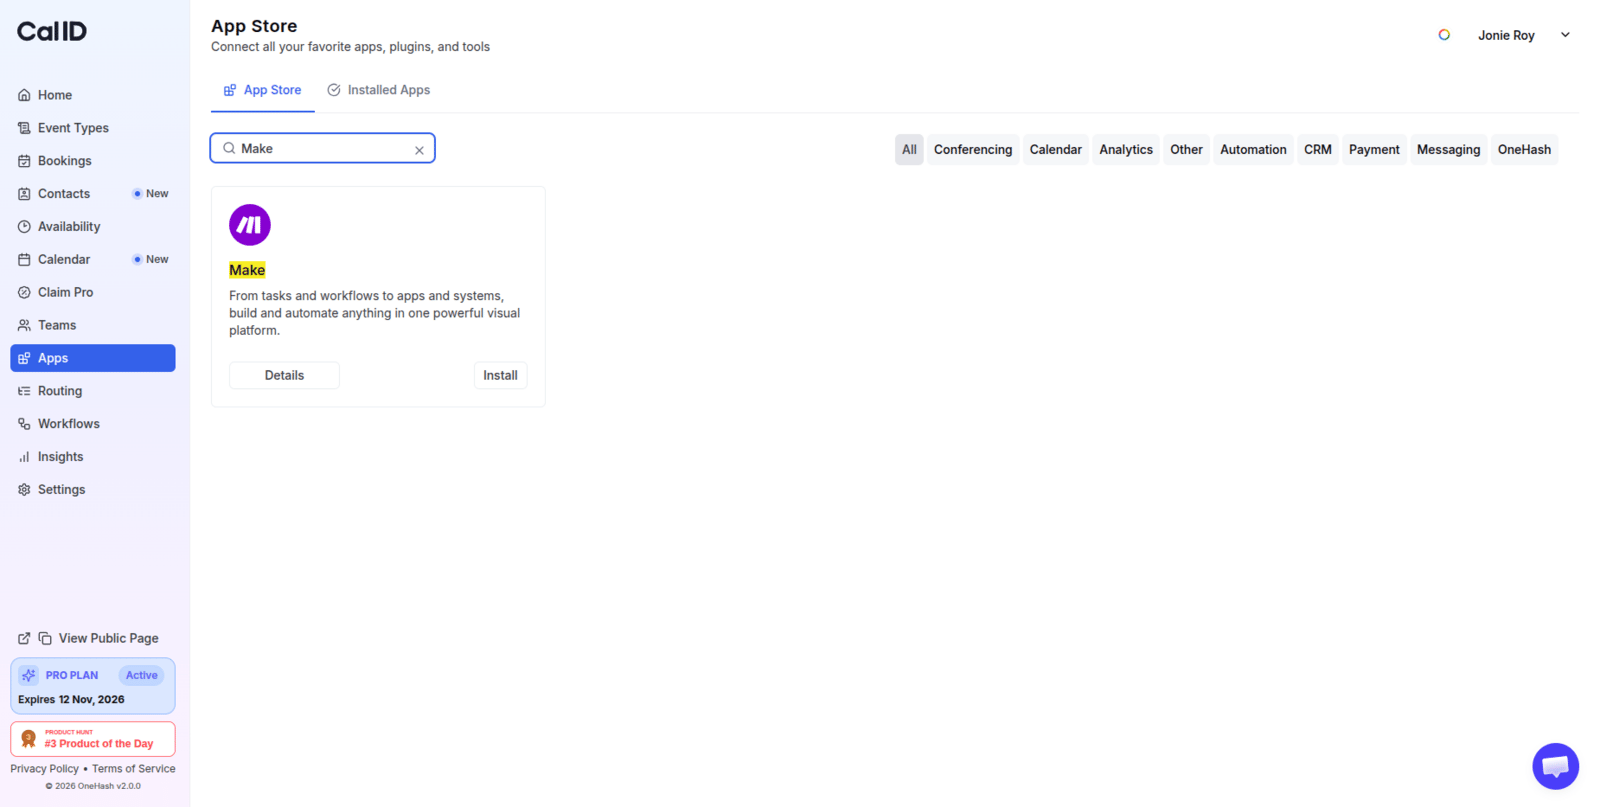
Click on the **Apps** tab in the left-hand sidebar of your dashboard. Type "Make" in the search bar and click on the **Install** button.
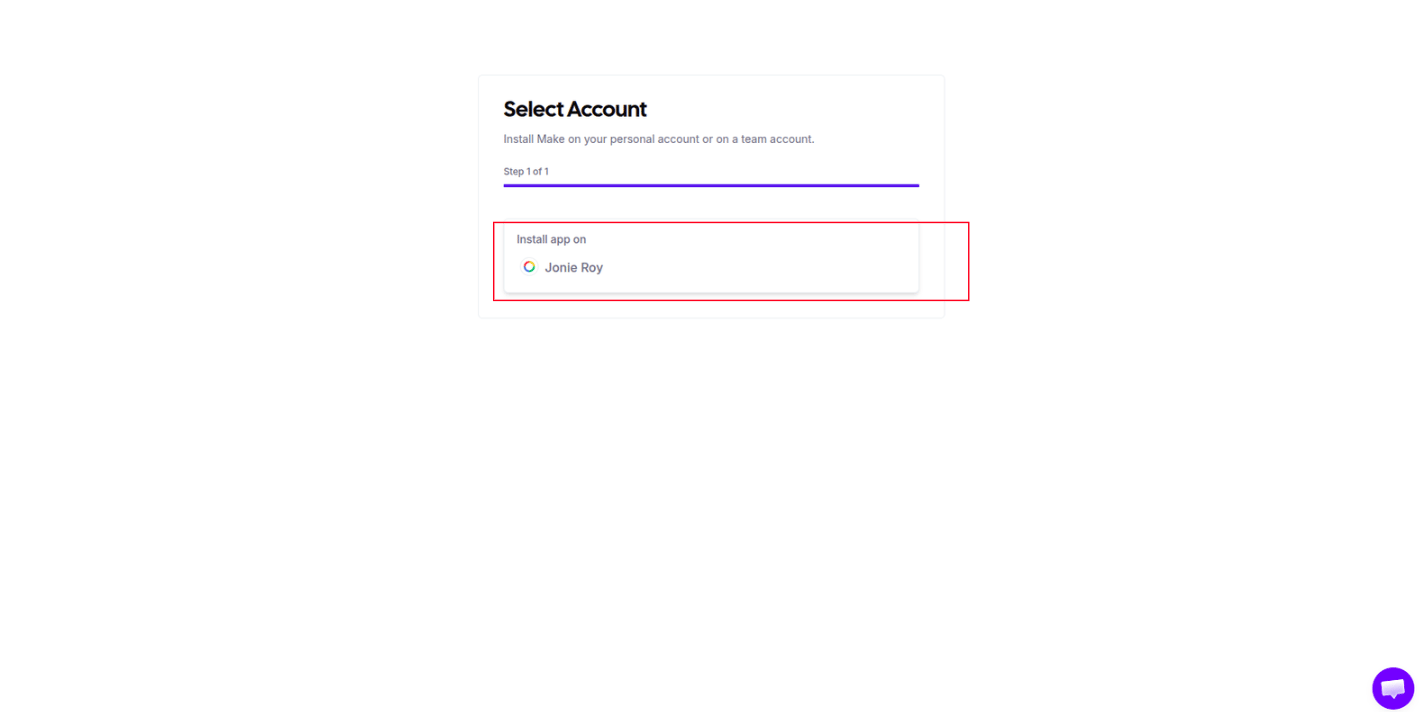
 Choose the account you wish to connect.
 You will be taken to a page showing API keys for your **Personal Account** and any **Teams** where you are an Admin or Owner.
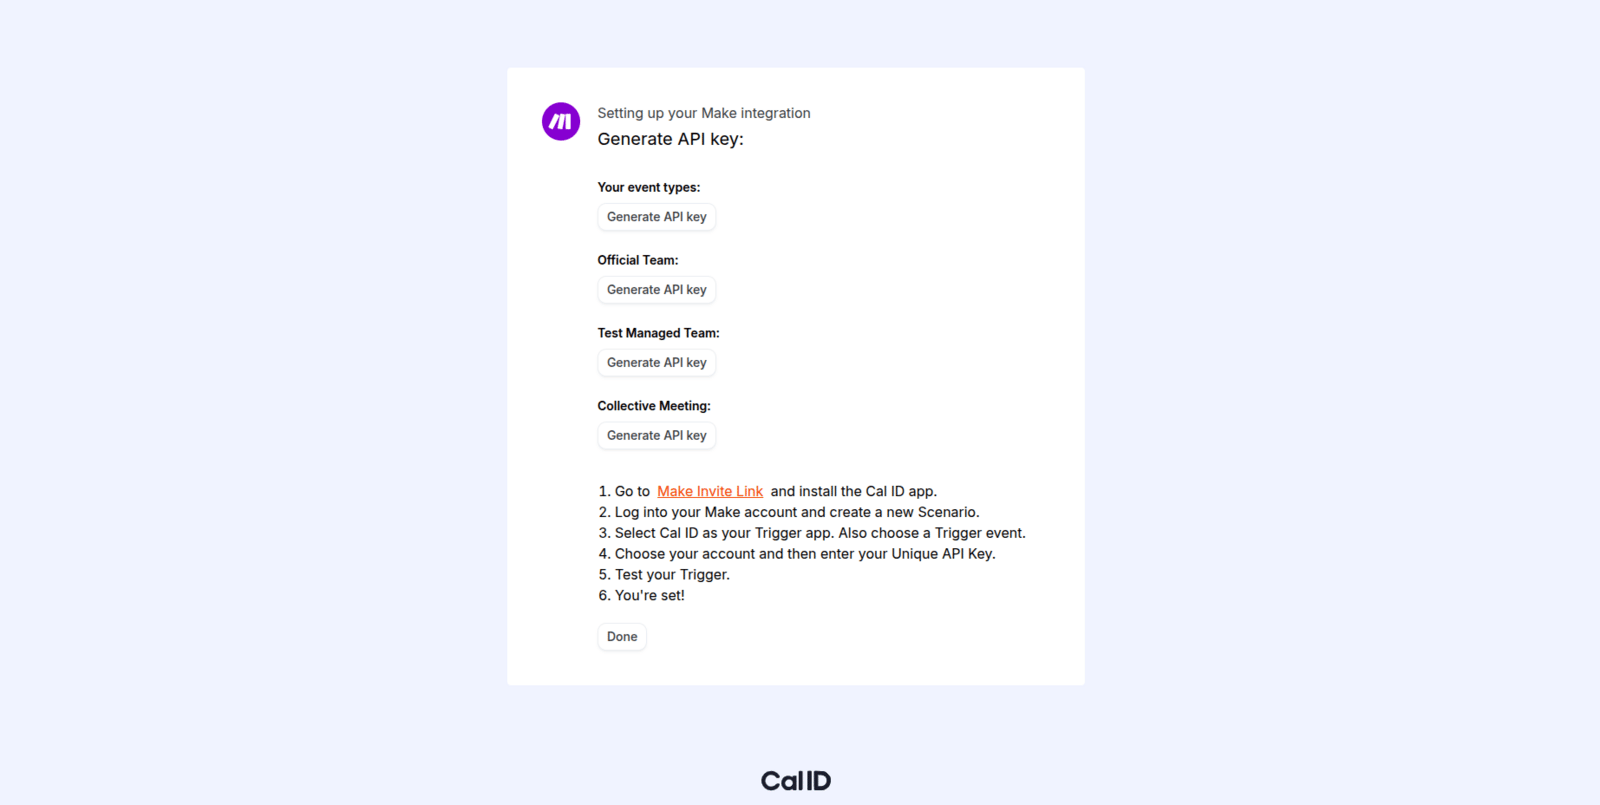 Click the **Generate API Key** button for the specific account or team you want to automate. A key will be generated.
Copy the key immediately and save it in a safe place — you won't be able to view it again after leaving this screen.
Click the **Generate API Key** button for the specific account or team you want to automate. A key will be generated.
Copy the key immediately and save it in a safe place — you won't be able to view it again after leaving this screen.
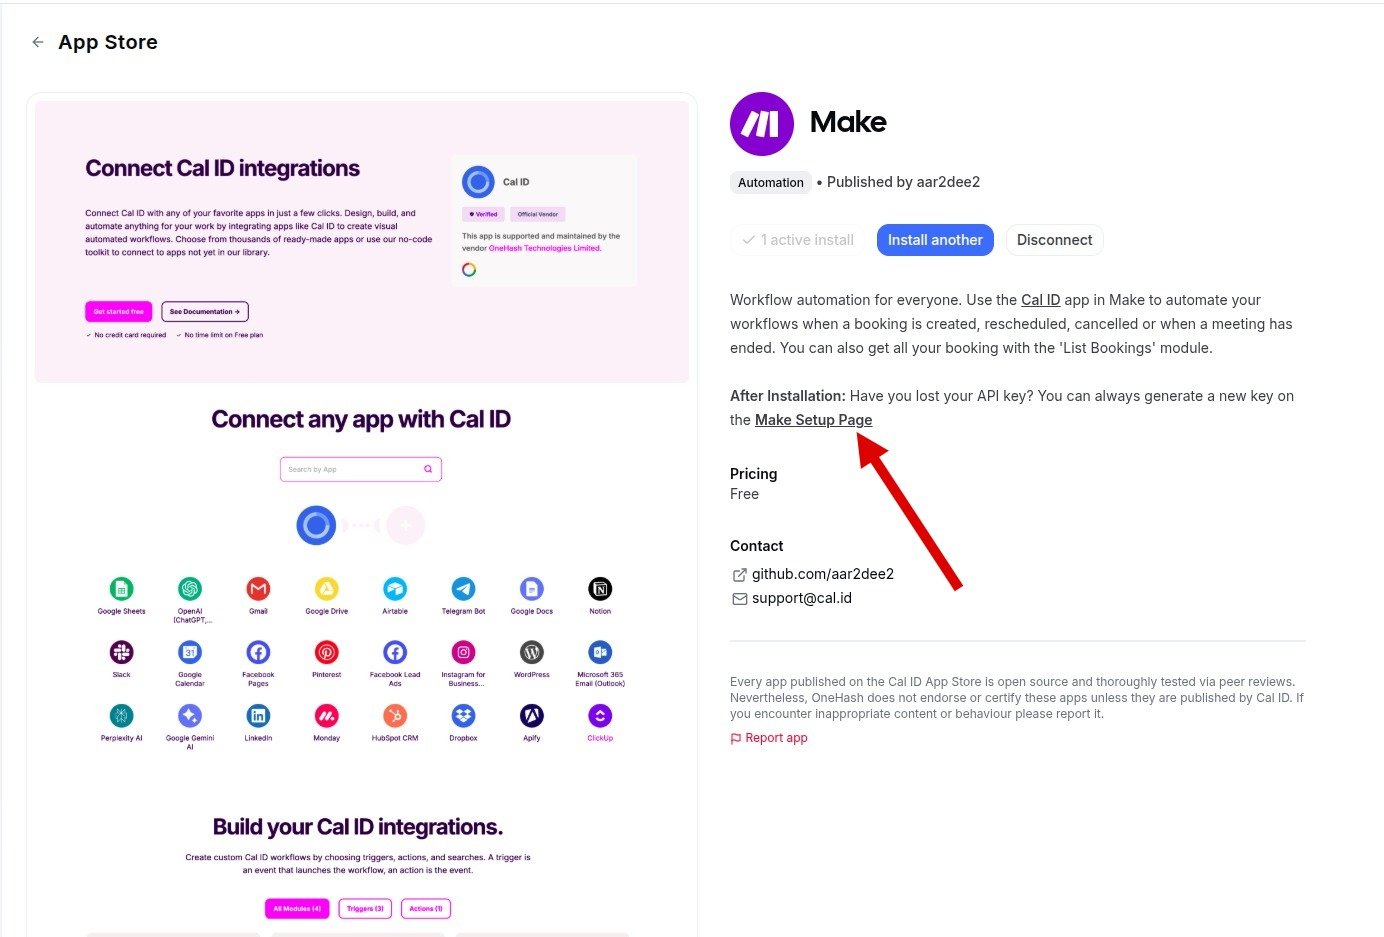
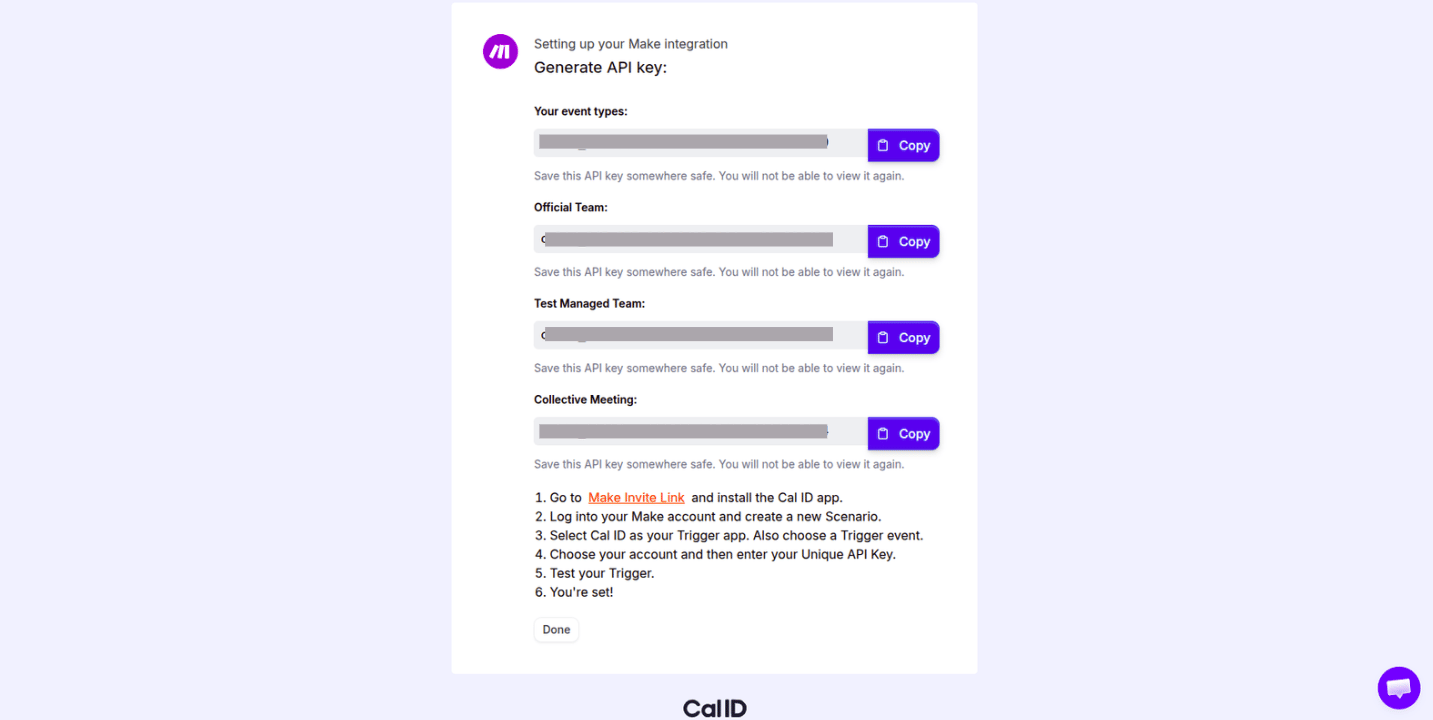 Once you install Make on your account, you can see all the API keys for all existing and future personal and team accounts on the Make Setup page.
 ## Step 2: Connect Cal ID to Make
Keep the **API Key** from Step 1 handy — you'll paste it into Make to authorize the connection.
Go to your [Make.com](https://www.make.com) account.
Click the **Create a new scenario** button in the top right.
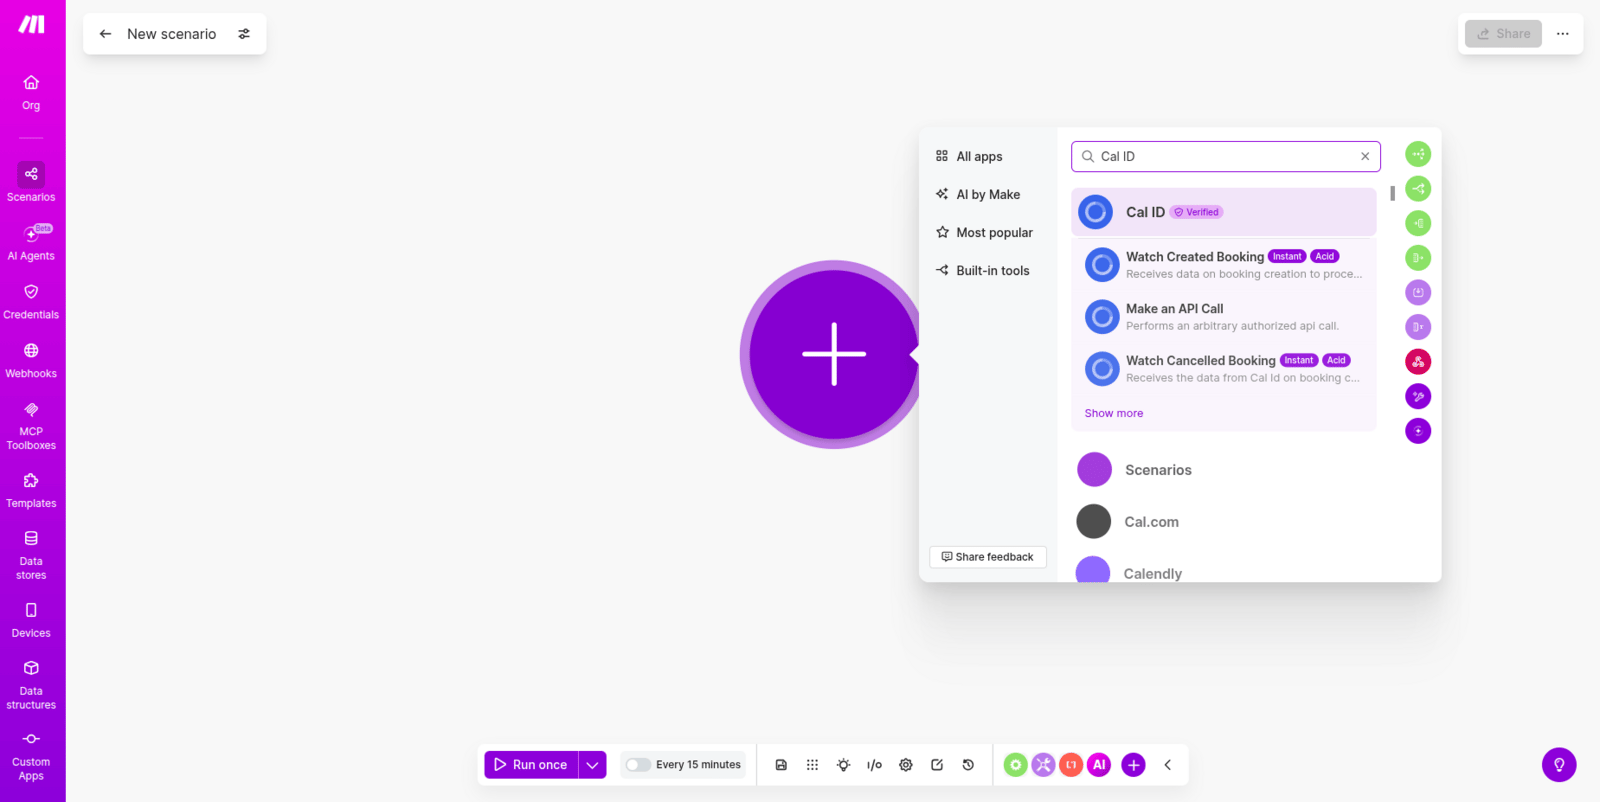
Click the large **(+)** button, search for "Cal ID," and select it.
## Step 2: Connect Cal ID to Make
Keep the **API Key** from Step 1 handy — you'll paste it into Make to authorize the connection.
Go to your [Make.com](https://www.make.com) account.
Click the **Create a new scenario** button in the top right.
Click the large **(+)** button, search for "Cal ID," and select it.
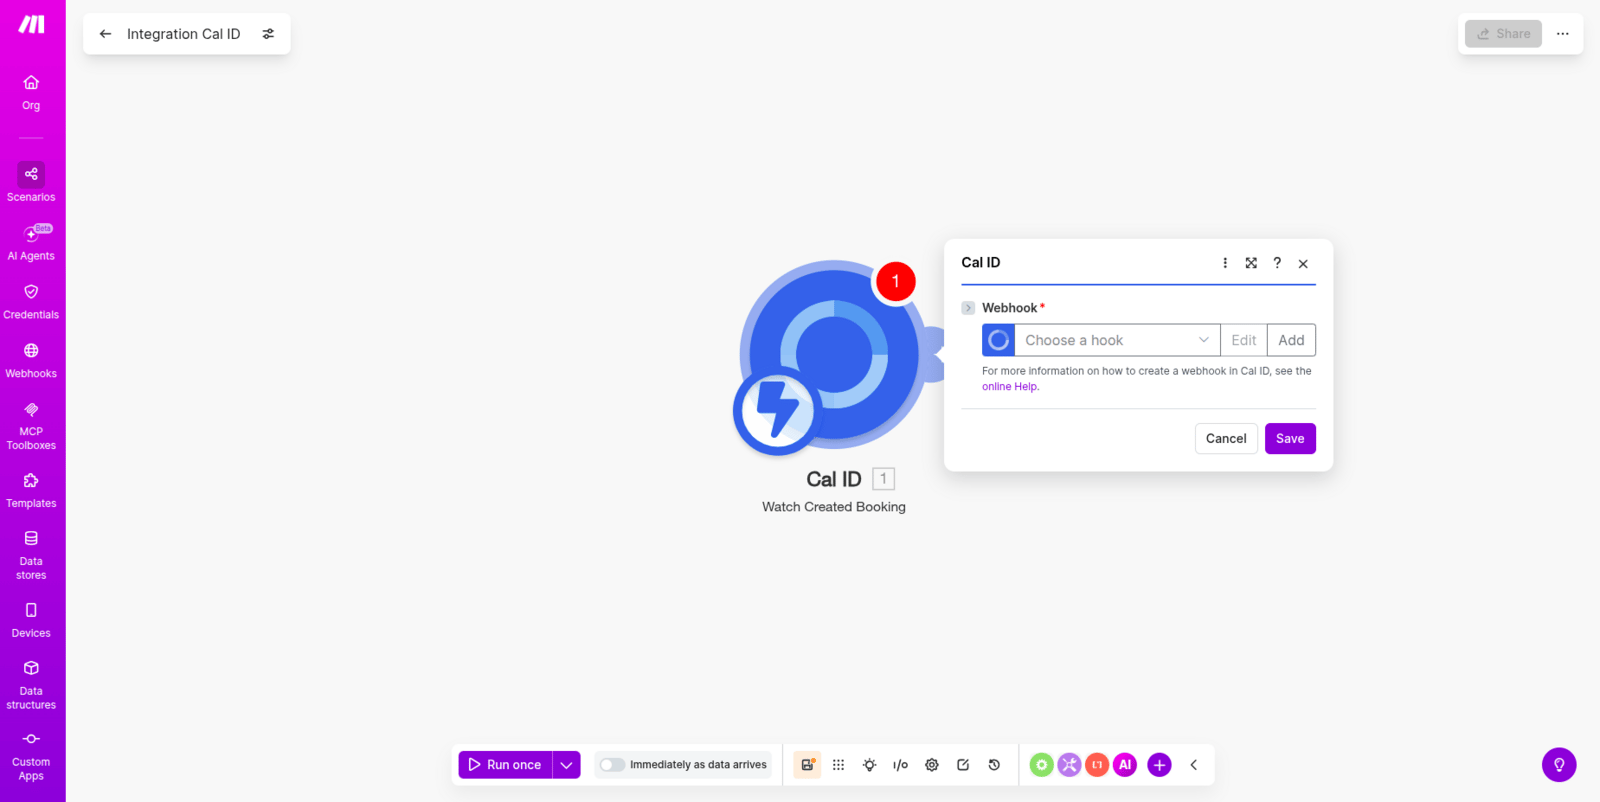
 Select a trigger like **"Watch New Bookings"** (this tells Make to start the automation whenever someone books a call).
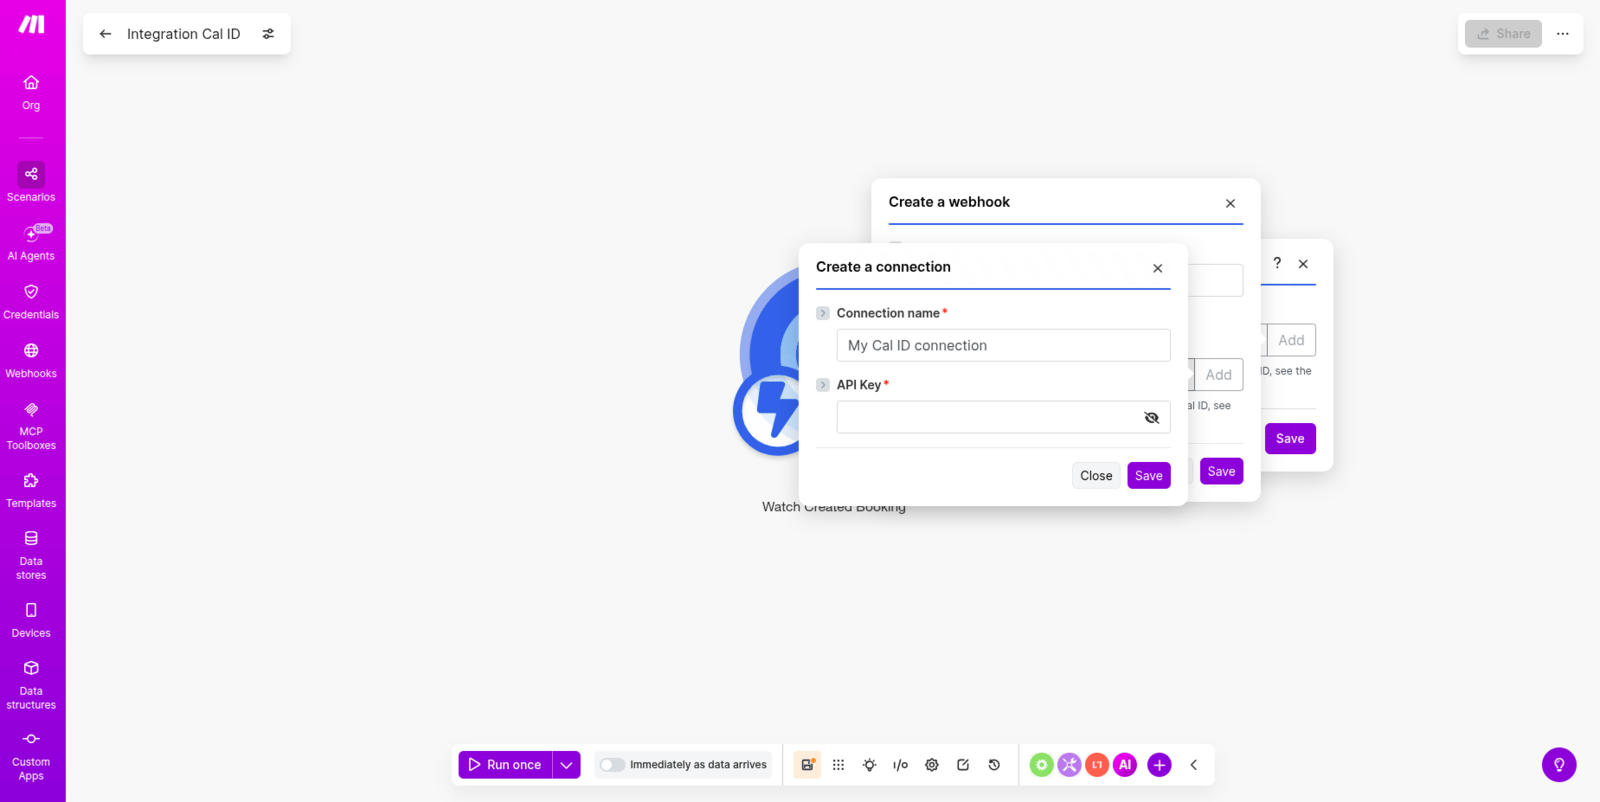
Click the **Add** button in the module settings and paste the **API Key** you copied from Cal ID earlier, then click **Save**. Cal ID is now connected successfully with Make.
Select a trigger like **"Watch New Bookings"** (this tells Make to start the automation whenever someone books a call).
Click the **Add** button in the module settings and paste the **API Key** you copied from Cal ID earlier, then click **Save**. Cal ID is now connected successfully with Make.
 ## Step 3: Send data to other apps
Once Cal ID is connected, you can add "Modules" to your scenario to send that booking data elsewhere:
* **Google Sheets**: Automatically add a new row with the attendee's name and email.
* **CRM (HubSpot/Salesforce)**: Create a new contact or lead automatically.
* **Communication**: Send a custom notification to a Slack channel or via a private server.
Remember to **Turn On** or **Save** the scenario in Make to start processing your bookings.
## Related topics
- [Integrating Cal ID with Pabbly](/docs/apps/pabbly.md)
- [How to Get Notified on Slack When an Event is Booked?](/docs/apps/slack.md)
- [App Store](/docs/apps/app-store.md)
- [Setting Up Event-Specific Webhooks](/docs/event-types/event-webhooks.md)
- [Webhook in Cal ID](/docs/developers/webhooks.md)
## Step 3: Send data to other apps
Once Cal ID is connected, you can add "Modules" to your scenario to send that booking data elsewhere:
* **Google Sheets**: Automatically add a new row with the attendee's name and email.
* **CRM (HubSpot/Salesforce)**: Create a new contact or lead automatically.
* **Communication**: Send a custom notification to a Slack channel or via a private server.
Remember to **Turn On** or **Save** the scenario in Make to start processing your bookings.
## Related topics
- [Integrating Cal ID with Pabbly](/docs/apps/pabbly.md)
- [How to Get Notified on Slack When an Event is Booked?](/docs/apps/slack.md)
- [App Store](/docs/apps/app-store.md)
- [Setting Up Event-Specific Webhooks](/docs/event-types/event-webhooks.md)
- [Webhook in Cal ID](/docs/developers/webhooks.md)