> ## Documentation Index
> Fetch the complete documentation index at: https://cal.id/docs/llms.txt
> Use this file to discover all available pages before exploring further.
# Integrating Cal ID with Pabbly
> Use Pabbly Connect webhooks to forward Cal ID booking events to over 1,000 apps so meetings automatically trigger emails, CRM updates, and other tasks.
**Pabbly Connect** is an automation platform that allows you to send your Cal ID booking data to over 1,000+ other applications. Unlike other integrations, Pabbly uses a **Webhook** system to "listen" for new bookings and instantly trigger your workflows.
## Step 1: Start the integration in Cal ID
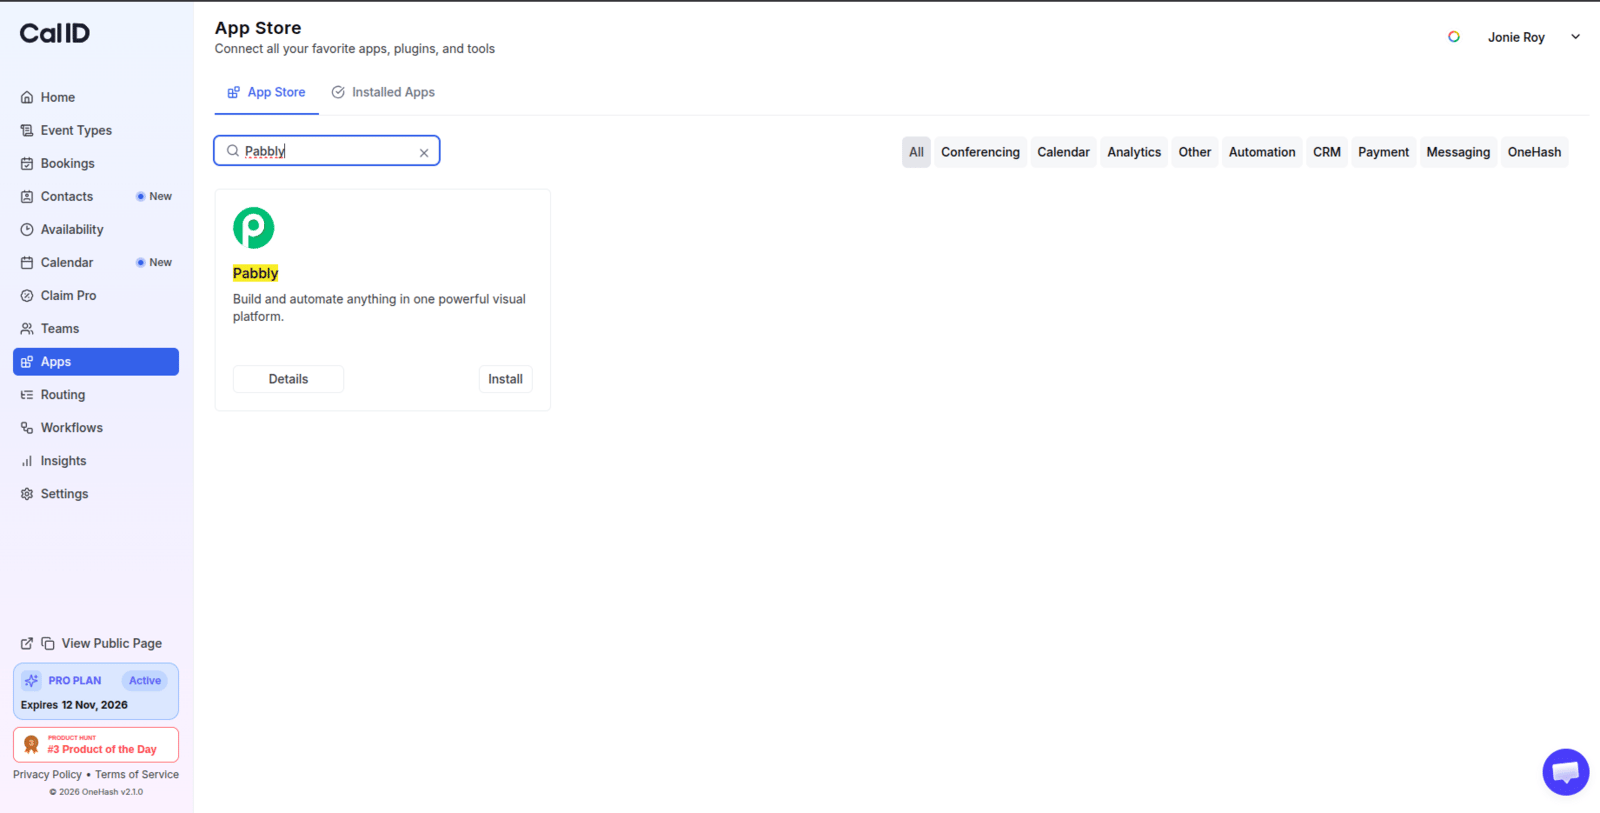
In your Cal ID dashboard, click on the **Apps** tab in the left sidebar. Search for "Pabbly Connect" and click **Install**.
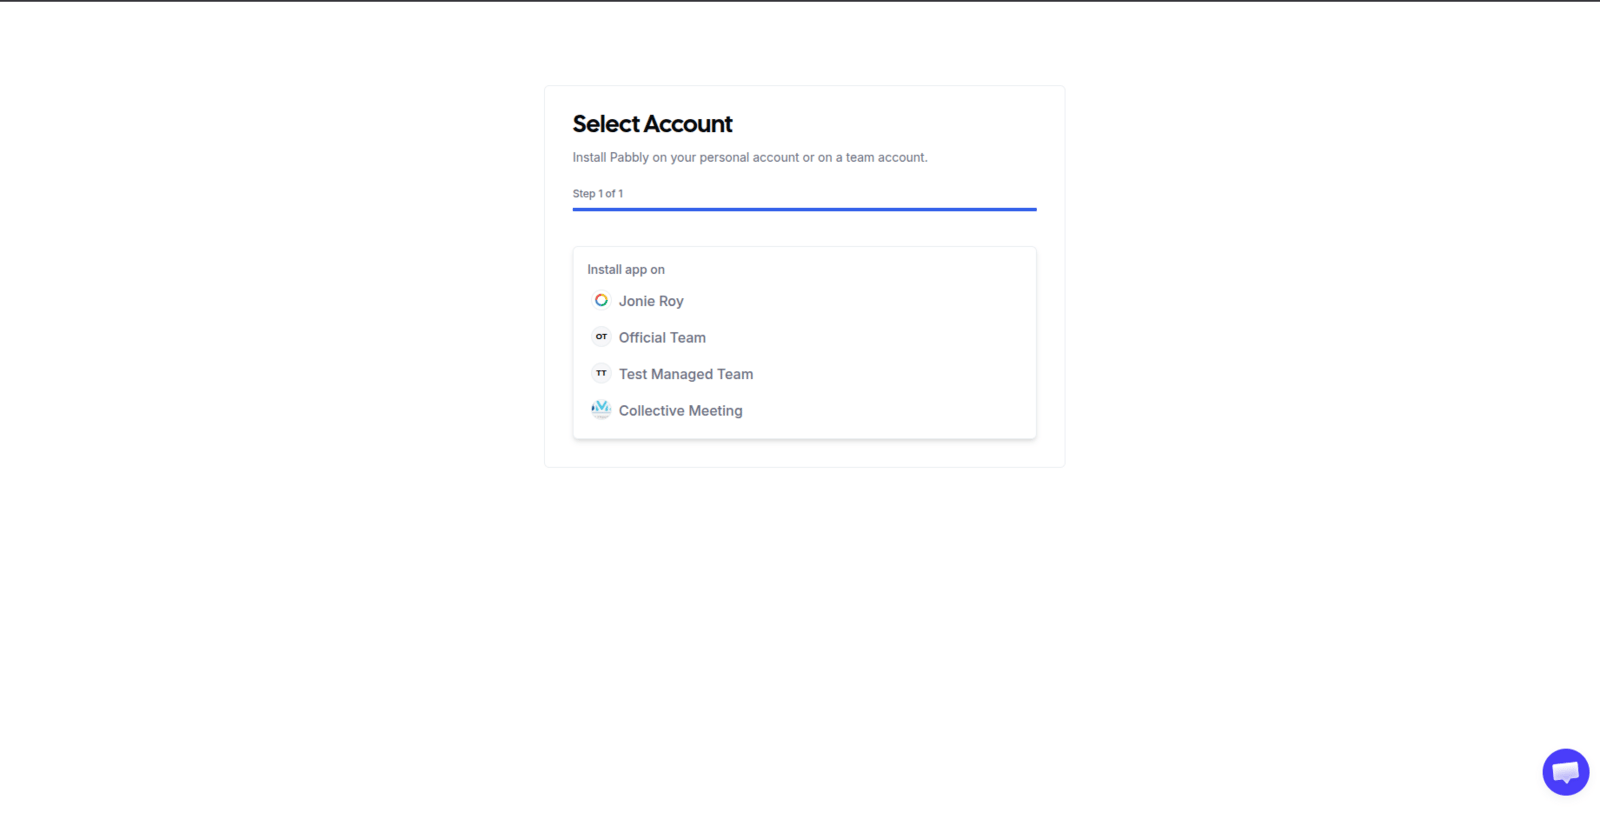
 Select whether you want to integrate your **Personal Account** or a specific **Team**.
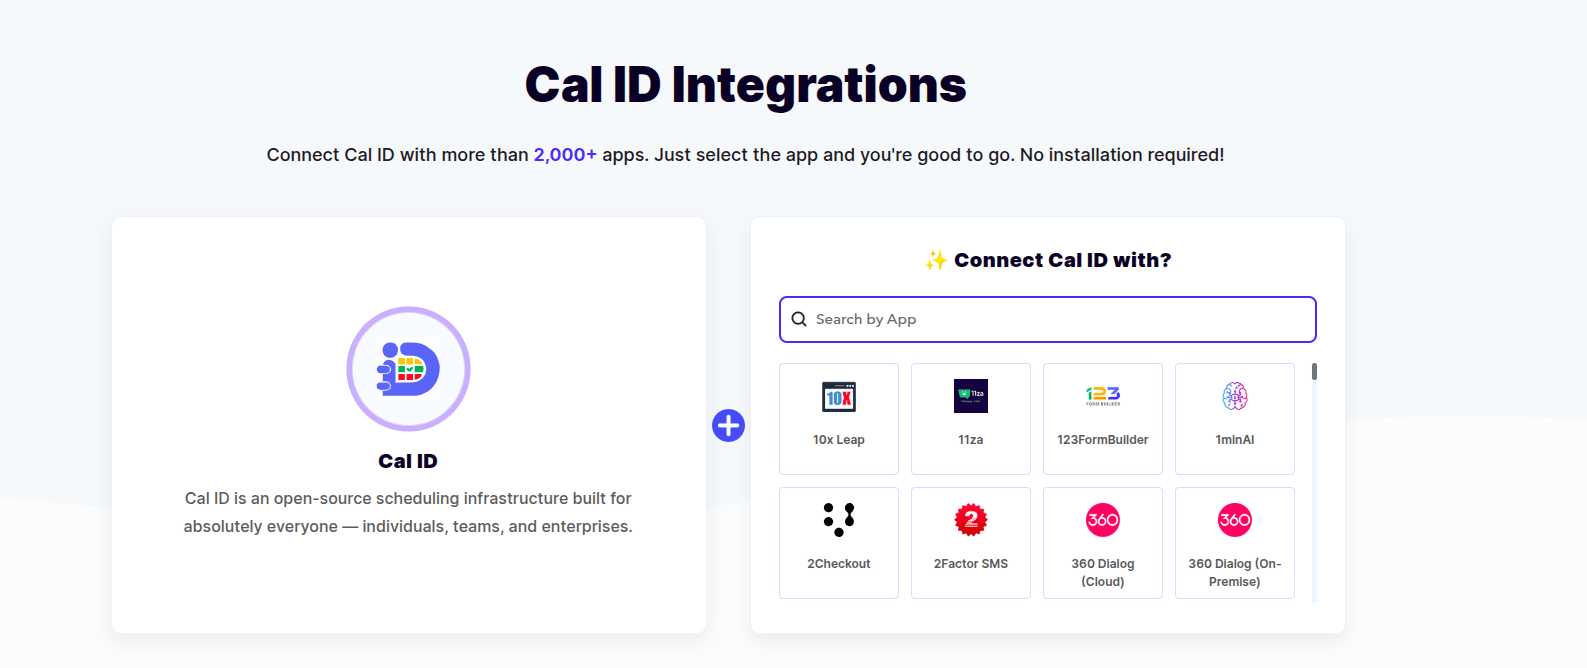
 You will be automatically sent to the Pabbly website. Select the second app you want to connect (e.g., Google Sheets, a CRM, or an Email tool) and click **Start** to create your automation flow.
 ## Step 2: Get the webhook URL from Pabbly
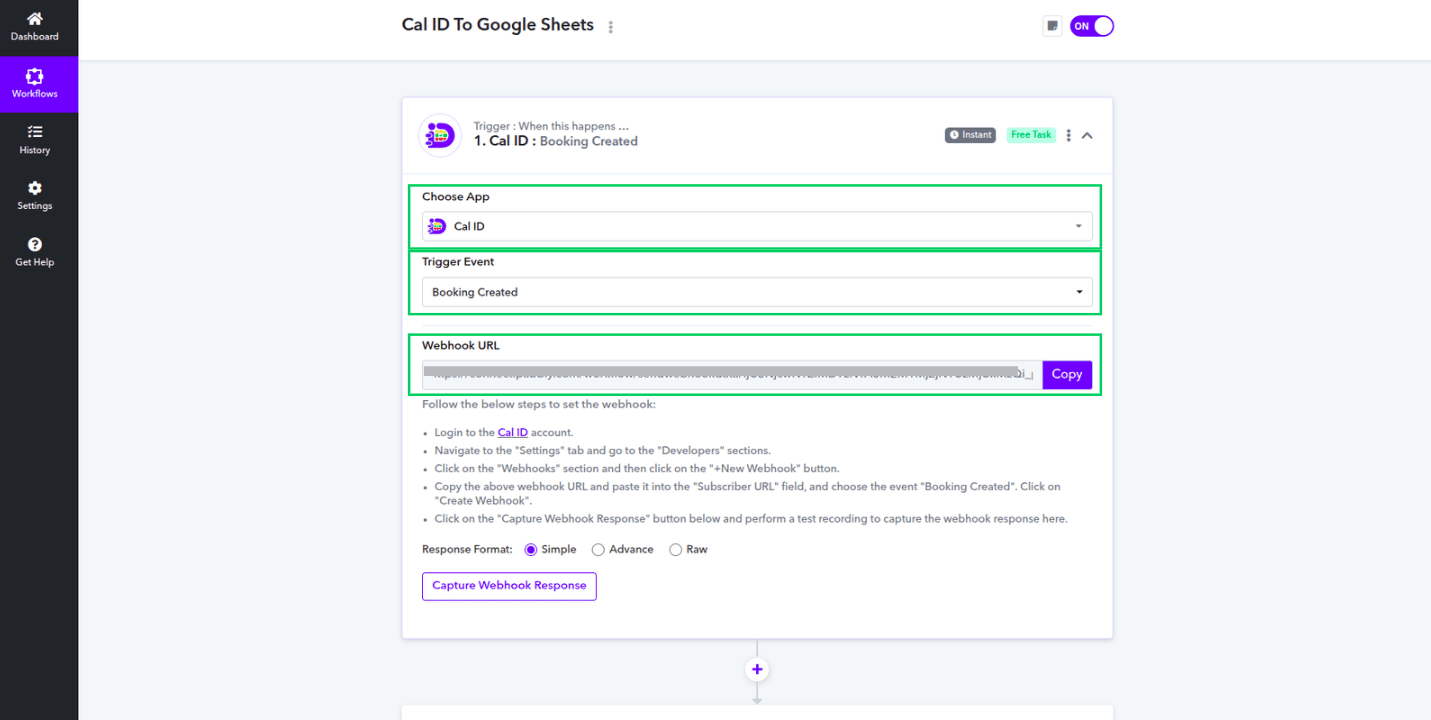
The **Webhook URL** is the link that connects Pabbly to Cal ID. Copy it in this step and keep it ready — you'll paste it into Cal ID in Step 3.
In your Pabbly workflow, select **Cal ID** as your trigger app.
Select the trigger event (e.g., "Booking Created").
Pabbly will provide you with a **Webhook URL** (a link that looks like `https://connect.pabbly.com/workflow/send....`). Copy this URL — you will need it for the next step.
## Step 2: Get the webhook URL from Pabbly
The **Webhook URL** is the link that connects Pabbly to Cal ID. Copy it in this step and keep it ready — you'll paste it into Cal ID in Step 3.
In your Pabbly workflow, select **Cal ID** as your trigger app.
Select the trigger event (e.g., "Booking Created").
Pabbly will provide you with a **Webhook URL** (a link that looks like `https://connect.pabbly.com/workflow/send....`). Copy this URL — you will need it for the next step.
 ## Step 3: Add the webhook to Cal ID
You can set up the webhook globally (for all events) or for just one specific event type.
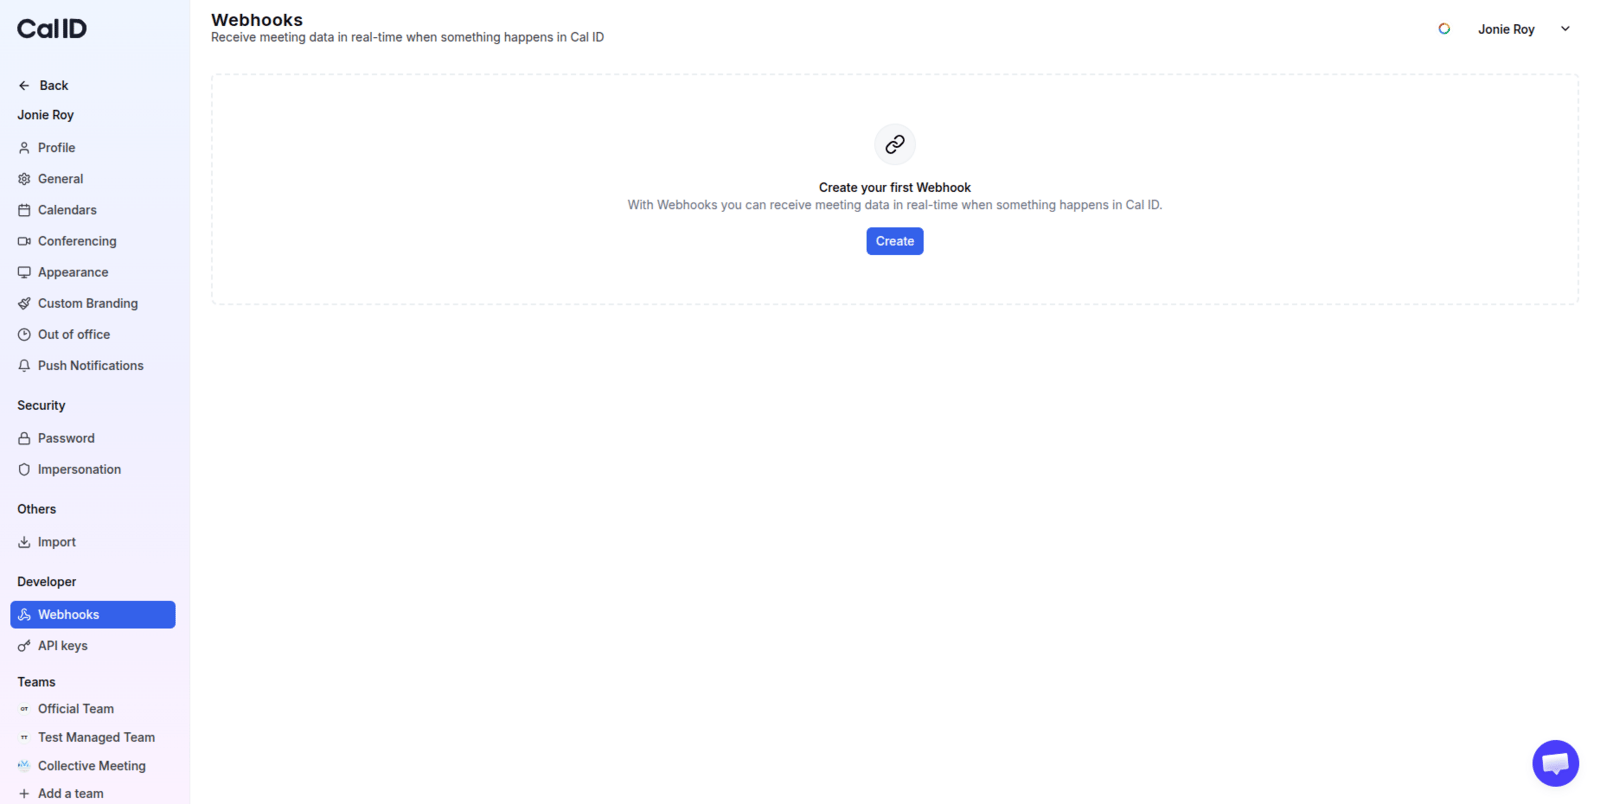
Navigate to **Settings** > **Developer** section in Cal ID. Click on **Webhooks** and then click the **+ New Webhook** button.
## Step 3: Add the webhook to Cal ID
You can set up the webhook globally (for all events) or for just one specific event type.
Navigate to **Settings** > **Developer** section in Cal ID. Click on **Webhooks** and then click the **+ New Webhook** button.
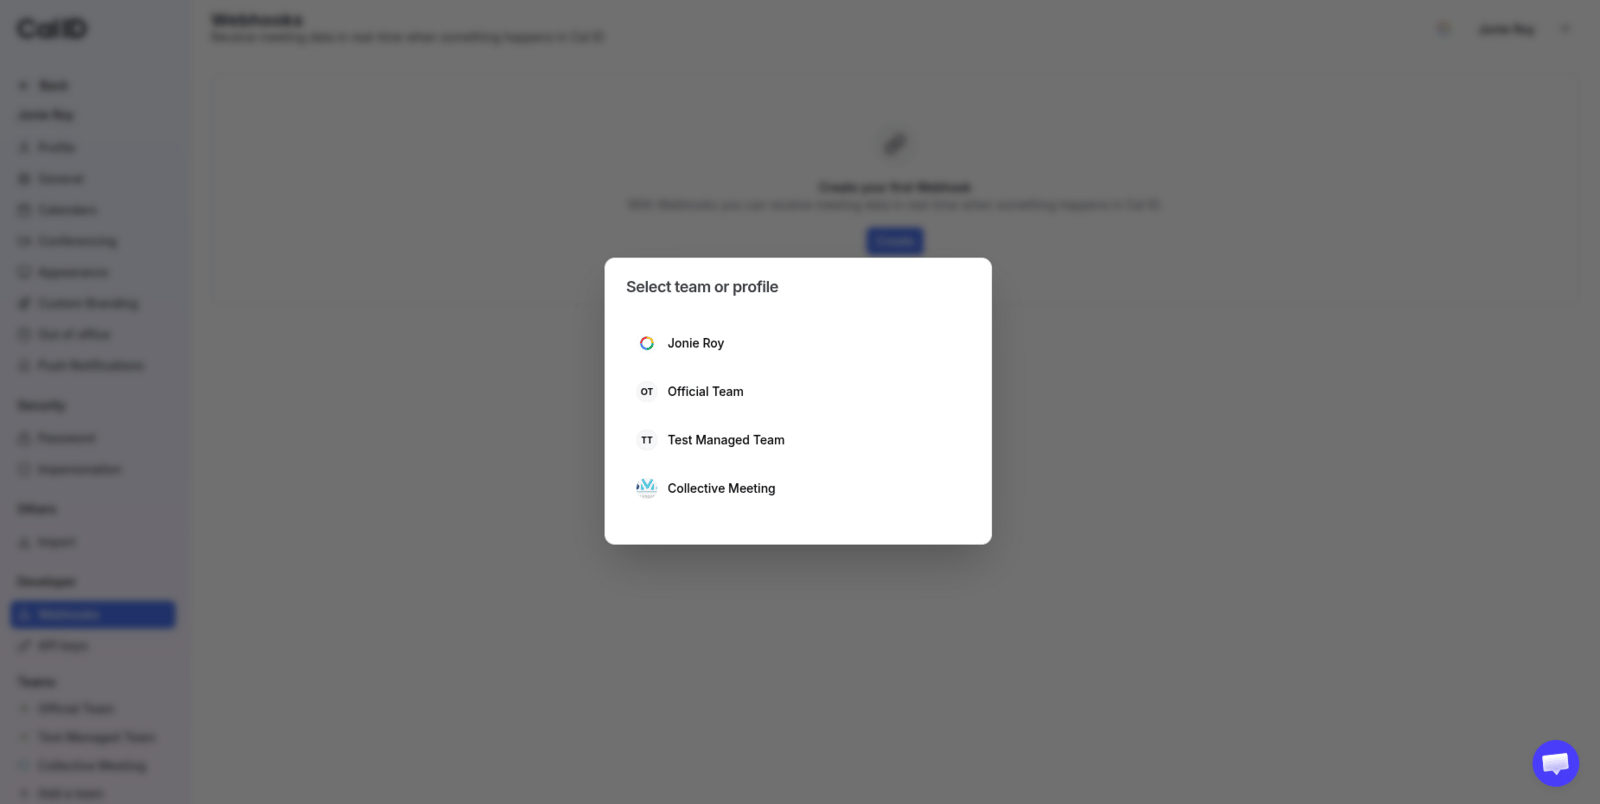
 Choose which account you want to add the webhook for, either Personal or any Team.
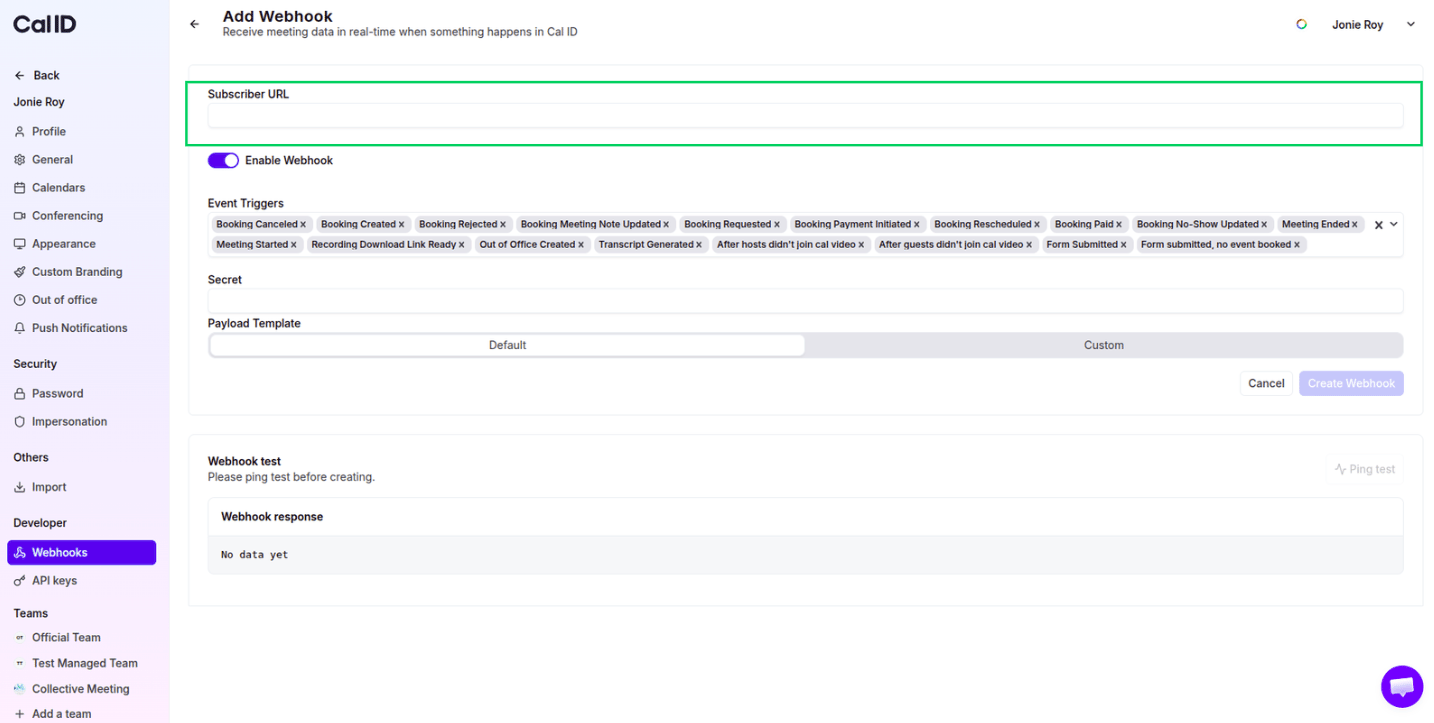
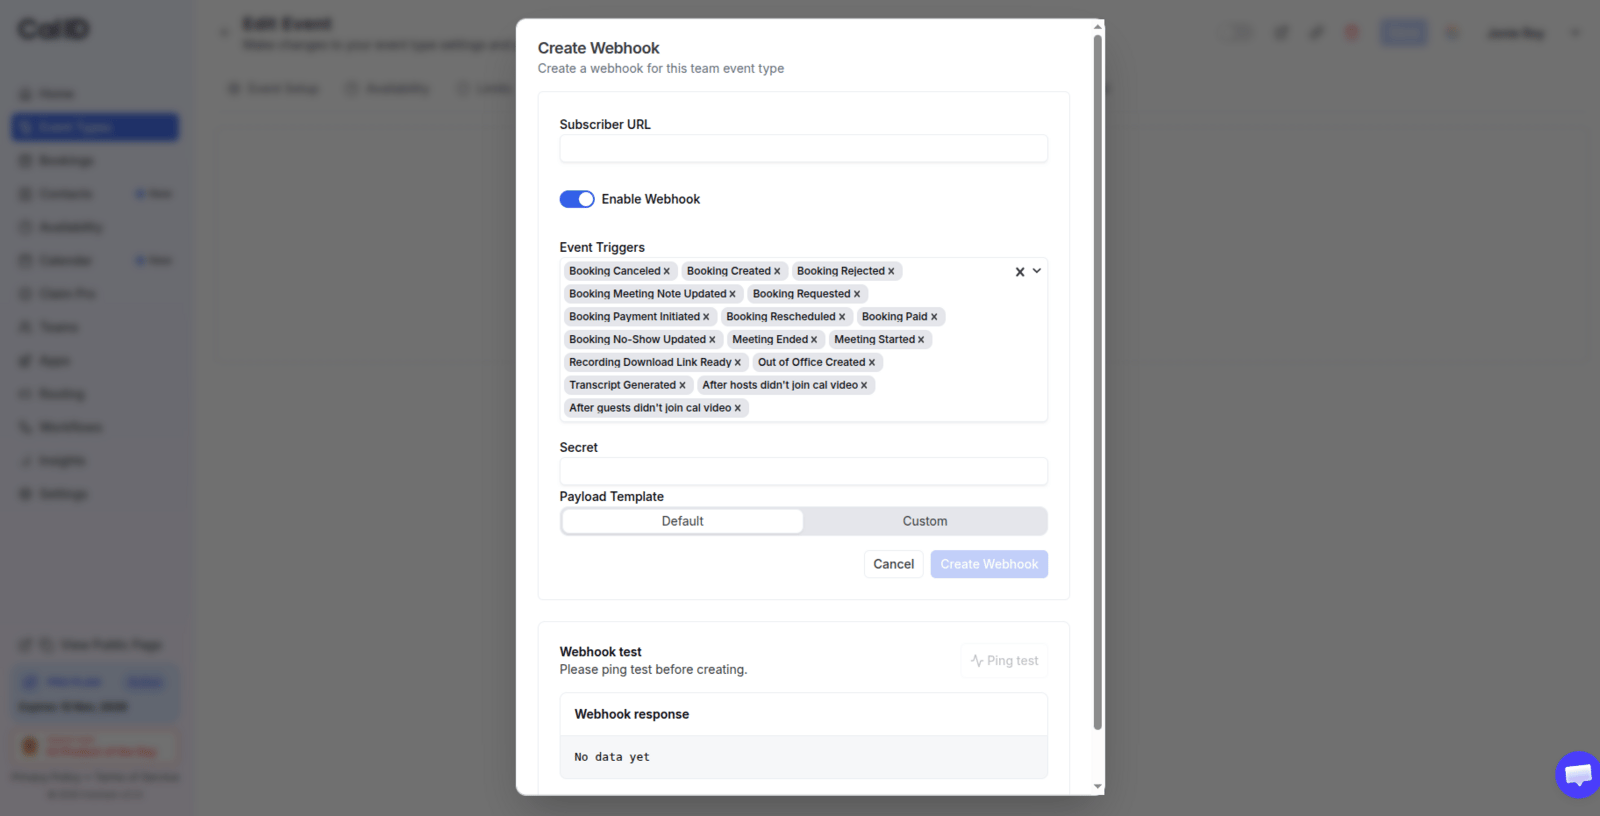
 Paste the link you copied from Pabbly into the **Subscriber URL** field.
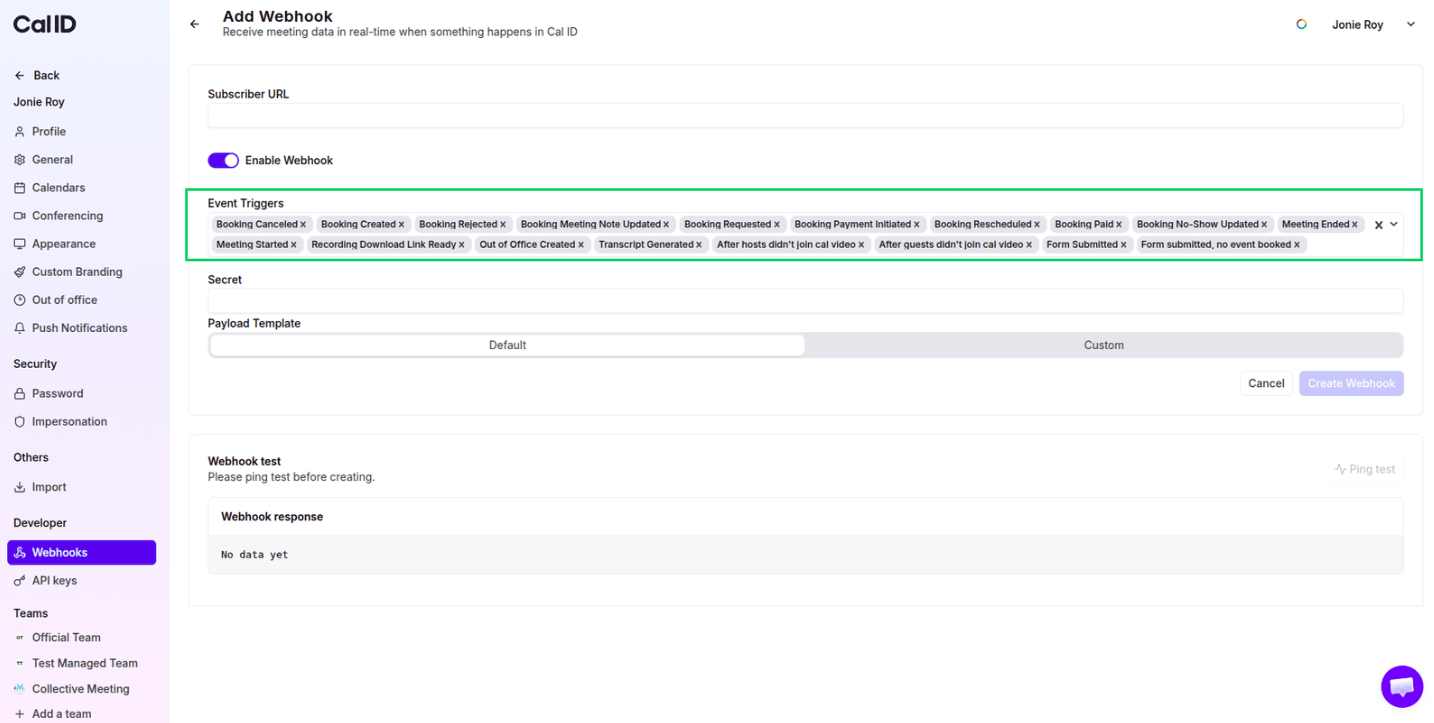
 Choose **Booking Created, Booking Canceled, Booking Rejected, Meeting Started**, and so on — you can choose any of the available triggers. Click **Create Webhook**.
 Go to the **Event Types** tab and click **Edit** (pencil icon) on your chosen event. Go to the **Webhooks** tab inside that event's settings.
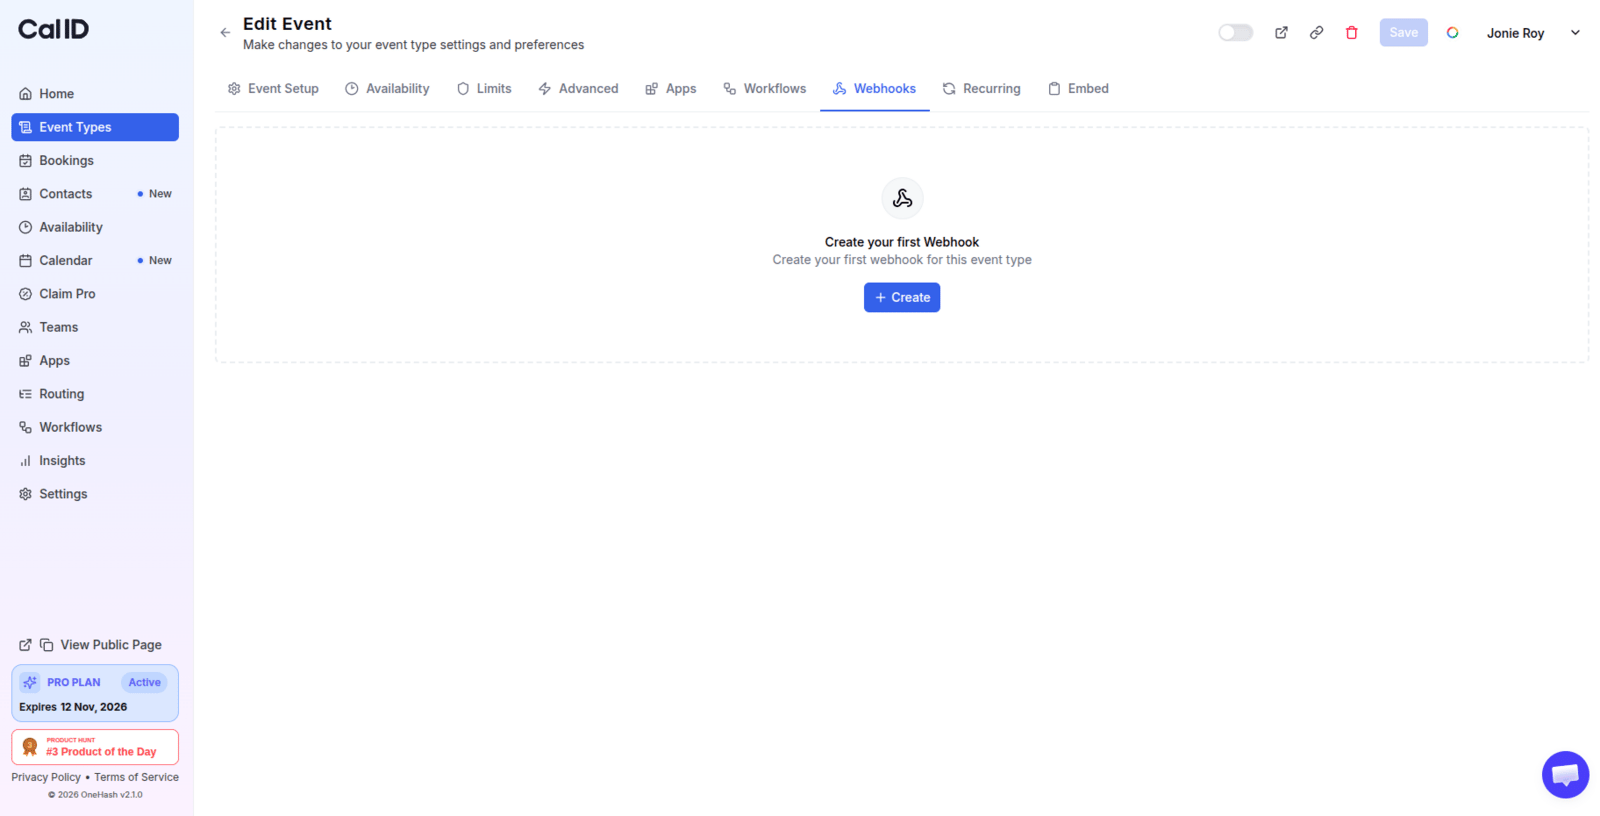 Click **Add Webhook**, paste the **Subscriber URL**, and select **Event Triggers**. Click **Create Webhook**.
 ## Step 4: Capture and map your data
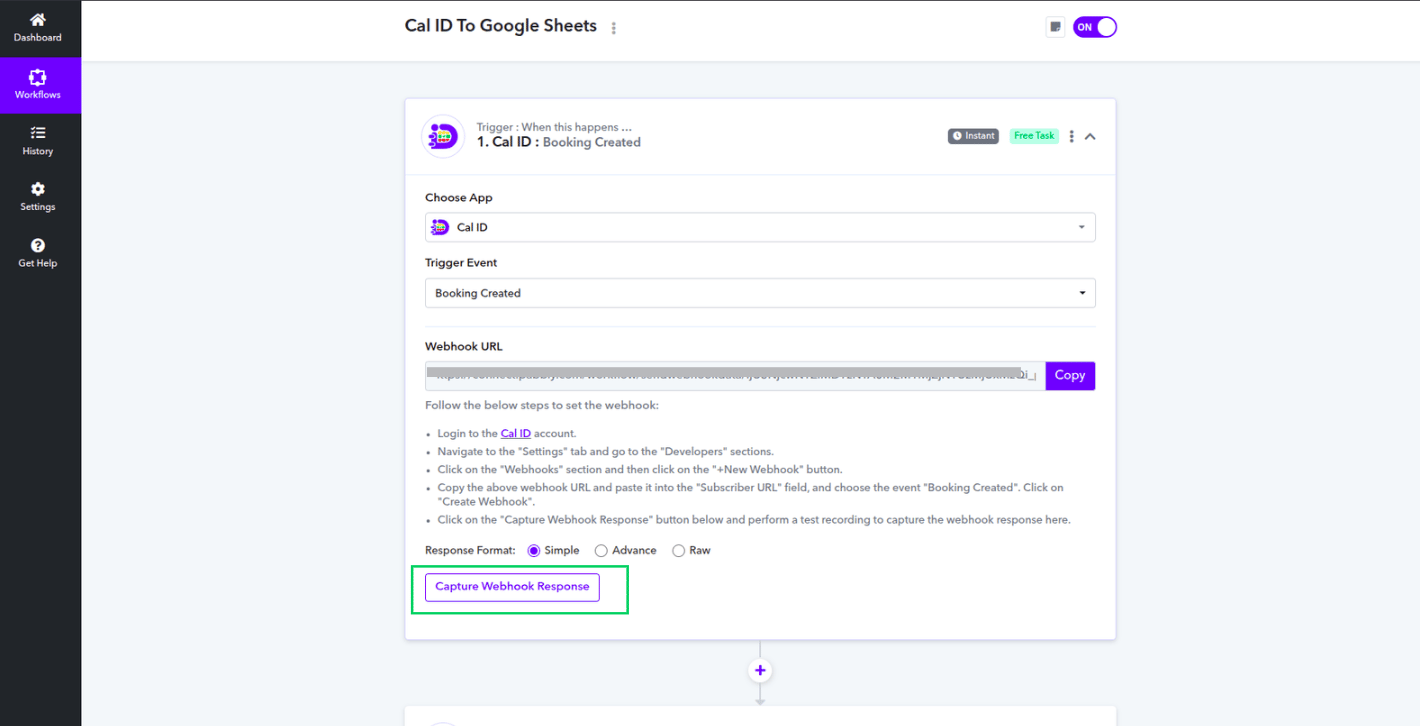
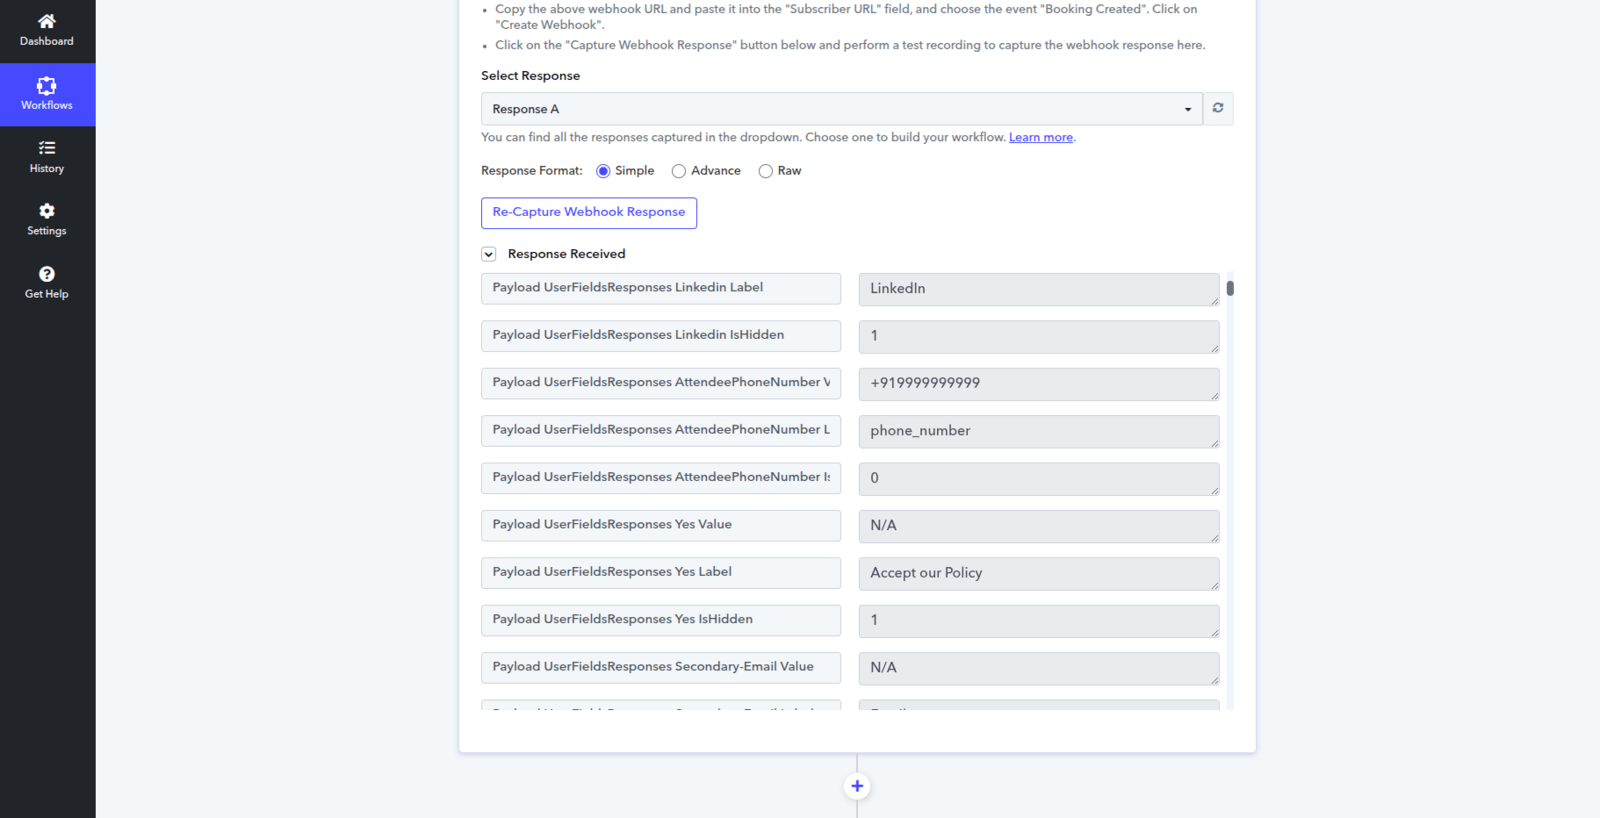
Go back to Pabbly and click **"Capture Webhook Response"**.
## Step 4: Capture and map your data
Go back to Pabbly and click **"Capture Webhook Response"**.
 Go to your public Cal ID booking page and complete a test booking. On completing it, you will see a response in Pabbly.
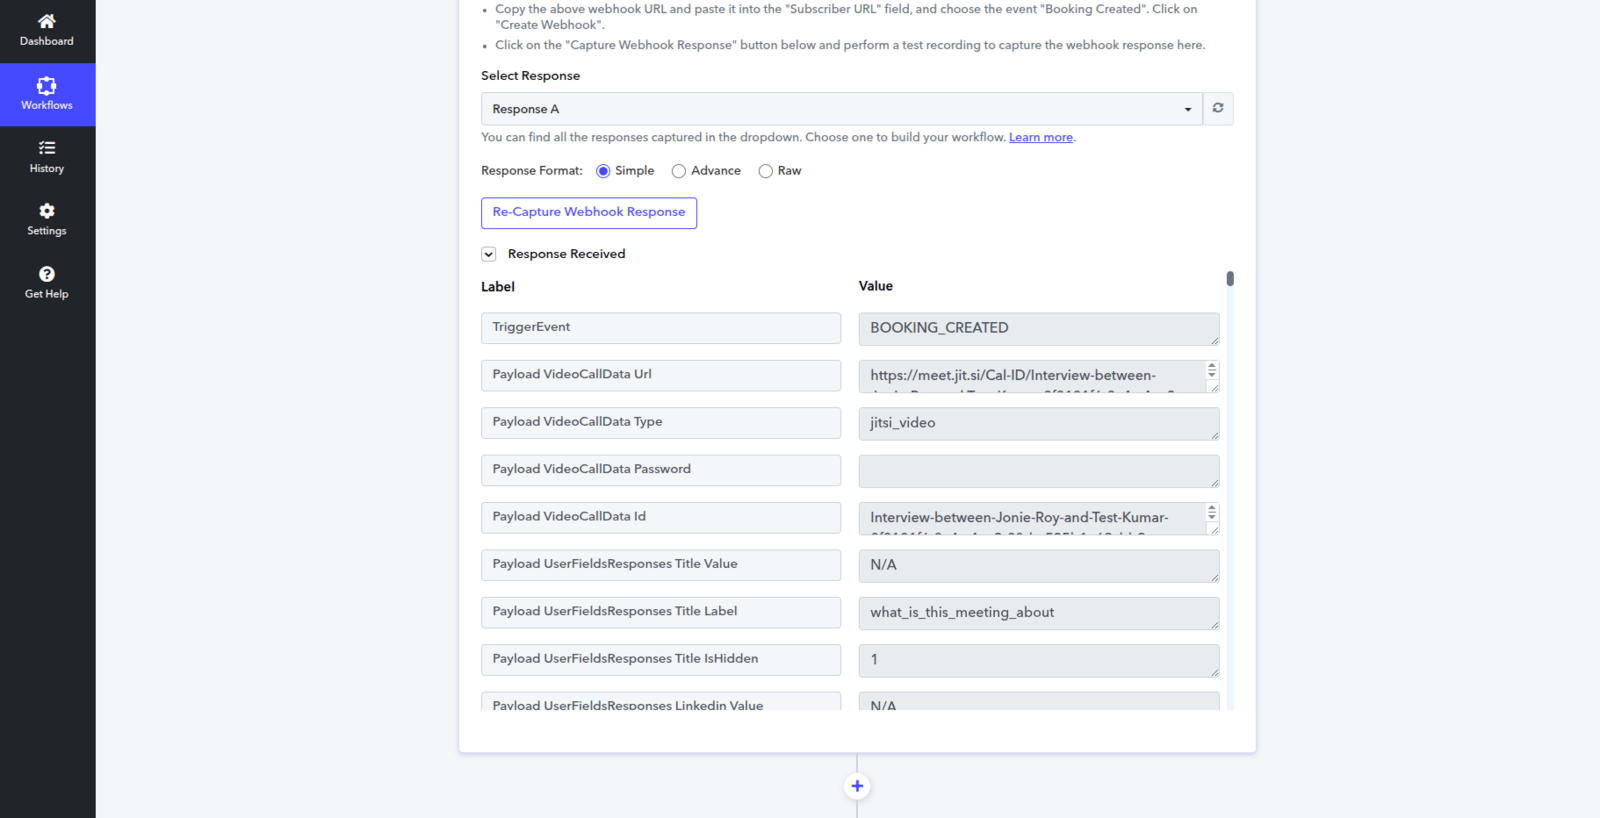
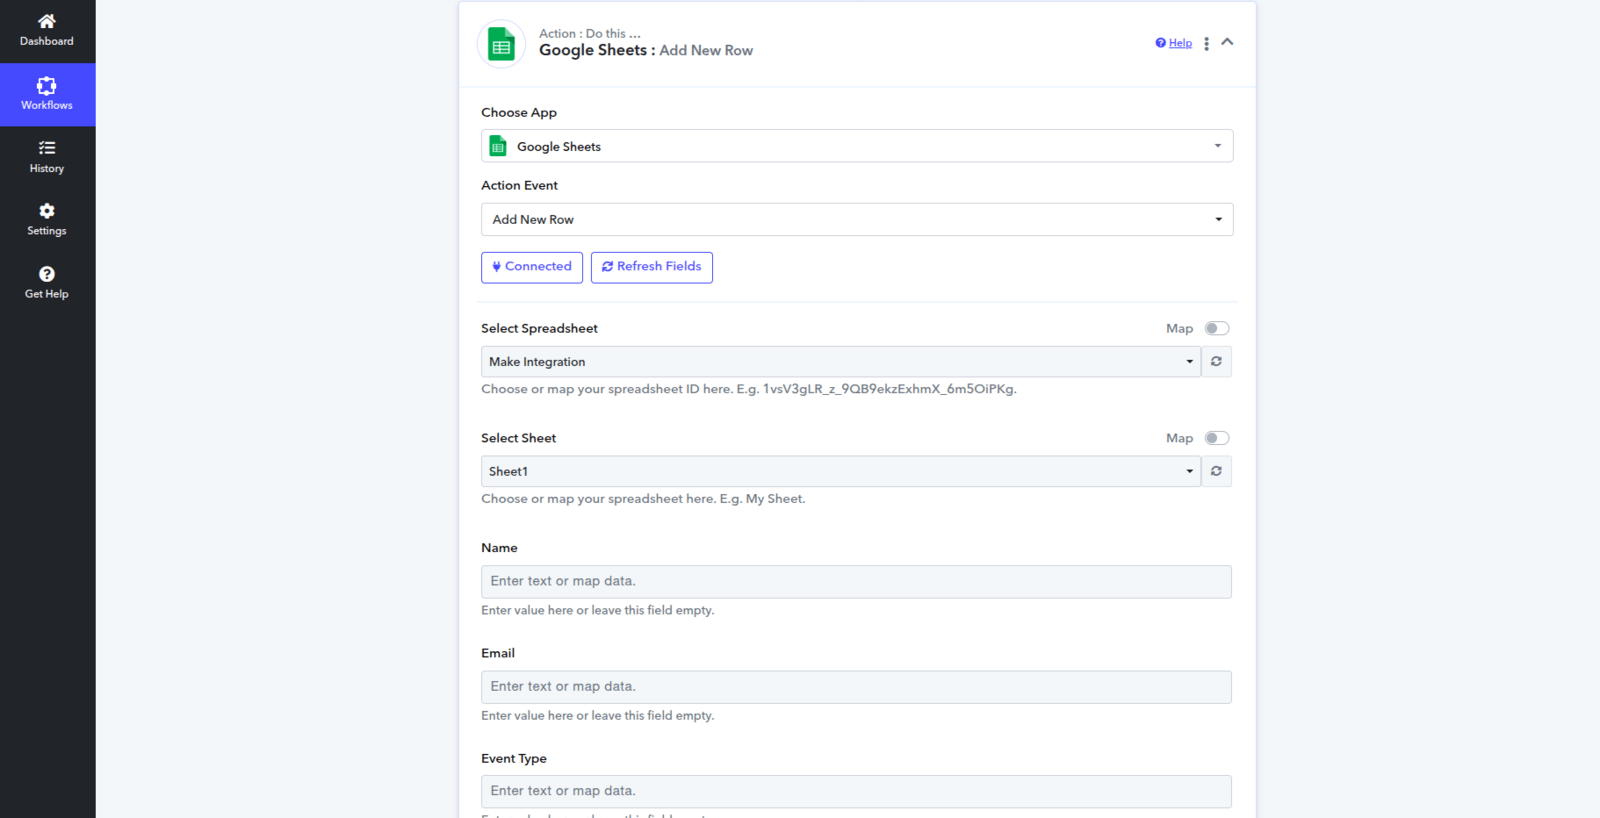
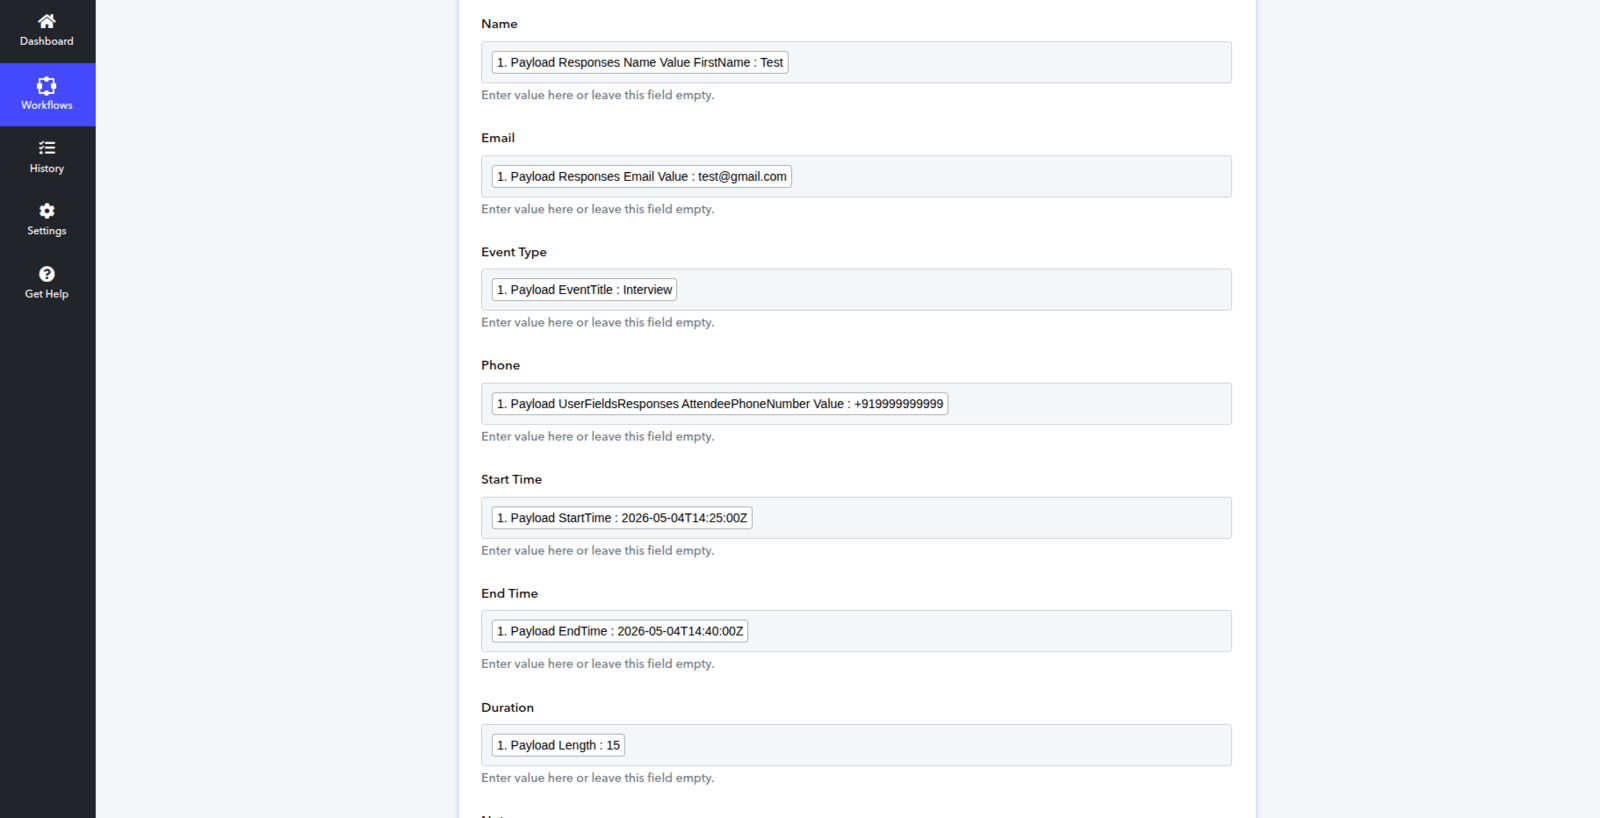
 Once Pabbly receives the data, you must send it to your destination app (e.g., Google Sheets). **Mapping** means matching the information Cal ID sent (like "Attendee Name") to the correct field in your next app (like "Customer Name" column). Carefully map fields like Email, Phone Number, and Meeting Time to make sure the data lands in the right place without errors.
 ## Summary of important points
* **Webhook URL**: Treat this URL like a digital mailbox; it's where Cal ID "drops off" your booking info.
* **Correct Mapping**: Always double-check your "Mapping" in Pabbly. If you map "Email" to a "Phone" field by mistake, your automation won't work correctly.
* **Test Recording**: You must complete a real test booking on your page to "activate" the connection and see the data fields for mapping.
## Related topics
- [Integrating Cal ID with Make](/docs/apps/make.md)
- [How to Get Notified on Slack When an Event is Booked?](/docs/apps/slack.md)
- [App Store](/docs/apps/app-store.md)
- [Setting Up Event-Specific Webhooks](/docs/event-types/event-webhooks.md)
- [Webhook in Cal ID](/docs/developers/webhooks.md)
## Summary of important points
* **Webhook URL**: Treat this URL like a digital mailbox; it's where Cal ID "drops off" your booking info.
* **Correct Mapping**: Always double-check your "Mapping" in Pabbly. If you map "Email" to a "Phone" field by mistake, your automation won't work correctly.
* **Test Recording**: You must complete a real test booking on your page to "activate" the connection and see the data fields for mapping.
## Related topics
- [Integrating Cal ID with Make](/docs/apps/make.md)
- [How to Get Notified on Slack When an Event is Booked?](/docs/apps/slack.md)
- [App Store](/docs/apps/app-store.md)
- [Setting Up Event-Specific Webhooks](/docs/event-types/event-webhooks.md)
- [Webhook in Cal ID](/docs/developers/webhooks.md)