> ## Documentation Index
> Fetch the complete documentation index at: https://cal.id/docs/llms.txt
> Use this file to discover all available pages before exploring further.
# Integrate Cal ID with PayPal
> Connect PayPal to Cal ID using your Client ID and Secret Key so bookers can pay for paid event types with a PayPal account or supported card.
Connect PayPal to [Cal ID](https://cal.id/home) to accept payments while users book your events. When someone selects your event, they must pay to confirm the booking, and once payment succeeds the meeting is scheduled automatically.
You'll need a PayPal Developer account to generate the **Client ID** and **Secret Key** used in setup. Cal ID uses PayPal to let you receive payments when someone books your paid event type.
## Connect PayPal to Cal ID
Go to the [Cal ID](https://cal.id/home) App store and search for **PayPal**.
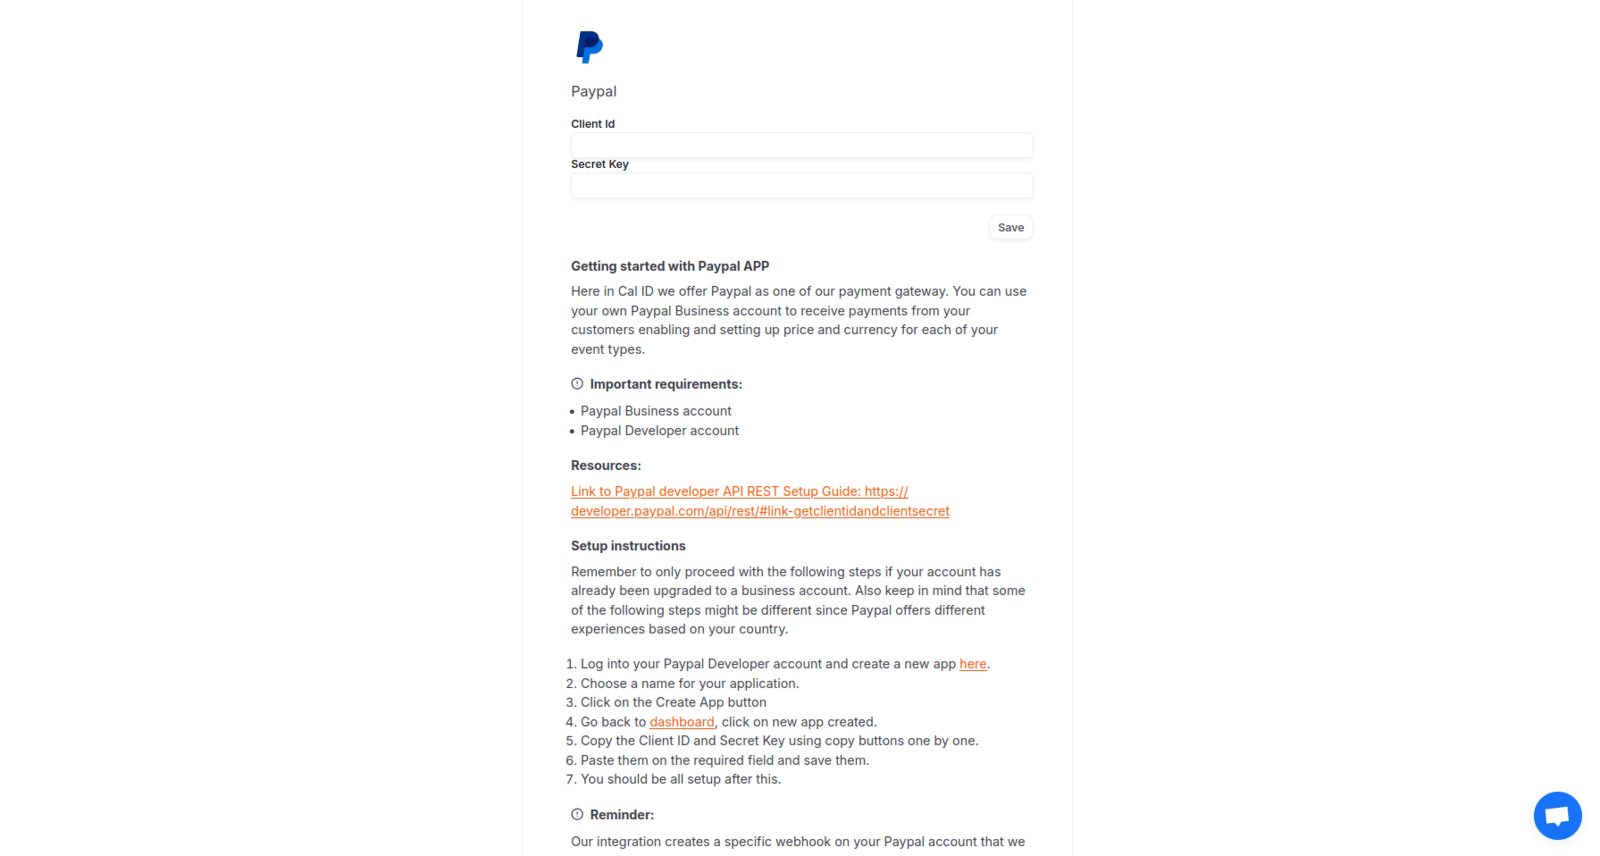
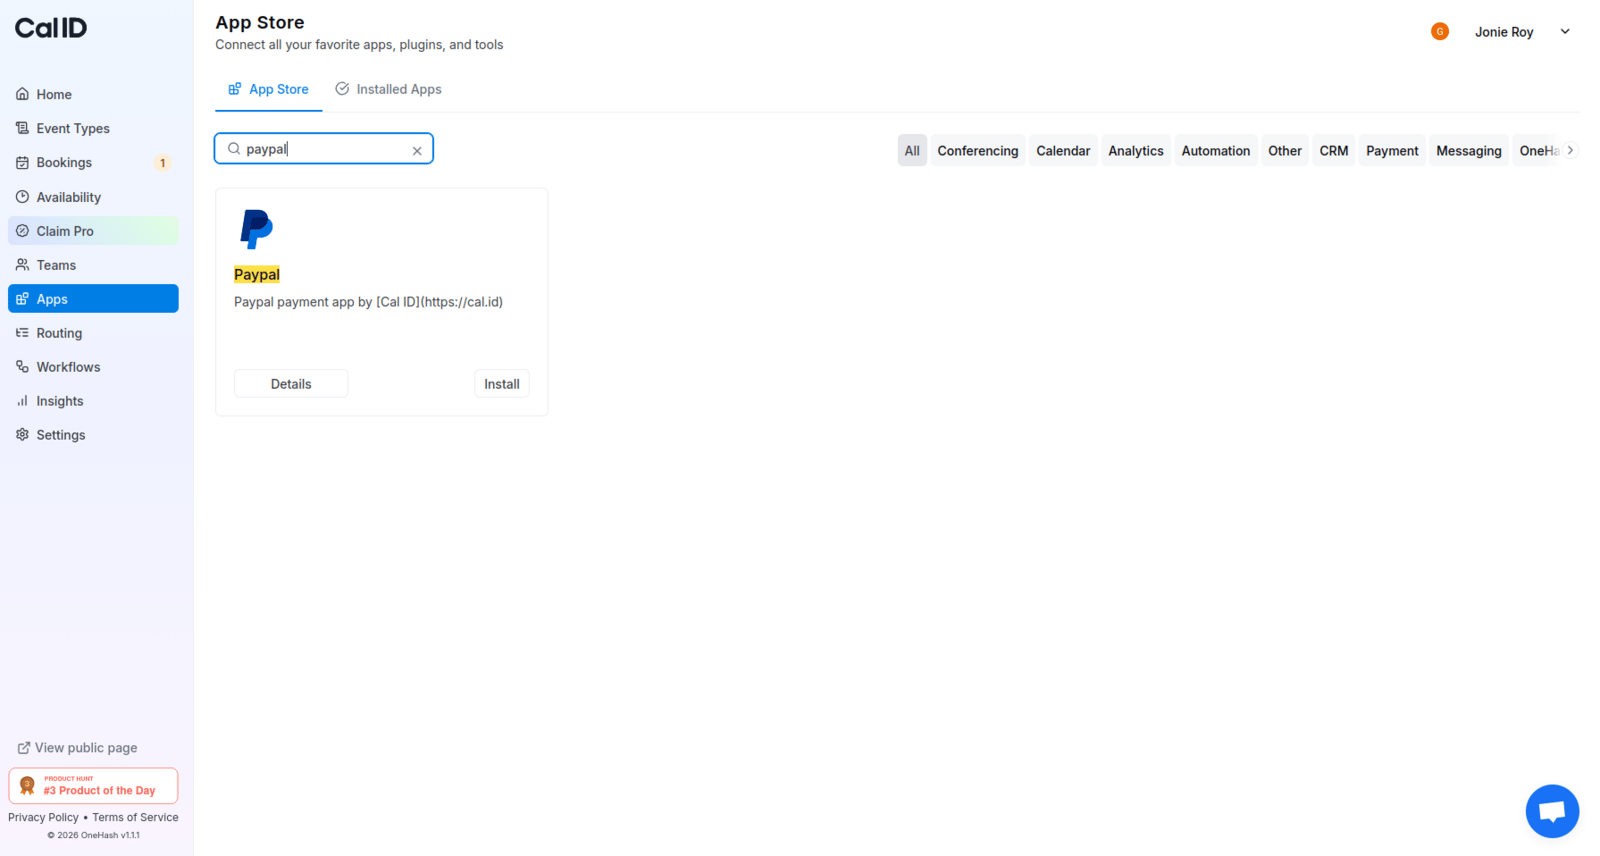 Click **Install**. A page will appear where you have to enter the Client ID and Secret Key of your PayPal account.
To obtain the Secret Key and Client ID:
* Log into your PayPal Developer account and create a new app [here](https://developer.paypal.com/dashboard/applications/live).
* Choose a name for your application.
* Click on the **Create App** button.
* Go back to the [dashboard](https://developer.paypal.com/dashboard/applications/live) and click on the new app created.
* Copy the Client ID and Secret Key using the copy buttons one by one.
* Paste them in the required fields and save them.
* You should be all set up after this.
Click **Install**. A page will appear where you have to enter the Client ID and Secret Key of your PayPal account.
To obtain the Secret Key and Client ID:
* Log into your PayPal Developer account and create a new app [here](https://developer.paypal.com/dashboard/applications/live).
* Choose a name for your application.
* Click on the **Create App** button.
* Go back to the [dashboard](https://developer.paypal.com/dashboard/applications/live) and click on the new app created.
* Copy the Client ID and Secret Key using the copy buttons one by one.
* Paste them in the required fields and save them.
* You should be all set up after this.
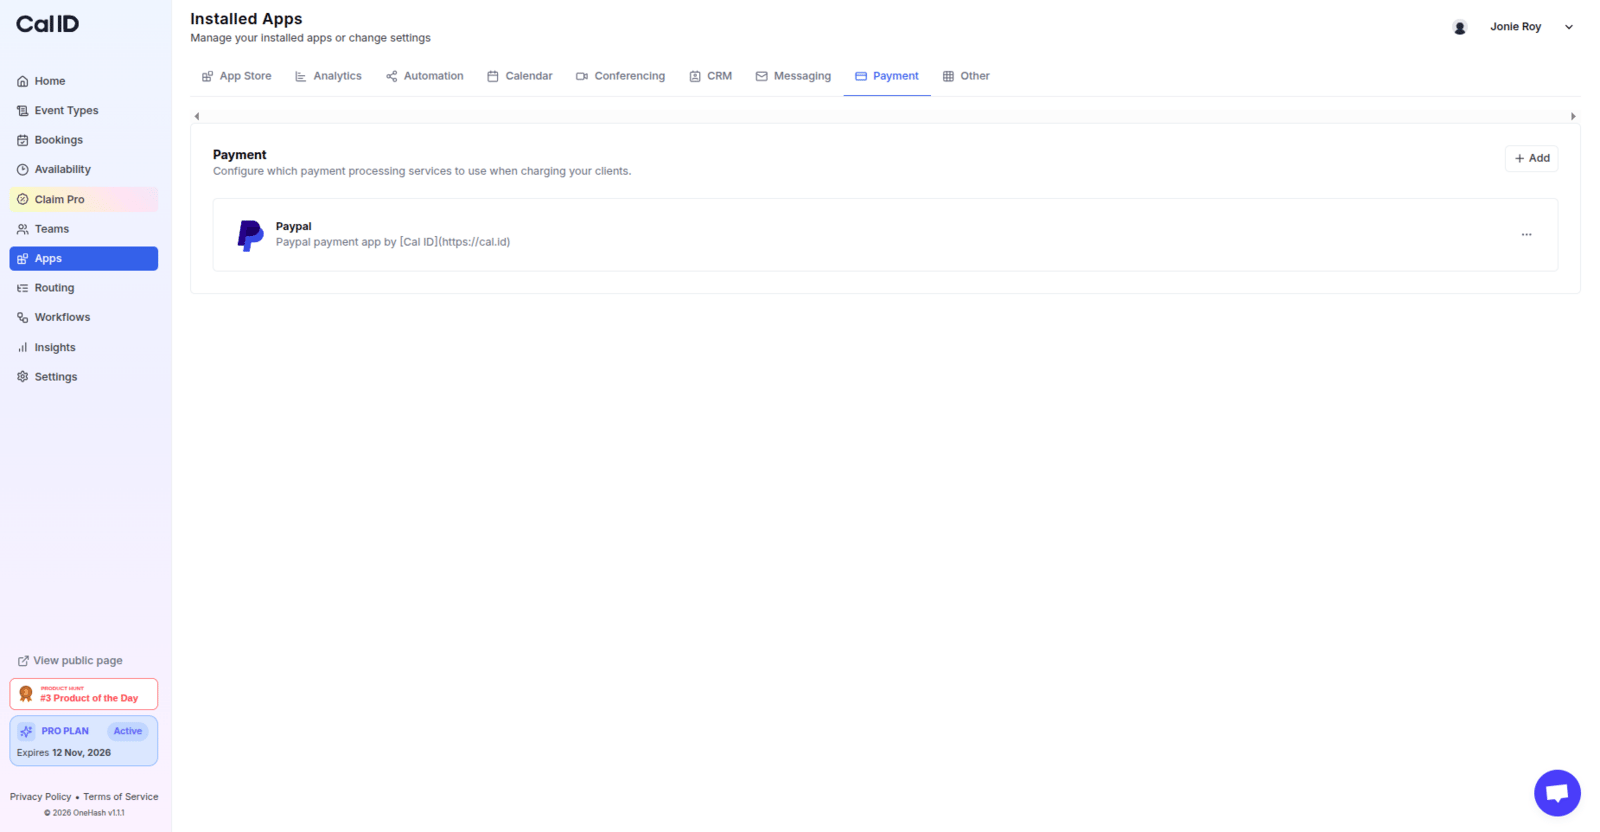
 On Save, you will be redirected to the Cal ID page, where you can see that the PayPal app has been installed. Now you can add the PayPal app as a payment method to any of your event types, whether it is a new or an existing one.
 ## How to add PayPal to an event type
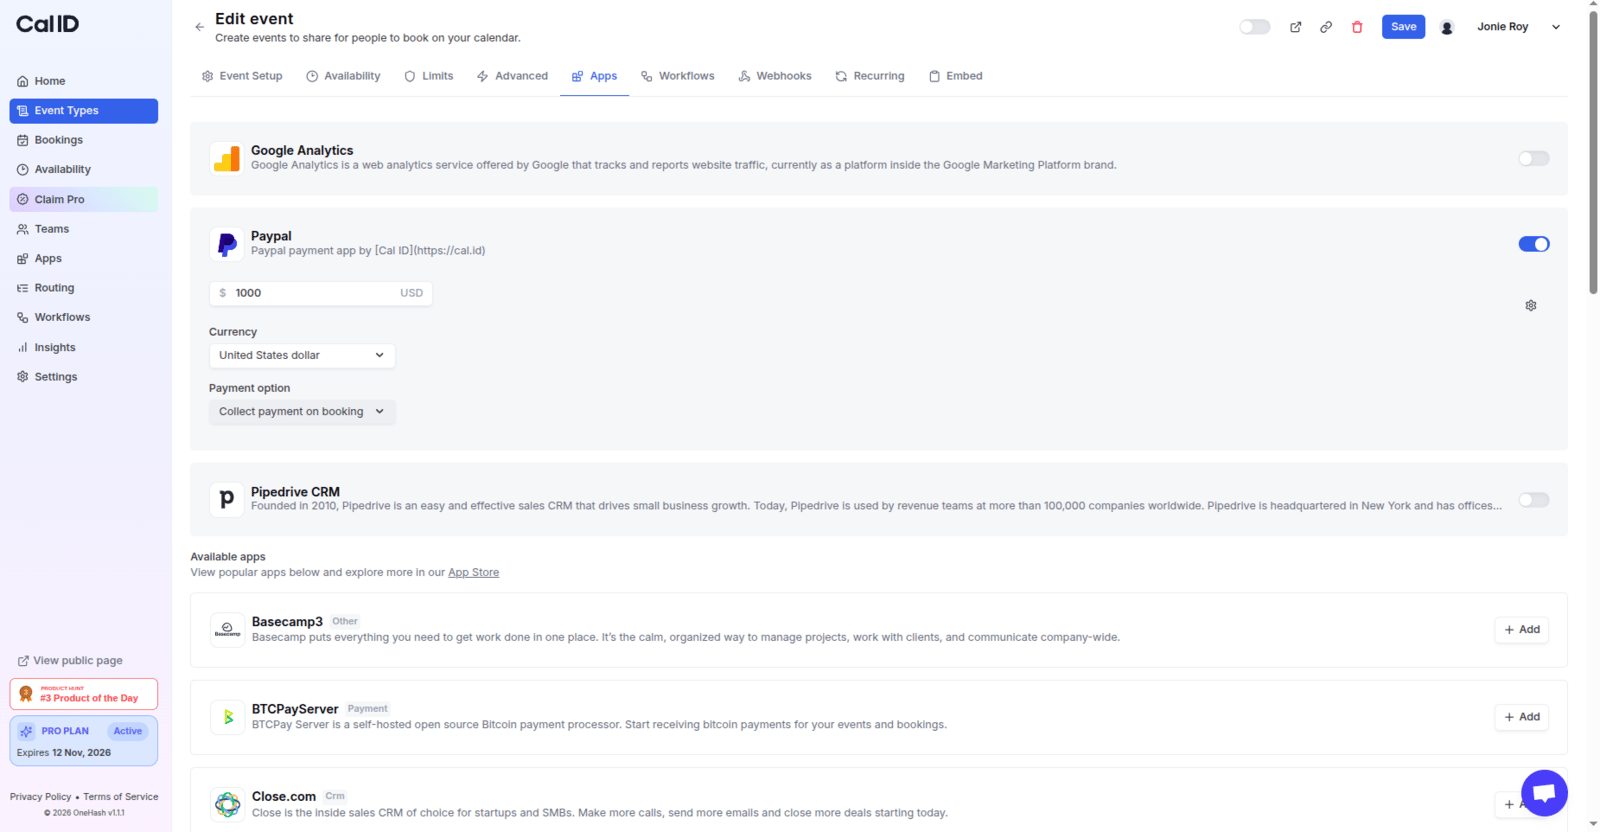
Go to **Event Types**, select the event type you want to add PayPal to, and click **Edit**.
Go to the **Apps** section and turn **ON** the PayPal app toggle.
Enter the amount you want to collect for this event type, then save it.
## How to add PayPal to an event type
Go to **Event Types**, select the event type you want to add PayPal to, and click **Edit**.
Go to the **Apps** section and turn **ON** the PayPal app toggle.
Enter the amount you want to collect for this event type, then save it.
 Now your booking page looks like this:
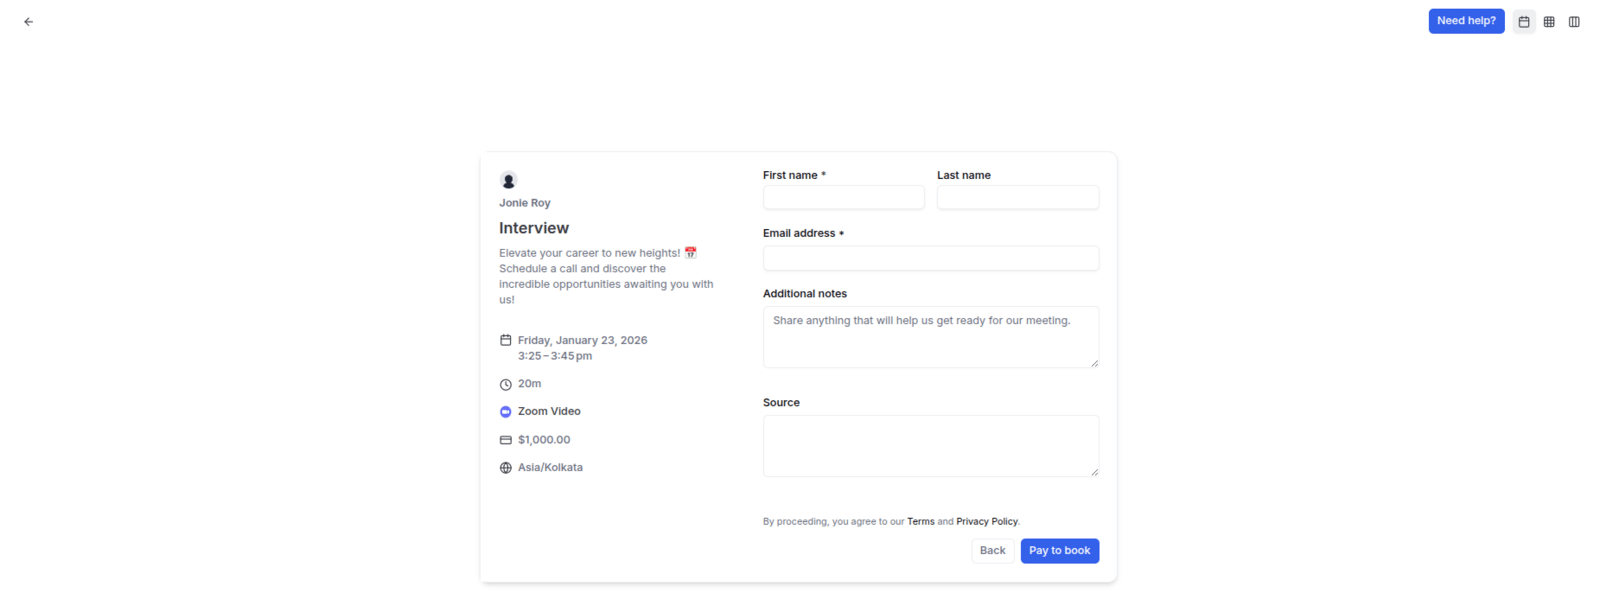 Once the user fills in the required questions, they need to click the **Pay to Book** button and complete the payment. After the payment is successful, the meeting will be scheduled.
That's it. You will receive payments as soon as someone books you using this event type.
## Related topics
- [Paid Bookings](/docs/apps/paid-bookings.md)
- [Integrate Cal ID with Stripe](/docs/apps/stripe.md)
- [Integrate Cal ID with Razorpay](/docs/apps/razorpay.md)
- [App Store](/docs/apps/app-store.md)
- [Managing Installed Apps](/docs/apps/manage-installed.md)
Once the user fills in the required questions, they need to click the **Pay to Book** button and complete the payment. After the payment is successful, the meeting will be scheduled.
That's it. You will receive payments as soon as someone books you using this event type.
## Related topics
- [Paid Bookings](/docs/apps/paid-bookings.md)
- [Integrate Cal ID with Stripe](/docs/apps/stripe.md)
- [Integrate Cal ID with Razorpay](/docs/apps/razorpay.md)
- [App Store](/docs/apps/app-store.md)
- [Managing Installed Apps](/docs/apps/manage-installed.md)