> ## Documentation Index
> Fetch the complete documentation index at: https://cal.id/docs/llms.txt
> Use this file to discover all available pages before exploring further.
# Public Page Banner for Team
> Add a wide header banner image to the top of your team's Cal ID booking page for a professional, on-brand first impression when guests visit.
The public page banner is the first thing guests see—a wide, professional image that sits at the very top of your booking page.
Your banner image must be exactly **3200 x 320 px** and **1 MB** or smaller.
## Step-by-step configuration
Access your account dashboard.
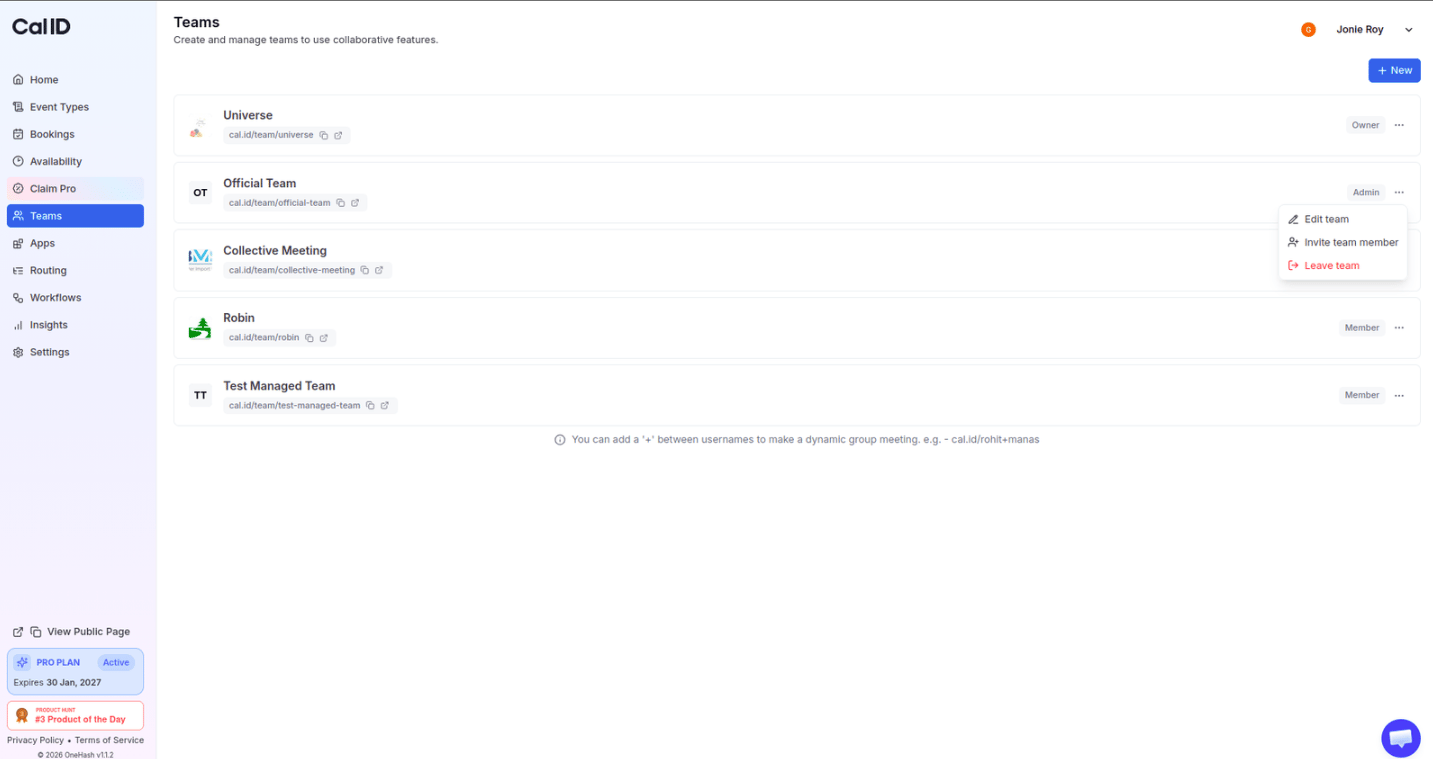
Click on the **Teams** icon in the left-hand sidebar.
Locate the team, click the **three horizontal dots**, and select **Edit team**.
 Click on the **Custom Branding** tab at the top of the page.
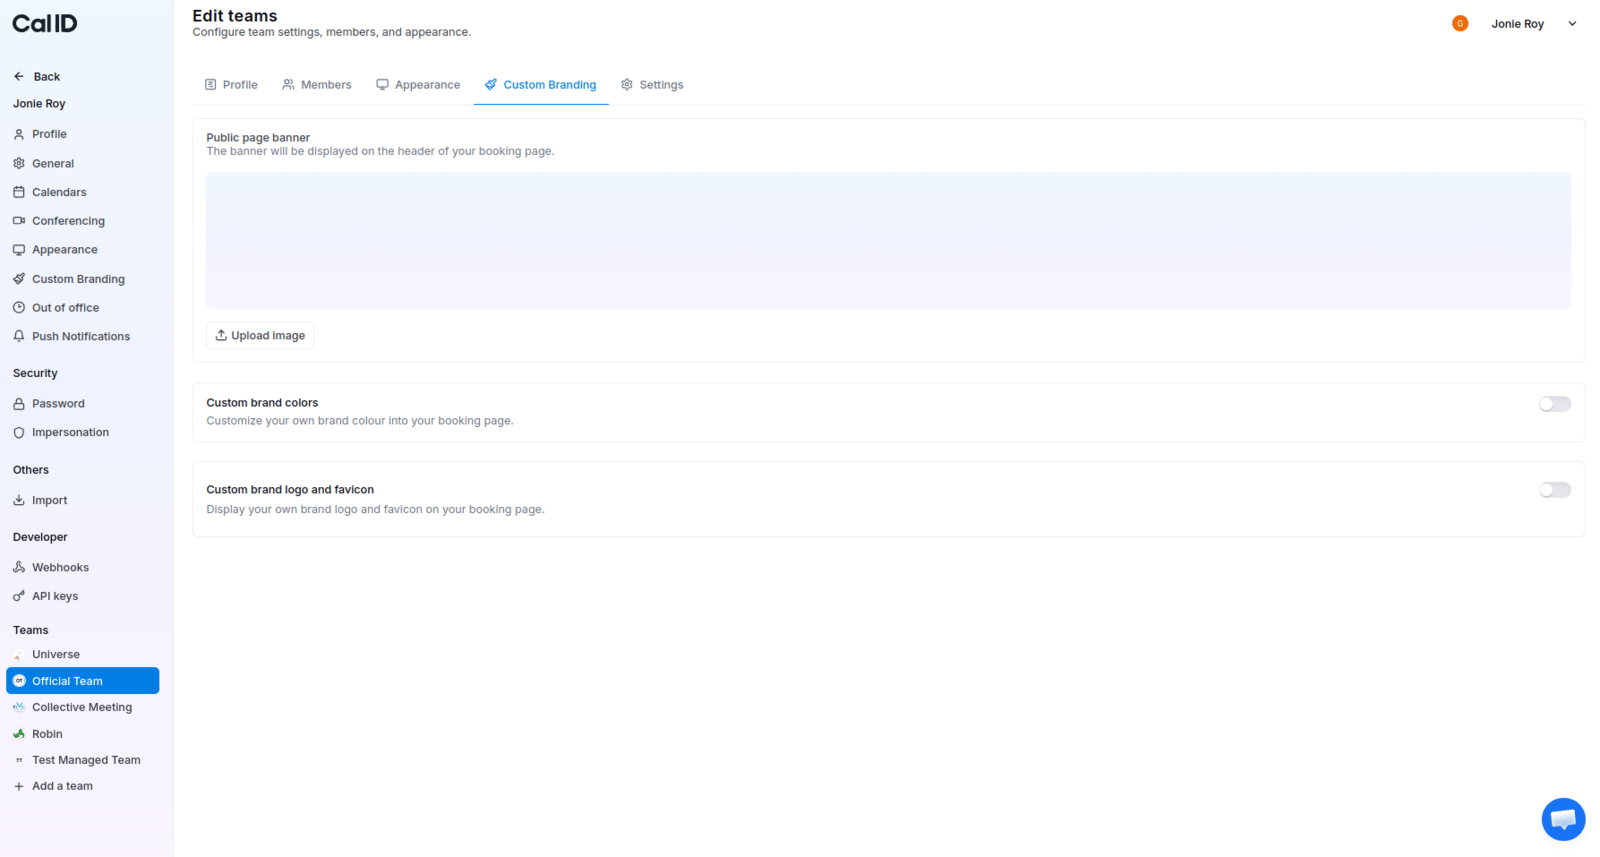 Click the **Upload image** button, then select your file (ensure it meets the 3200 x 320 dimension and 1 MB size limit).
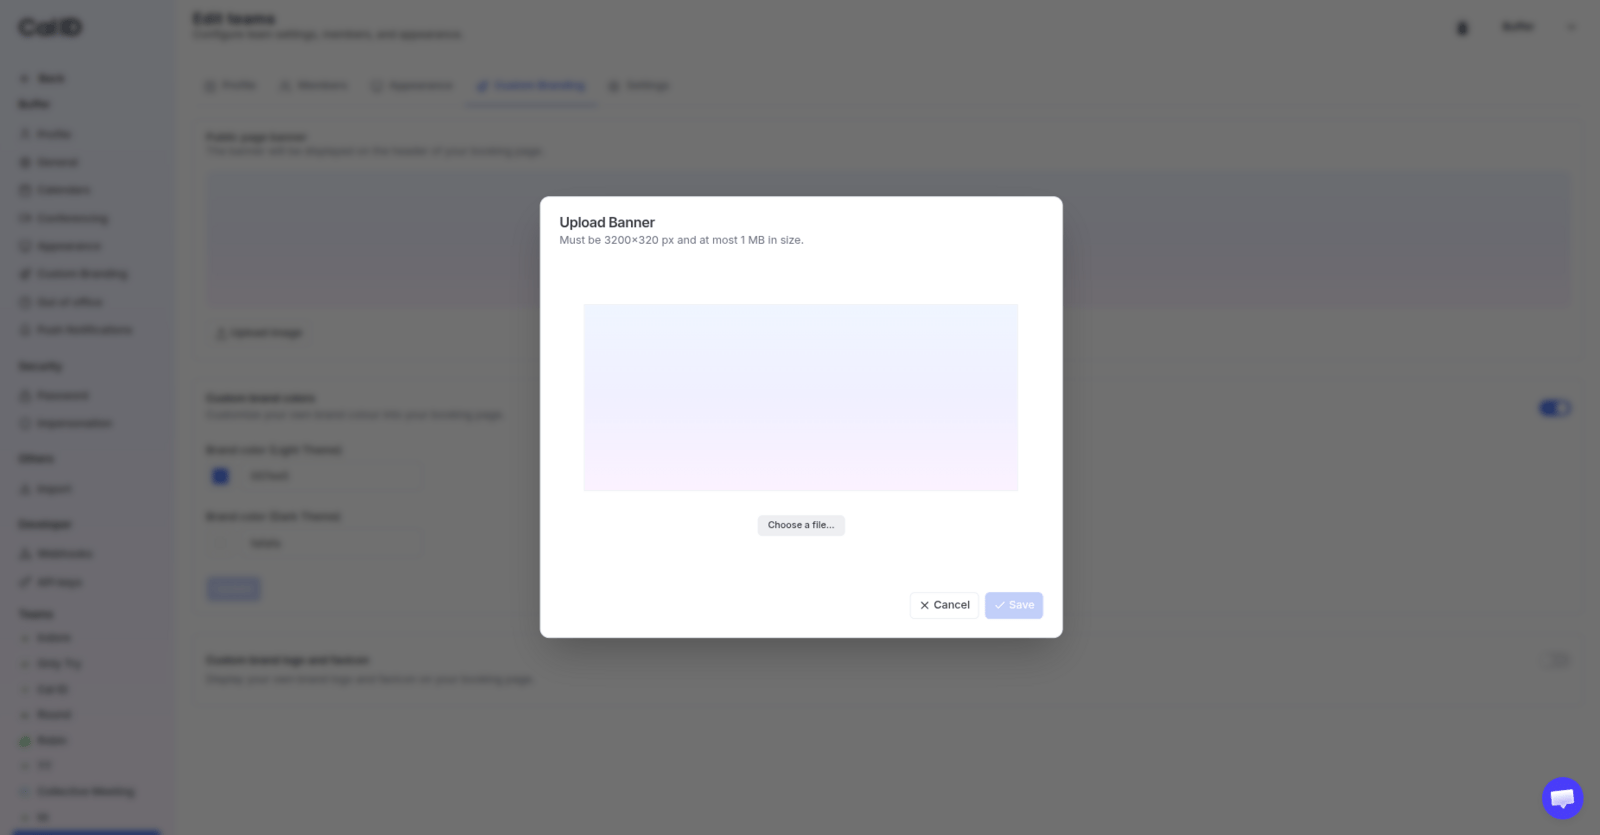 The banner will display in the preview box once the upload is successful.
Because the banner is very wide and short, try to use a landscape photo or a brand pattern where the most important visual elements are centered. This prevents important details from being cut off on smaller mobile devices.
## Next steps
Add a banner to your own personal booking page.
Round out the team page with brand colors and a logo.
## Related topics
- [Custom Branding For Teams](/docs/branding/teams.md)
- [Public Page Banner](/docs/branding/banner.md)
- [Customize Your Brand Logo and Favicon in Cal ID for Team](/docs/branding/logo-favicon-team.md)
- [Managing Custom Brand Colors in Cal ID for Team](/docs/branding/brand-colors-team.md)
- [Team Appearance Settings](/docs/appearance/team-appearance.md)
The banner will display in the preview box once the upload is successful.
Because the banner is very wide and short, try to use a landscape photo or a brand pattern where the most important visual elements are centered. This prevents important details from being cut off on smaller mobile devices.
## Next steps
Add a banner to your own personal booking page.
Round out the team page with brand colors and a logo.
## Related topics
- [Custom Branding For Teams](/docs/branding/teams.md)
- [Public Page Banner](/docs/branding/banner.md)
- [Customize Your Brand Logo and Favicon in Cal ID for Team](/docs/branding/logo-favicon-team.md)
- [Managing Custom Brand Colors in Cal ID for Team](/docs/branding/brand-colors-team.md)
- [Team Appearance Settings](/docs/appearance/team-appearance.md)