> ## Documentation Index
> Fetch the complete documentation index at: https://cal.id/docs/llms.txt
> Use this file to discover all available pages before exploring further.
# Managing Custom Brand Colors in Cal ID for Team
> Set primary brand colors for the light and dark themes of your team's Cal ID public booking page so it matches your company's visual identity.
Set specific primary colors for your team booking page so it matches your company's visual identity. You can define different colors for light and dark themes, giving your page a custom, polished feel regardless of your guest's system settings.
## Step-by-step configuration
Access your account dashboard.
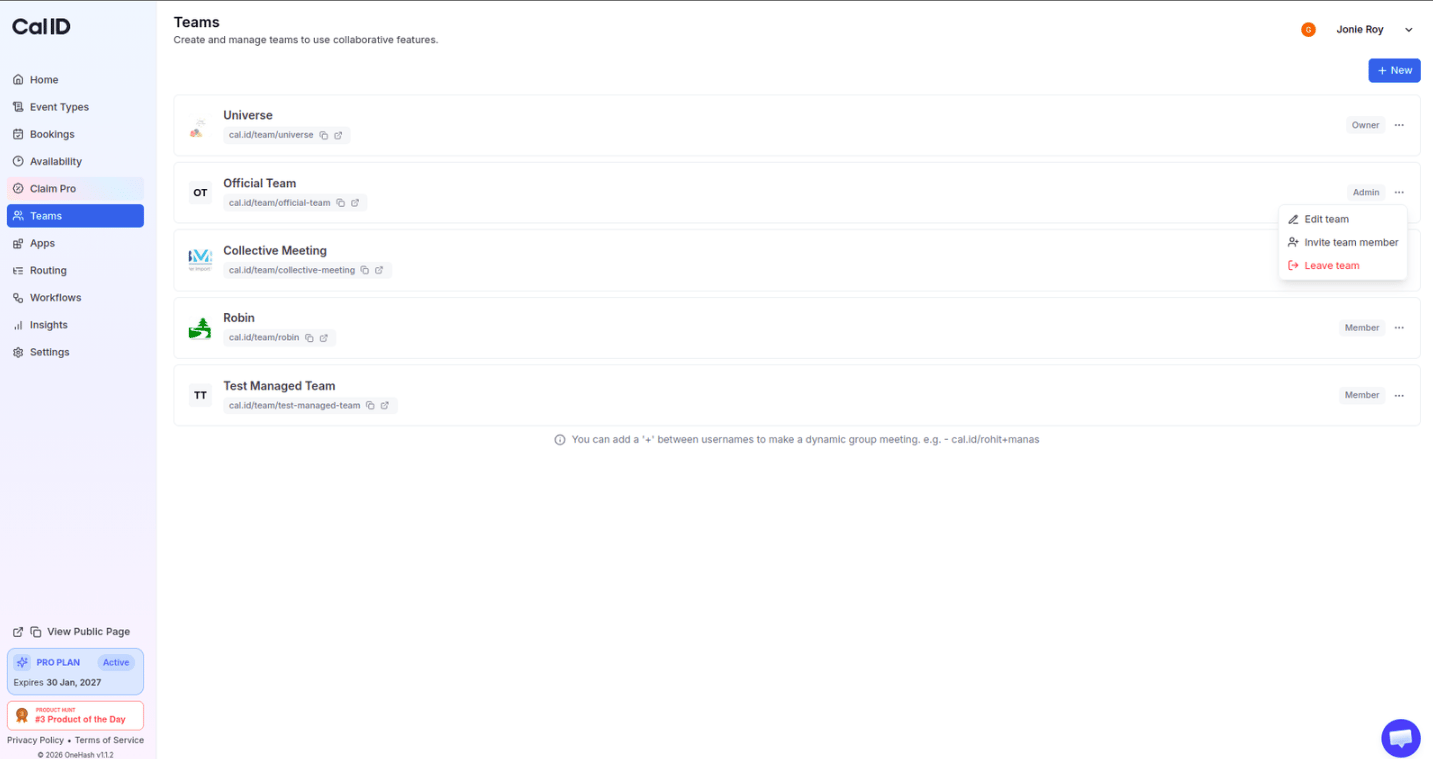
Click on the **Teams** icon in the left-hand sidebar.
Locate the team, click the **three horizontal dots**, and select **Edit team**.
 Click on the **Custom Branding** tab at the top of the page.
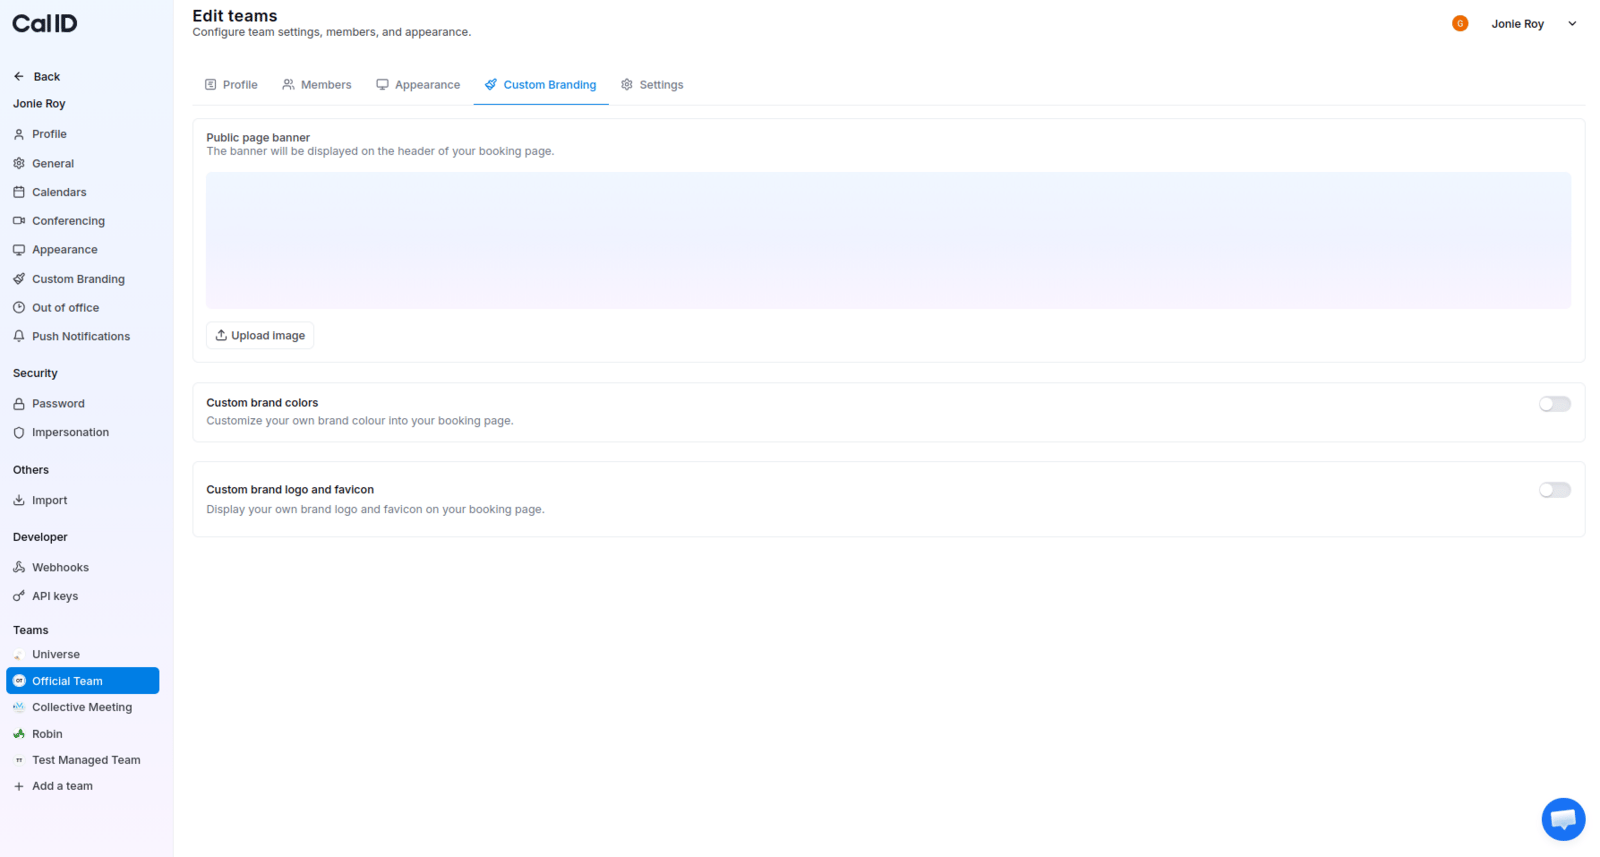 Scroll to **Custom brand colors** and switch the section toggle to **ON**.
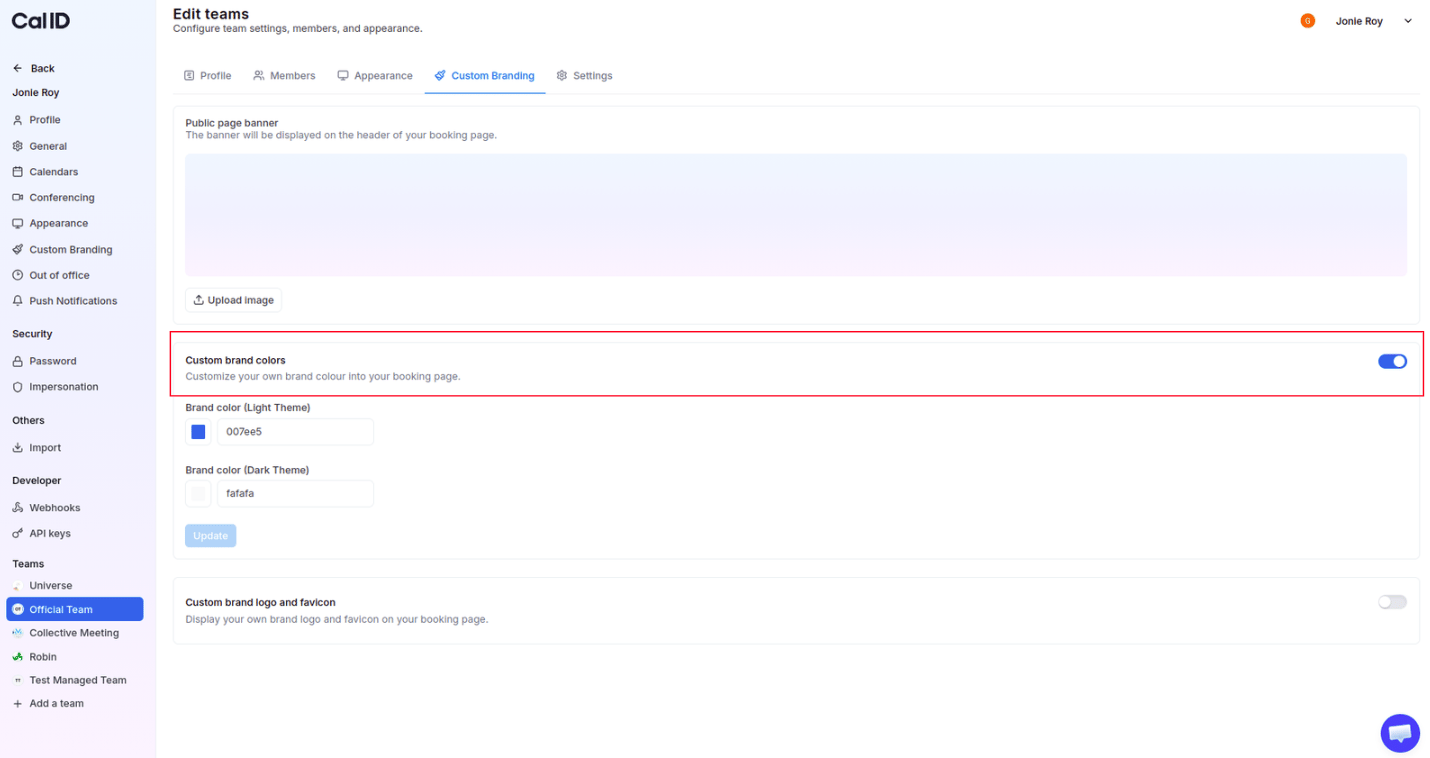 Click on the **Brand color (light theme)** field, then enter your brand's Hex code or use the color picker to select the primary color for light mode.
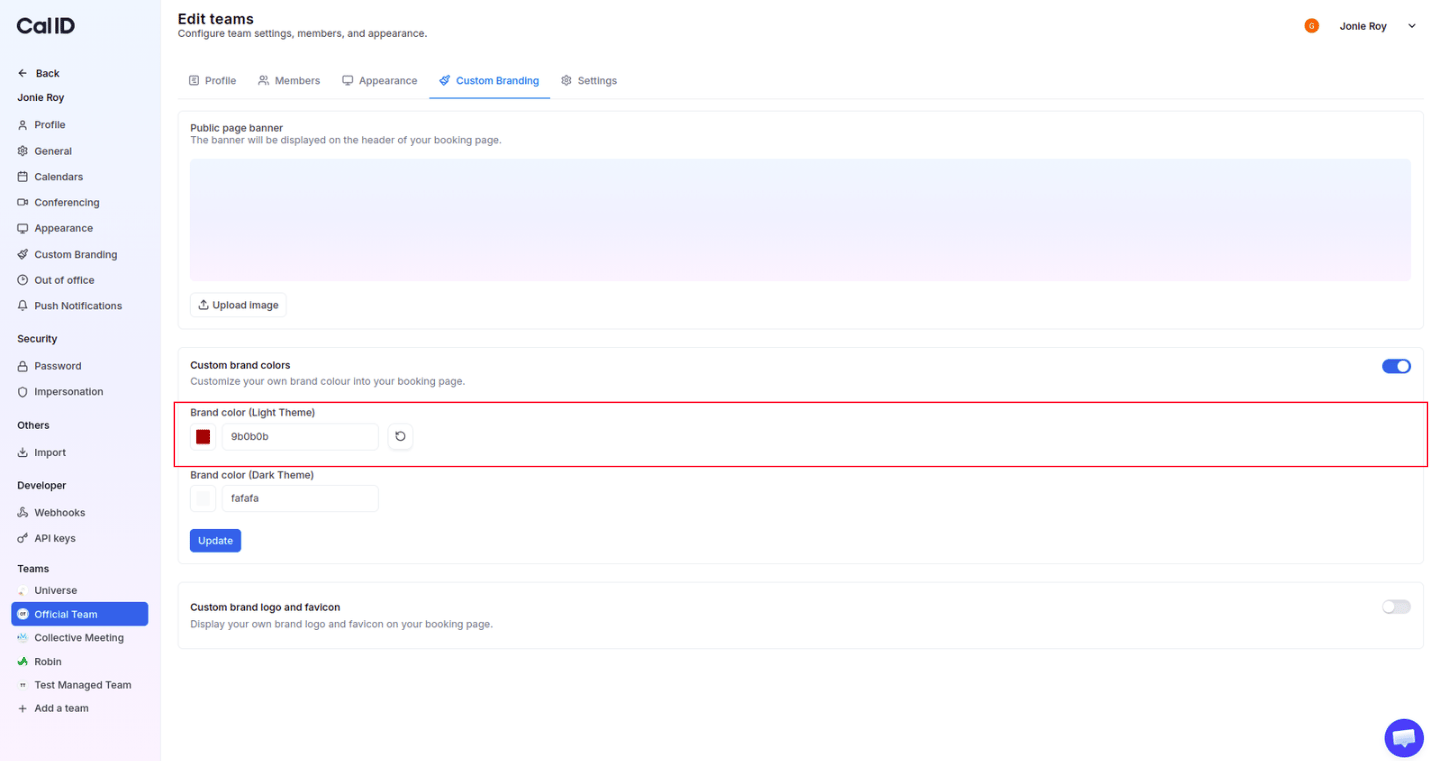 Click on the **Brand color (dark theme)** field, then select the color that will represent your brand when a guest views your page in dark mode.
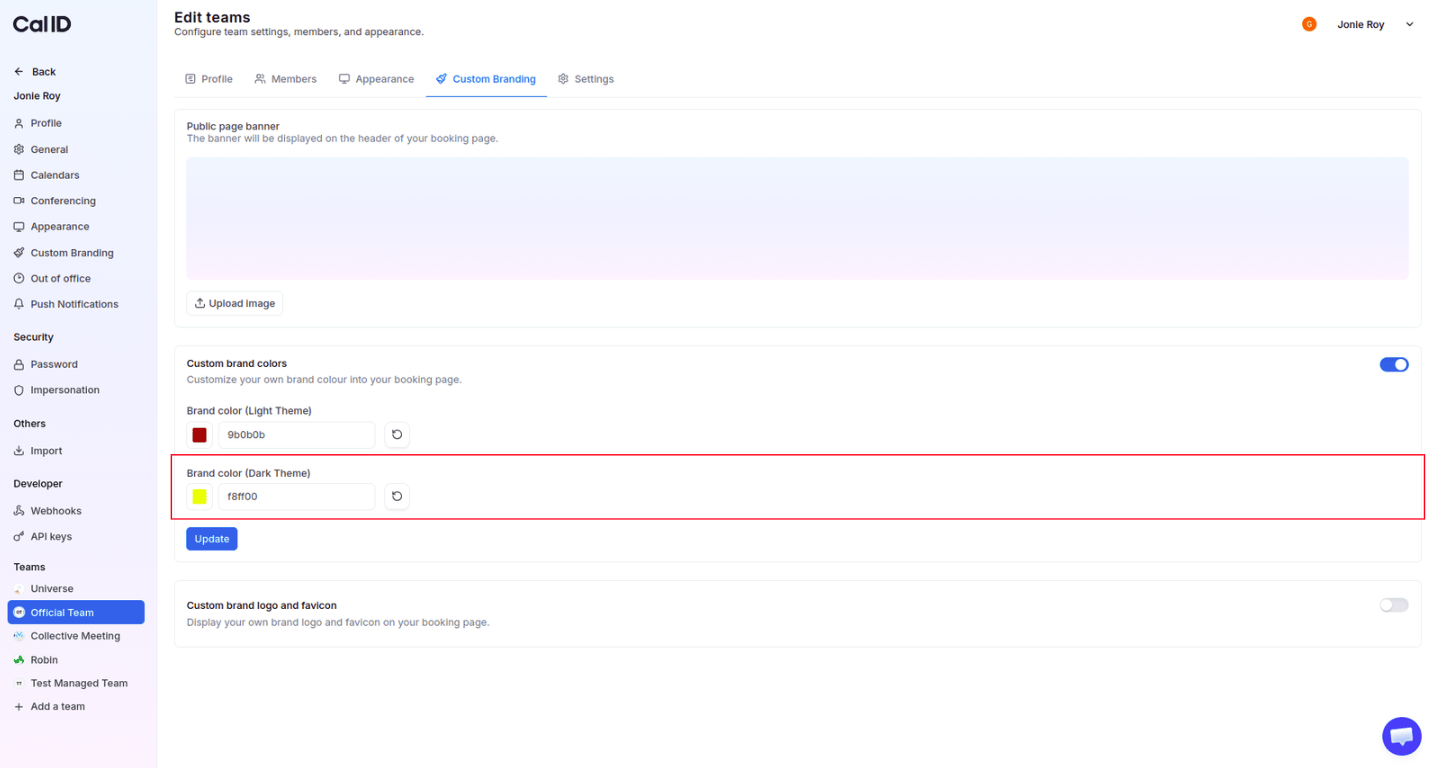 Click the blue **Update** button at the bottom of the section to apply these colors to your public booking page.
Choose colors that remain readable in their respective themes—for example, a darker shade for light mode and a slightly brighter or more vibrant shade for dark mode.
## What this changes on your page
Once saved, your custom colors will override the default Cal ID branding in several key areas:
* **Buttons**: Your primary action buttons (like "Confirm") will use your selected brand color.
* **Highlights**: Selected dates and active time slots in the calendar will be highlighted in your brand color.
* **Navigation elements**: Progress bars and specific icons will adopt your custom color scheme.
Click the blue **Update** button at the bottom of the section to apply these colors to your public booking page.
Choose colors that remain readable in their respective themes—for example, a darker shade for light mode and a slightly brighter or more vibrant shade for dark mode.
## What this changes on your page
Once saved, your custom colors will override the default Cal ID branding in several key areas:
* **Buttons**: Your primary action buttons (like "Confirm") will use your selected brand color.
* **Highlights**: Selected dates and active time slots in the calendar will be highlighted in your brand color.
* **Navigation elements**: Progress bars and specific icons will adopt your custom color scheme.
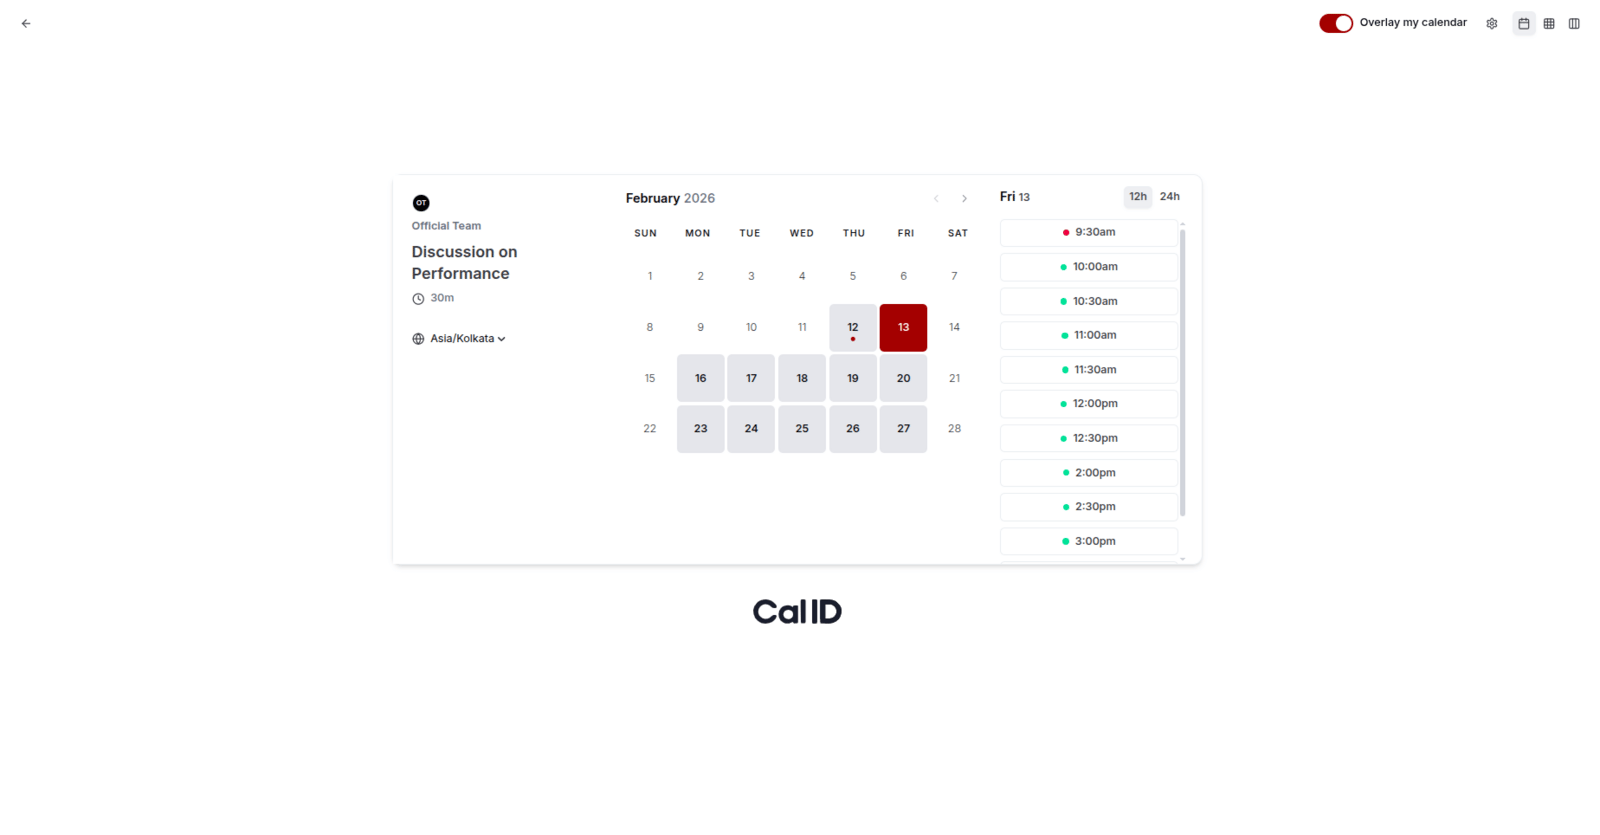
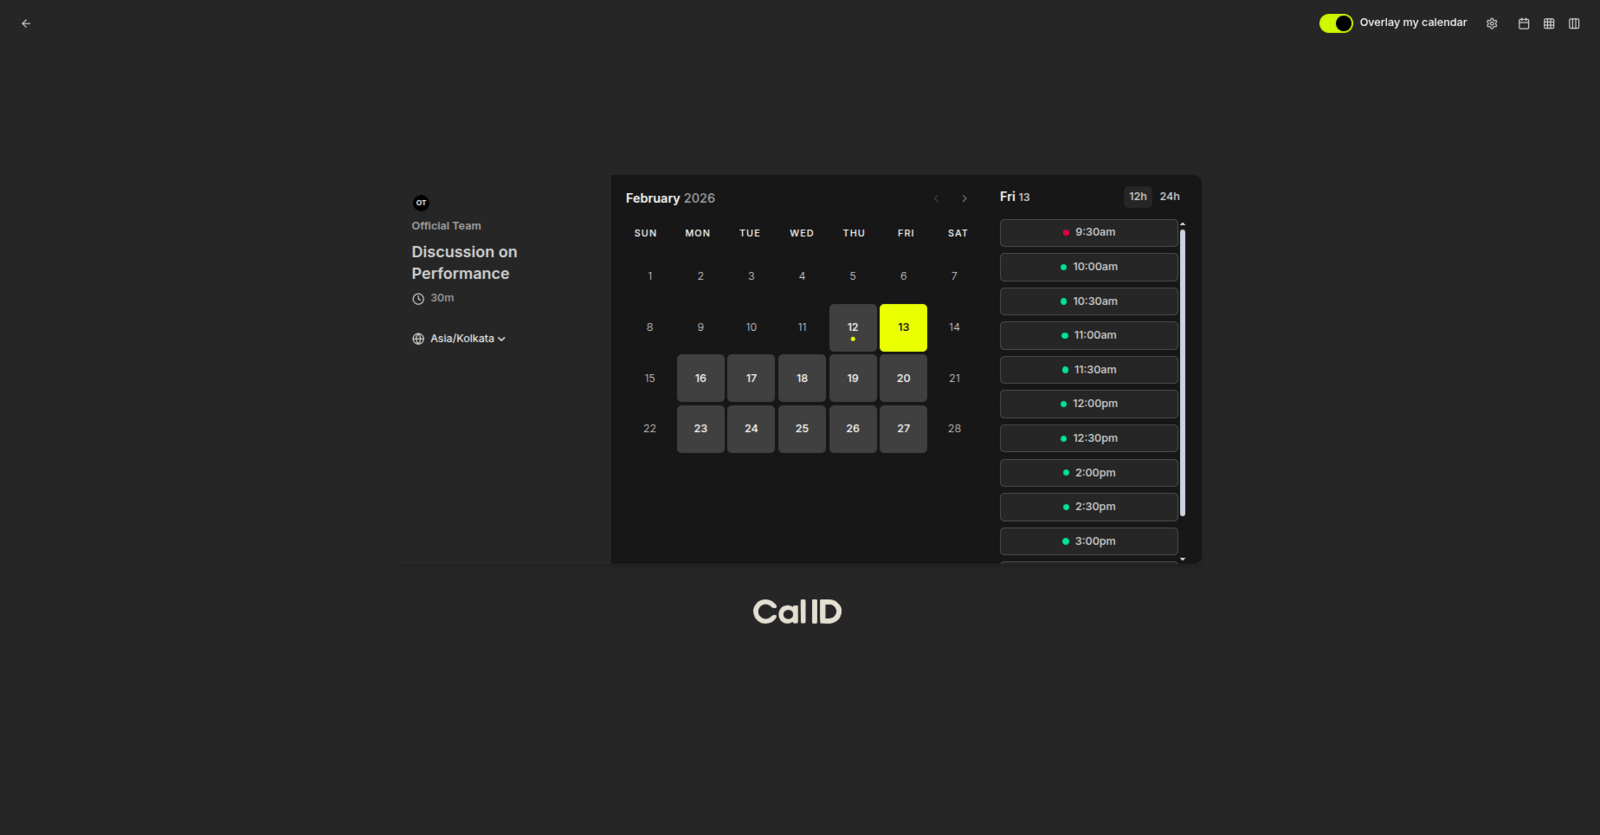 To ensure accessibility, avoid using very pale colors (like white or light yellow) as your primary brand color, as they can be difficult to read on light backgrounds. Aim for a contrast ratio that makes your buttons easy to see for all users.
## Next steps
Apply the same color controls to your own personal booking page.
Add a banner and logo to complete the team page.
## Related topics
- [Managing Custom Brand Colors in Cal ID](/docs/branding/brand-colors.md)
- [Custom Branding For Teams](/docs/branding/teams.md)
- [Customize Your Brand Logo and Favicon in Cal ID for Team](/docs/branding/logo-favicon-team.md)
- [Team Appearance Settings](/docs/appearance/team-appearance.md)
To ensure accessibility, avoid using very pale colors (like white or light yellow) as your primary brand color, as they can be difficult to read on light backgrounds. Aim for a contrast ratio that makes your buttons easy to see for all users.
## Next steps
Apply the same color controls to your own personal booking page.
Add a banner and logo to complete the team page.
## Related topics
- [Managing Custom Brand Colors in Cal ID](/docs/branding/brand-colors.md)
- [Custom Branding For Teams](/docs/branding/teams.md)
- [Customize Your Brand Logo and Favicon in Cal ID for Team](/docs/branding/logo-favicon-team.md)
- [Team Appearance Settings](/docs/appearance/team-appearance.md)