> ## Documentation Index
> Fetch the complete documentation index at: https://cal.id/docs/llms.txt
> Use this file to discover all available pages before exploring further.
# Custom Event Name in Booking
> Use dynamic variables in Cal ID to customize how each booking appears on your calendar and the guest's calendar with names, event types, and questions.
Change how meetings appear on both your calendar and your guest's calendar. With **Custom Event Names**, you can replace the generic default title with dynamic variables that pull in specific details from each booking automatically.
By default, Cal ID often titles events as `\{Event type title\} with \{Scheduler\}`. Customizing this makes your calendar far more scannable.
## Why use custom event names?
* **Instant context:** Identify who you're meeting with and the topic without opening the event details.
* **Better organization:** Useful if you manage multiple locations or a high volume of similar meetings.
* **Professional branding:** Create clear, customized titles.
## Available variables
Use these tags to pull information directly from the booking request. Keep them wrapped in backticks or escaped so Cal ID treats them as tokens.
| Variable | Inserts |
| ------------------------ | --------------------------------------------------- |
| `{Event type title}` | The name you gave the event (e.g., "Weekly Sync") |
| `{Event Duration}` | The event duration |
| `{Organiser}` | Your full name |
| `{Organiser first name}` | Your first name |
| `{Scheduler}` | The full name of the person who booked the meeting |
| `{Scheduler first name}` | The first name of the person who booked the meeting |
## How to set it up
Click on **Event Types** in the left sidebar.
Click on the event you want to customize.
Click on the **Advanced** tab in the top navigation bar.
Navigate to the **Event name** field.
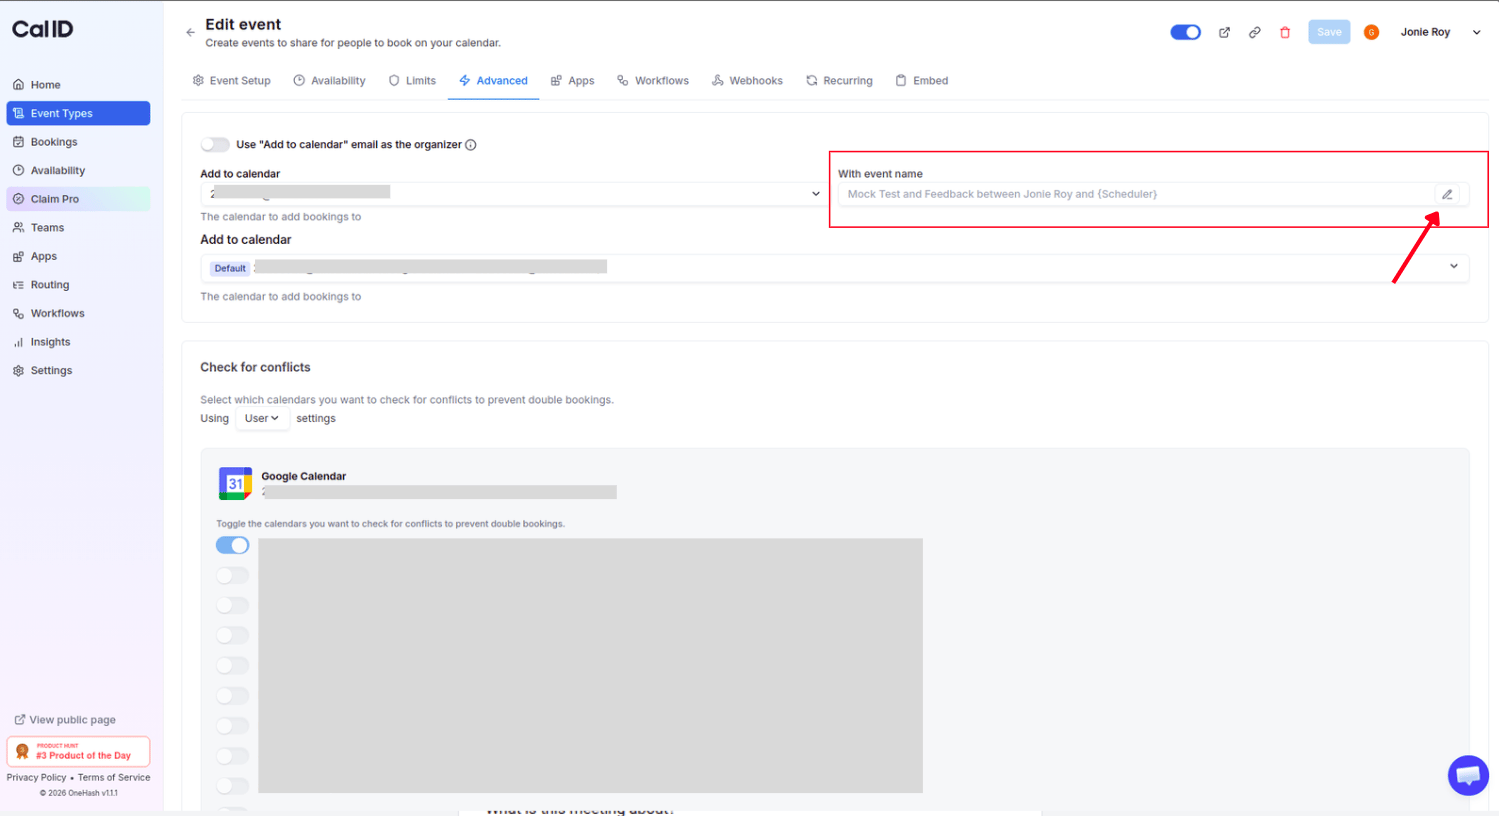 Type your desired format using the variables (e.g., `{Event type title} | {Scheduler}`).
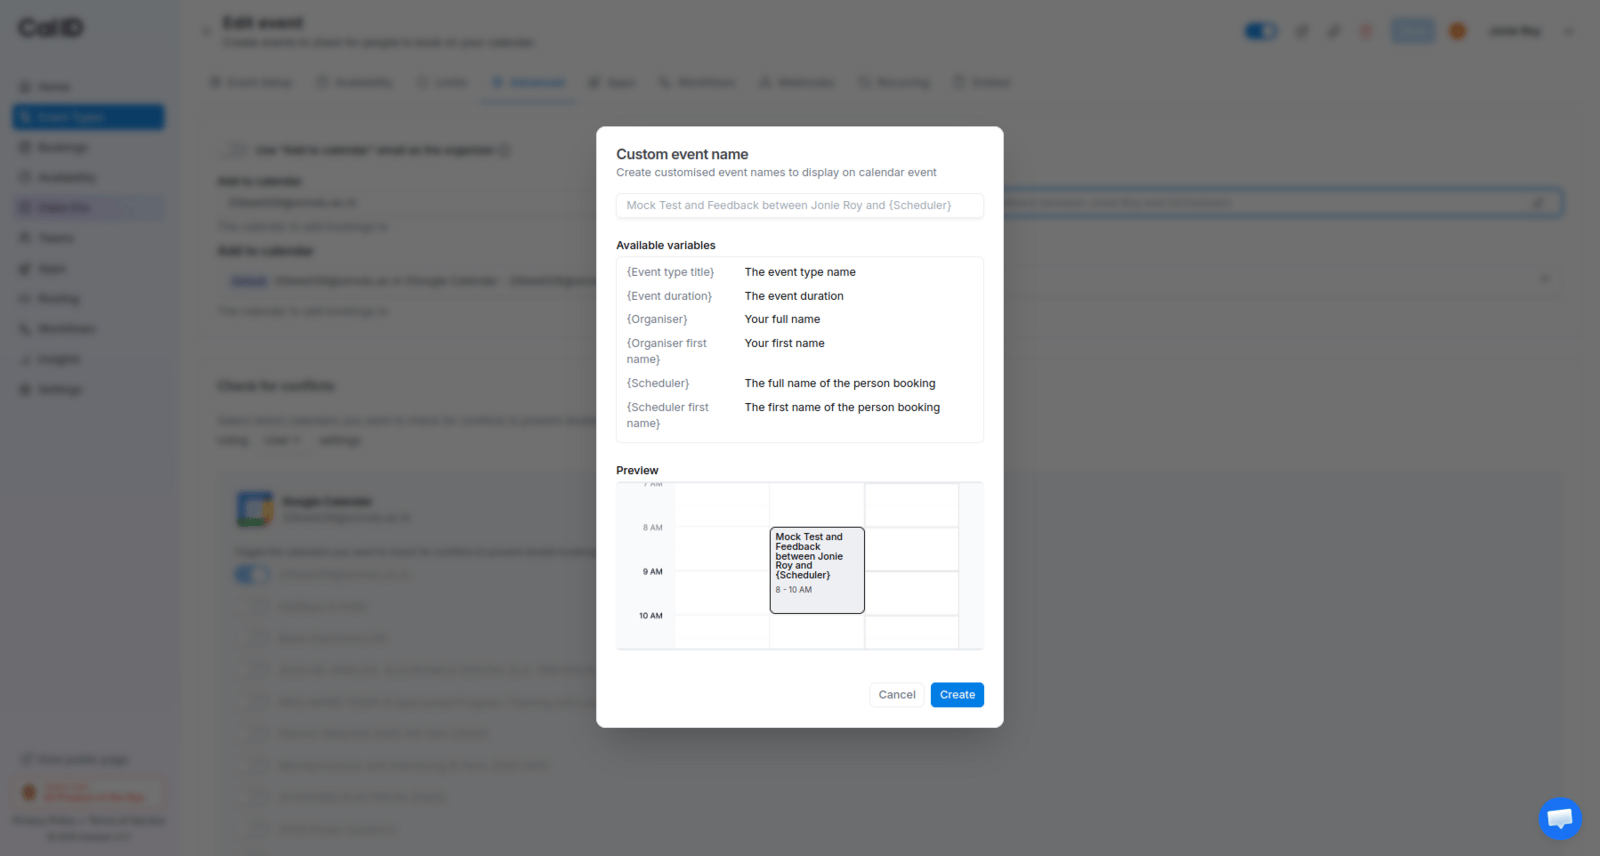 Click the **Save** button at the top right.
**Split names:** If you've enabled "Split full name into first and last name" on your booking page, you can also use more specific variables like `{Scheduler first name}` in your event title.
## Related topics
- [Custom 'Reply-To' Email](/docs/event-types/advanced/custom-reply-to.md)
- [Add Events to Calendar](/docs/event-types/advanced/add-to-calendar.md)
- [Hide Organizer's Email](/docs/event-types/advanced/hide-organizer-email.md)
- [Booking Success Redirect Parameters](/docs/event-types/advanced/success-redirect-params.md)
Click the **Save** button at the top right.
**Split names:** If you've enabled "Split full name into first and last name" on your booking page, you can also use more specific variables like `{Scheduler first name}` in your event title.
## Related topics
- [Custom 'Reply-To' Email](/docs/event-types/advanced/custom-reply-to.md)
- [Add Events to Calendar](/docs/event-types/advanced/add-to-calendar.md)
- [Hide Organizer's Email](/docs/event-types/advanced/hide-organizer-email.md)
- [Booking Success Redirect Parameters](/docs/event-types/advanced/success-redirect-params.md)