> ## Documentation Index
> Fetch the complete documentation index at: https://cal.id/docs/llms.txt
> Use this file to discover all available pages before exploring further.
# Enabling Apps for Specific Event Types
> Choose exactly which installed Cal ID apps are active for each individual event type so you can tailor the booking experience for different meetings.
Turn installed apps on or off per event type so each meeting gets exactly the experience it needs. Install apps once from the Cal ID App Store, then decide which are active for each event—for example, using **Razorpay** only for paid consultations while keeping it disabled for internal team syncs.
## How to enable an app for a particular event
From your main dashboard, click the [**Event Types**](https://cal.id/event-types) tab in the left-hand sidebar.
Find the event type you want to customize and click the **Edit** icon (pencil).
In the top navigation menu of the event editor, click on the **Apps** tab.
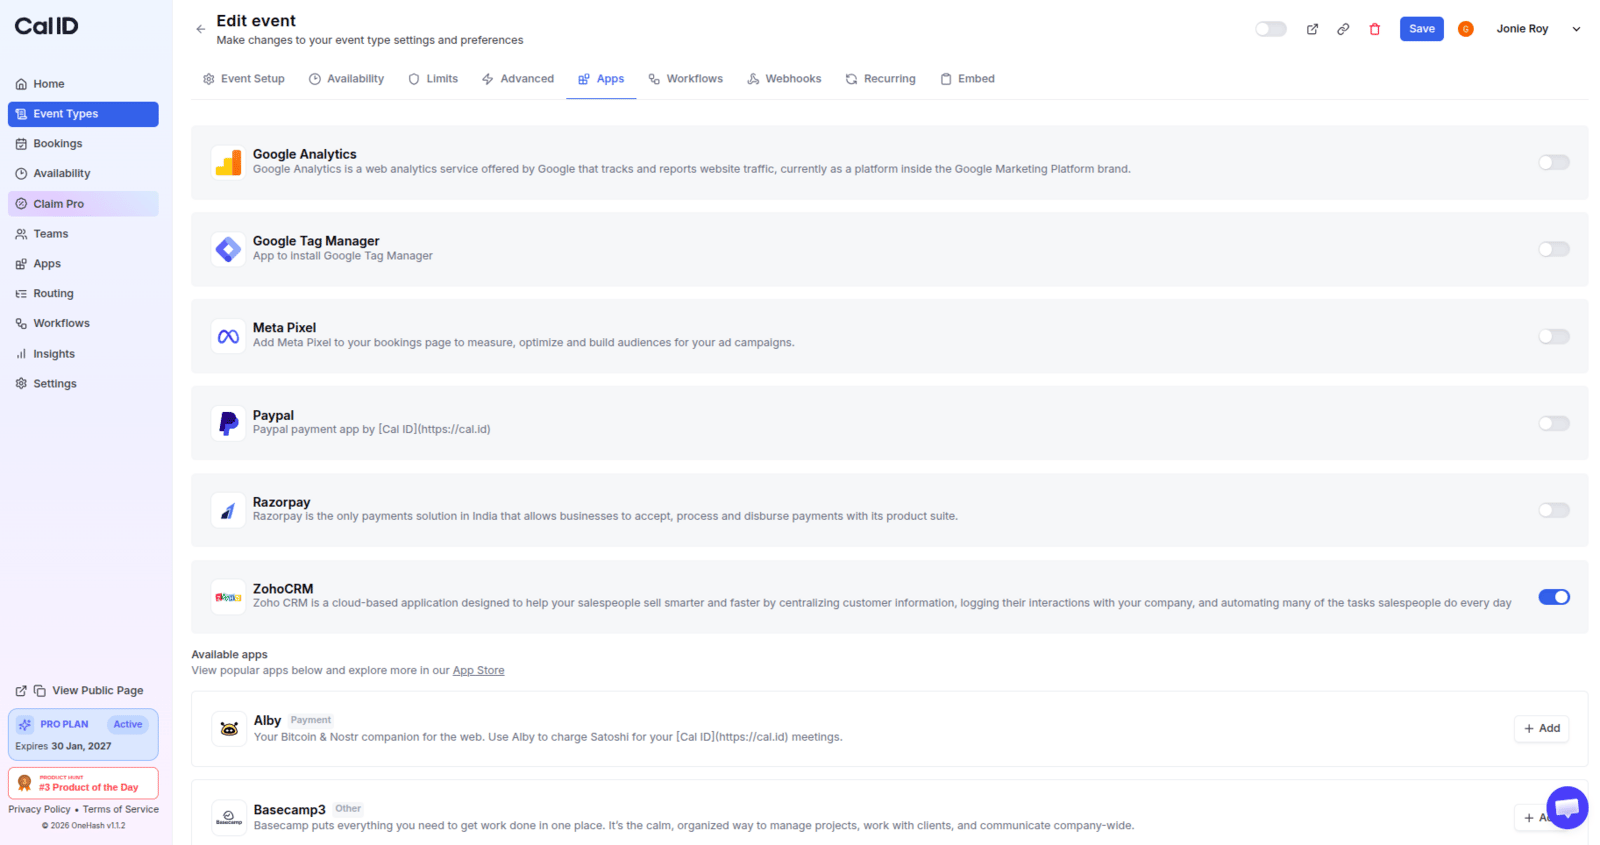 Scroll through the list of installed apps to find the one you want to enable (e.g., Google Analytics, Zoom, Stripe, etc.).
Switch the toggle next to the app name to the **ON** position.
* Some apps require specific information to work for that event (e.g., a specific **Tracking ID** for analytics or a **Price** for a payment app).
* Enter these values in the input fields provided under the app name.
Click the **Save** button in the top right corner to apply these settings.
Only apps you've already installed appear in this list. If you don't see the app you want, install it first from the [App Store](/docs/apps/app-store).
## Key benefits of event-specific apps
* **Tailored automation**: Connect different automation tools (like **Make**, **Viasocket**, or **Zapier**) to specific events to streamline unique workflows, such as updating different CRM pipelines based on the meeting type.
* **Selective payments**: Only trigger payment requests for specific "Premium" service types.
* **Targeted tracking**: Use unique tracking codes to see which specific services are converting the most leads.
## Next steps
Discover integrations you can install and enable for your events.
Add a new app to your account before enabling it per event type.
## Related topics
- [App Store](/docs/apps/app-store.md)
- [Install New App on Cal ID](/docs/apps/install-app.md)
- [Embed Meeting Scheduling Link](/docs/event-types/embed.md)
- [Setting Up Event-Specific Webhooks](/docs/event-types/event-webhooks.md)
Scroll through the list of installed apps to find the one you want to enable (e.g., Google Analytics, Zoom, Stripe, etc.).
Switch the toggle next to the app name to the **ON** position.
* Some apps require specific information to work for that event (e.g., a specific **Tracking ID** for analytics or a **Price** for a payment app).
* Enter these values in the input fields provided under the app name.
Click the **Save** button in the top right corner to apply these settings.
Only apps you've already installed appear in this list. If you don't see the app you want, install it first from the [App Store](/docs/apps/app-store).
## Key benefits of event-specific apps
* **Tailored automation**: Connect different automation tools (like **Make**, **Viasocket**, or **Zapier**) to specific events to streamline unique workflows, such as updating different CRM pipelines based on the meeting type.
* **Selective payments**: Only trigger payment requests for specific "Premium" service types.
* **Targeted tracking**: Use unique tracking codes to see which specific services are converting the most leads.
## Next steps
Discover integrations you can install and enable for your events.
Add a new app to your account before enabling it per event type.
## Related topics
- [App Store](/docs/apps/app-store.md)
- [Install New App on Cal ID](/docs/apps/install-app.md)
- [Embed Meeting Scheduling Link](/docs/event-types/embed.md)
- [Setting Up Event-Specific Webhooks](/docs/event-types/event-webhooks.md)