> ## Documentation Index
> Fetch the complete documentation index at: https://cal.id/docs/llms.txt
> Use this file to discover all available pages before exploring further.
# How to Seamlessly Import Your Data from Calendly to Cal ID
> Migrate your event types, availability, and existing bookings from Calendly into Cal ID using the built-in Import tool for a smooth switch between platforms.
The **Import** tool lets you bring your existing Calendly setup into Cal ID in one move — your **Event Types, Availability, and all Bookings** transfer directly into your account, so you can switch platforms without rebuilding anything.
Before you start, make sure you have your Calendly login handy — you'll authorize the connection partway through, and the import pulls data straight from your live Calendly account.
## Step-by-step migration
Access your account dashboard.
Open the **Settings** page.
Click the **Import** option in the left-hand sidebar, under the **Others** section.
Locate the **Import from calendly** section. Check the box for **Notify past bookers about your migration** if you want to automatically inform your previous clients about your move to Cal ID.
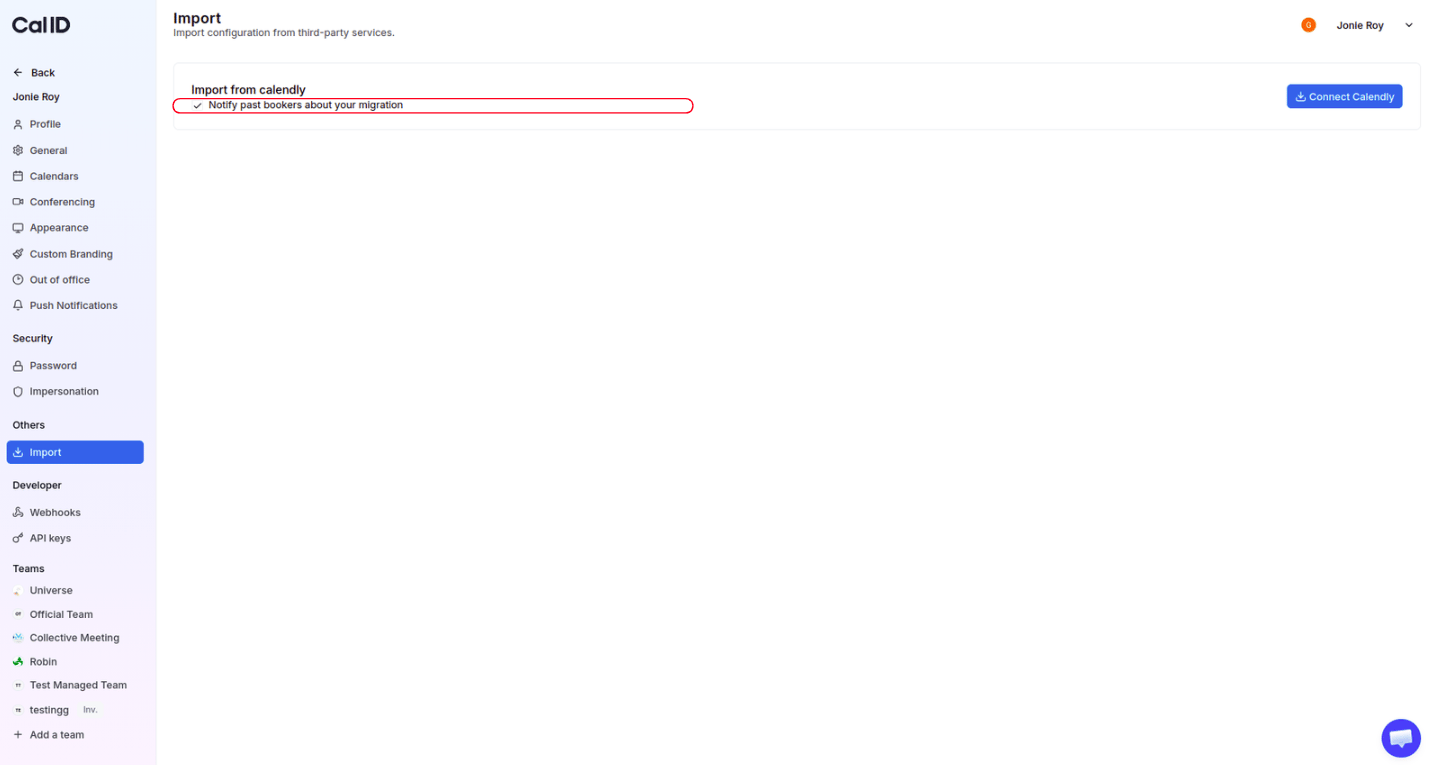 Deciding whether to notify past bookers is a one-time choice made at import. Set this option the way you want it **before** you connect and import your data.
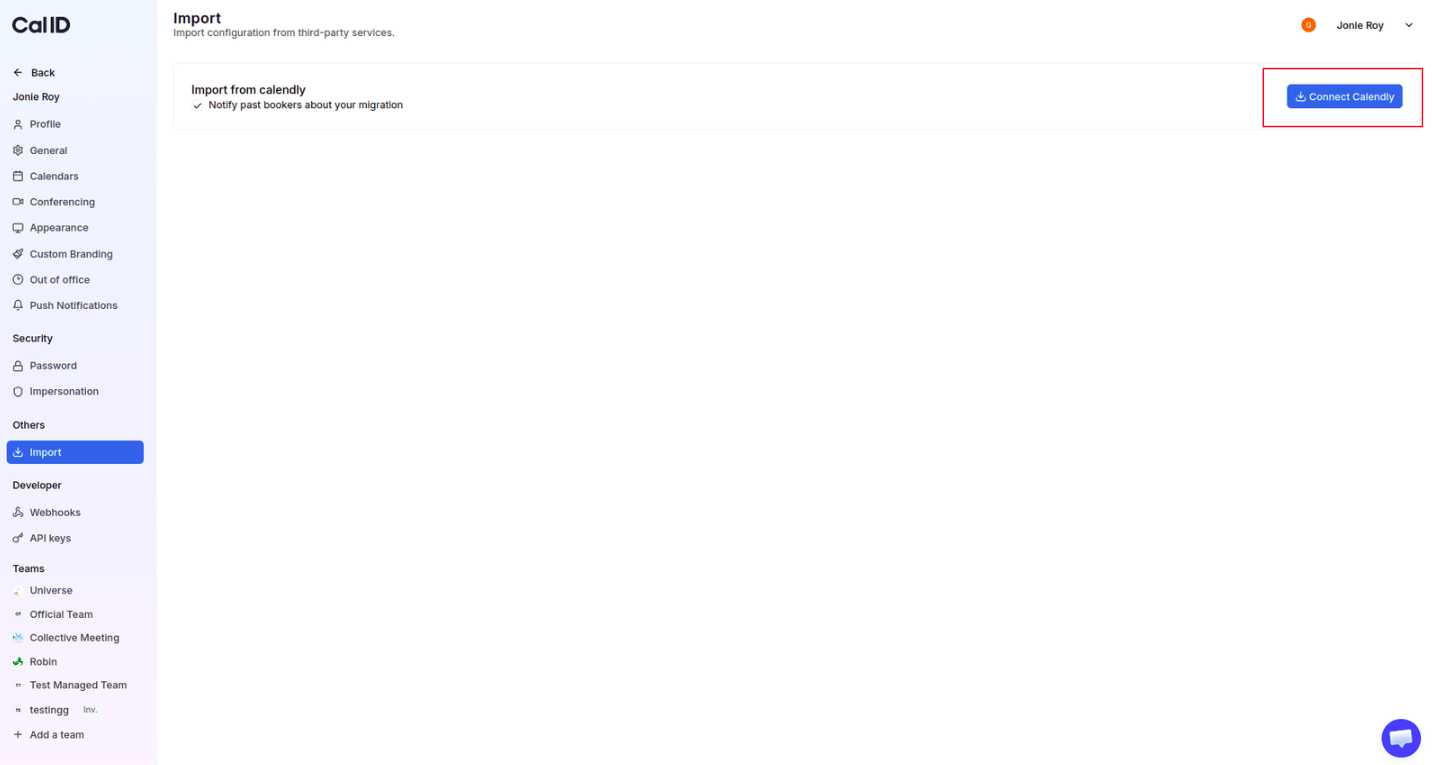
Click the blue **Connect Calendly** button in the top-right corner to connect your account and bring your data over to Cal ID.
Deciding whether to notify past bookers is a one-time choice made at import. Set this option the way you want it **before** you connect and import your data.
Click the blue **Connect Calendly** button in the top-right corner to connect your account and bring your data over to Cal ID.
 Your Calendly data is now in Cal ID. Your event types, availability, and bookings have all made the move.
## Next steps
Send your Cal ID booking URL to clients and start taking meetings.
Fine-tune the hours and rules people can book against.
## Related topics
- [Complete your Cal ID Onboarding](/docs/getting-started/onboarding.md)
- [How to Find and Share Your Cal ID URL](/docs/getting-started/share-your-url.md)
- [Event Types](/docs/event-types/basics/overview.md)
- [How to Schedule a Meeting through Cal ID](/docs/getting-started/schedule-a-meeting.md)
- [Cal ID FAQs](/docs/getting-started/faq.md)
Your Calendly data is now in Cal ID. Your event types, availability, and bookings have all made the move.
## Next steps
Send your Cal ID booking URL to clients and start taking meetings.
Fine-tune the hours and rules people can book against.
## Related topics
- [Complete your Cal ID Onboarding](/docs/getting-started/onboarding.md)
- [How to Find and Share Your Cal ID URL](/docs/getting-started/share-your-url.md)
- [Event Types](/docs/event-types/basics/overview.md)
- [How to Schedule a Meeting through Cal ID](/docs/getting-started/schedule-a-meeting.md)
- [Cal ID FAQs](/docs/getting-started/faq.md)