> ## Documentation Index
> Fetch the complete documentation index at: https://cal.id/docs/llms.txt
> Use this file to discover all available pages before exploring further.
# Integrate WhatsApp Business
> Connect your own WhatsApp Business phone number to Cal ID so workflow reminders and confirmations are sent to guests from your official business account.
Connecting WhatsApp Business to Cal ID lets your workflow reminders and confirmations reach guests from your own official business number instead of the default Cal ID number. This page is the hub for the full integration; the steps below walk you through installing the app, choosing your number, and attaching it to a workflow.
## Integrate WhatsApp Business with Cal ID
* Log in to Cal ID.
* Go to the **Apps** section.
* Search for **WhatsApp Business** and install it.
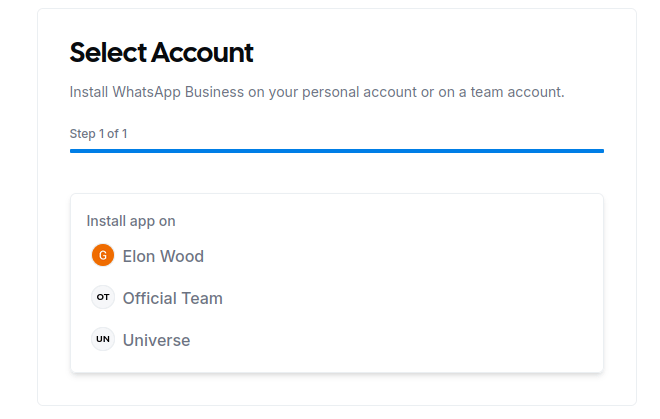
Choose the account type to install on:
* **Personal account** — for individual use.
* **Team account** — for team collaboration.
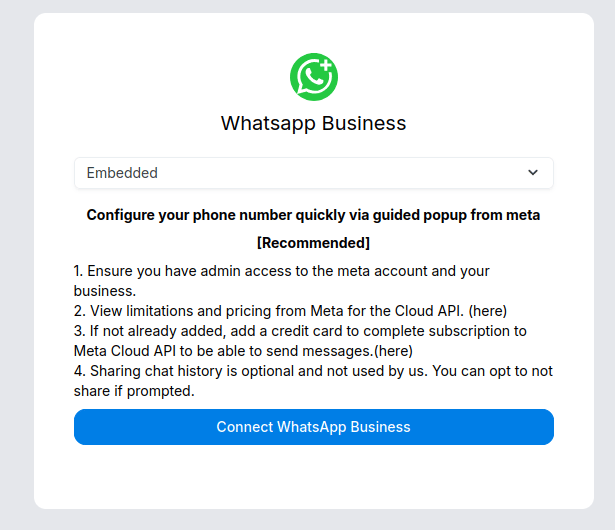
 A page appears asking you to connect WhatsApp Business. Click it to proceed.
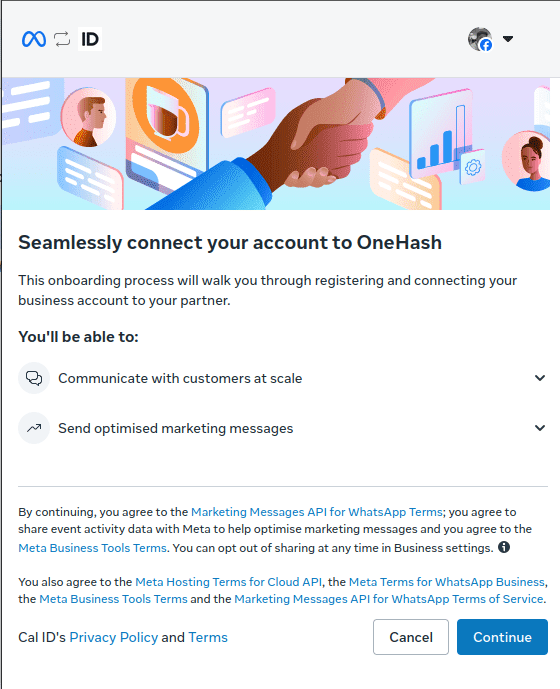
 On the confirmation screen, click **Continue** to move to the next step.
 Pick the path that matches your situation:
* **Already have a WhatsApp Business account?** Continue with the next step below.
* **Need to create a new account?** See [Create a new WhatsApp Business account](/docs/workflows/create-whatsapp-account).
* **Connecting an existing WhatsApp Business app?** See [Connect with WhatsApp Business app](/docs/workflows/connect-whatsapp-app).
Select the **business portfolio** associated with your WhatsApp Business account, then pick the **WhatsApp Business account** (the number) you want to use.
Your address and Tax ID must be verified on Meta to trigger the templates.
Pick the path that matches your situation:
* **Already have a WhatsApp Business account?** Continue with the next step below.
* **Need to create a new account?** See [Create a new WhatsApp Business account](/docs/workflows/create-whatsapp-account).
* **Connecting an existing WhatsApp Business app?** See [Connect with WhatsApp Business app](/docs/workflows/connect-whatsapp-app).
Select the **business portfolio** associated with your WhatsApp Business account, then pick the **WhatsApp Business account** (the number) you want to use.
Your address and Tax ID must be verified on Meta to trigger the templates.
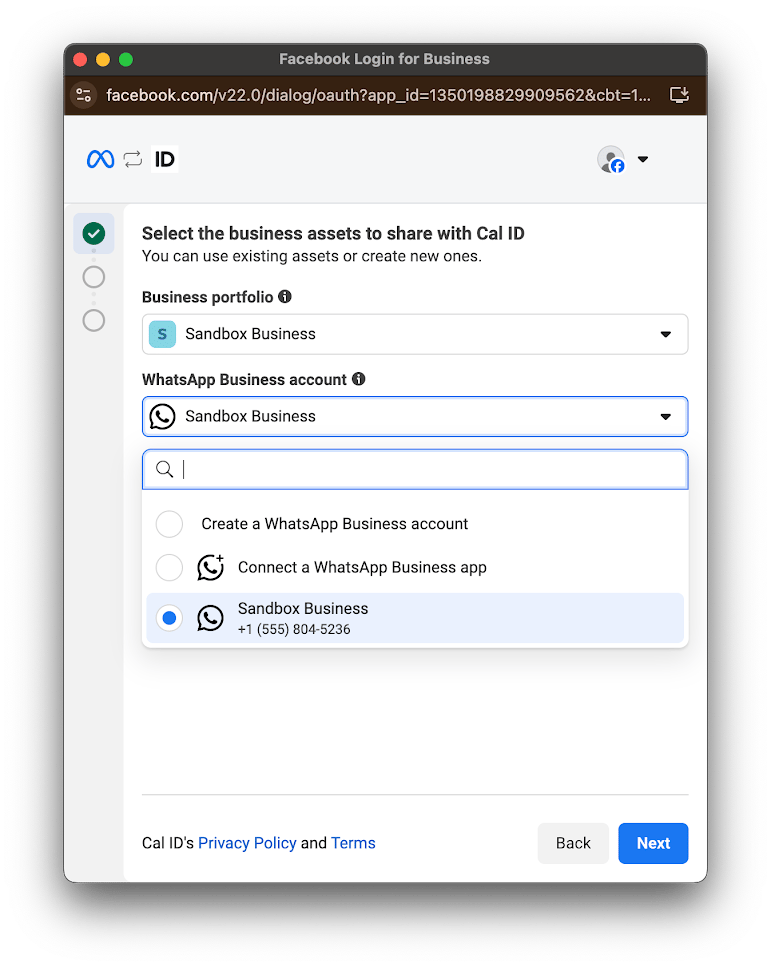 Choose the phone number from the list you want to use with WhatsApp Business, then click **Next** to proceed to the confirmation step. This number becomes the main contact point for your WhatsApp Business integration.
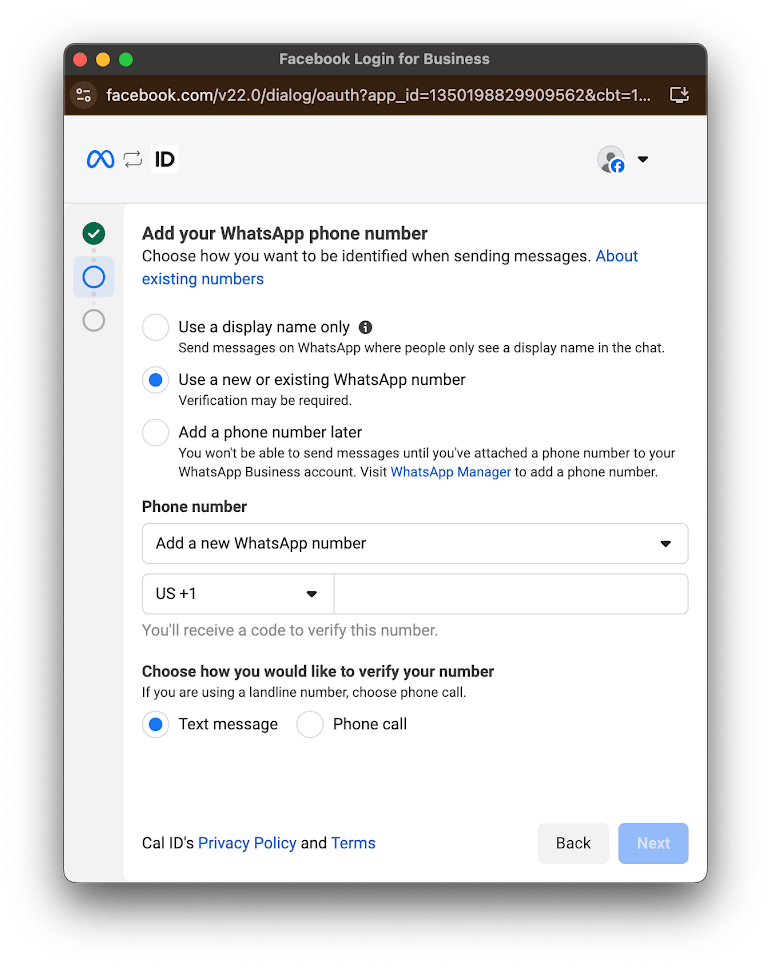 Review the information and click **Confirm** to verify your settings. This ensures everything is set up correctly before finalizing the connection.
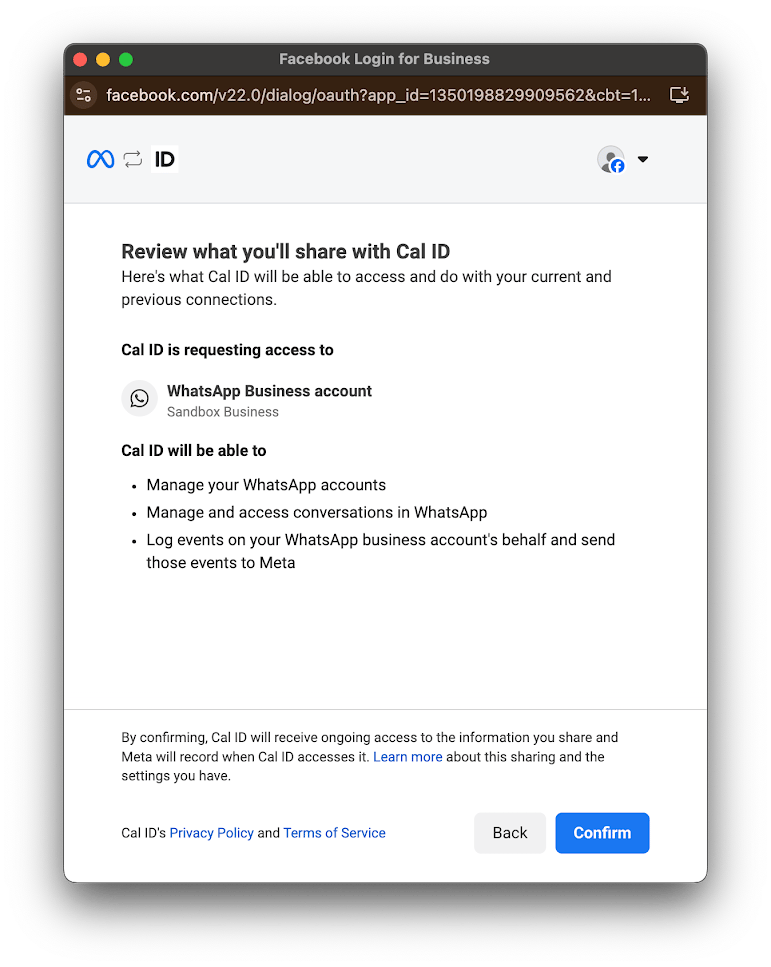 After you click Confirm, your WhatsApp Business app is installed and connected to your Cal ID account.
Next, go to Cal ID and choose the event type where you want the workflow. Select your WhatsApp Business phone number, choose the template from the **Message Template** dropdown, and save the workflow.
After you click Confirm, your WhatsApp Business app is installed and connected to your Cal ID account.
Next, go to Cal ID and choose the event type where you want the workflow. Select your WhatsApp Business phone number, choose the template from the **Message Template** dropdown, and save the workflow.
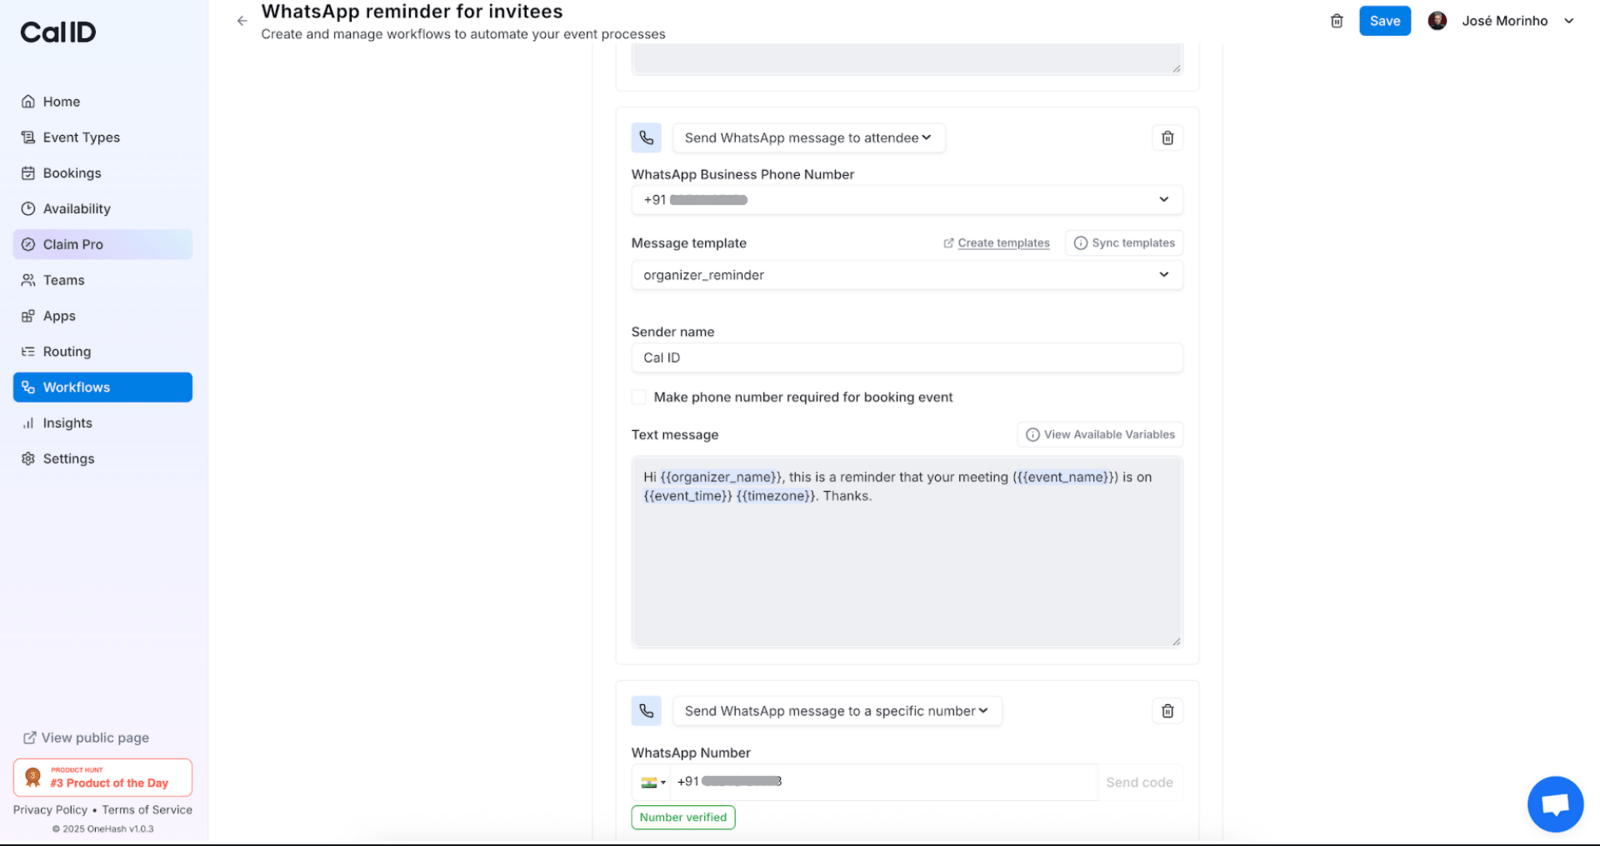 If you don't have a template yet, click **Create Template** and create one.
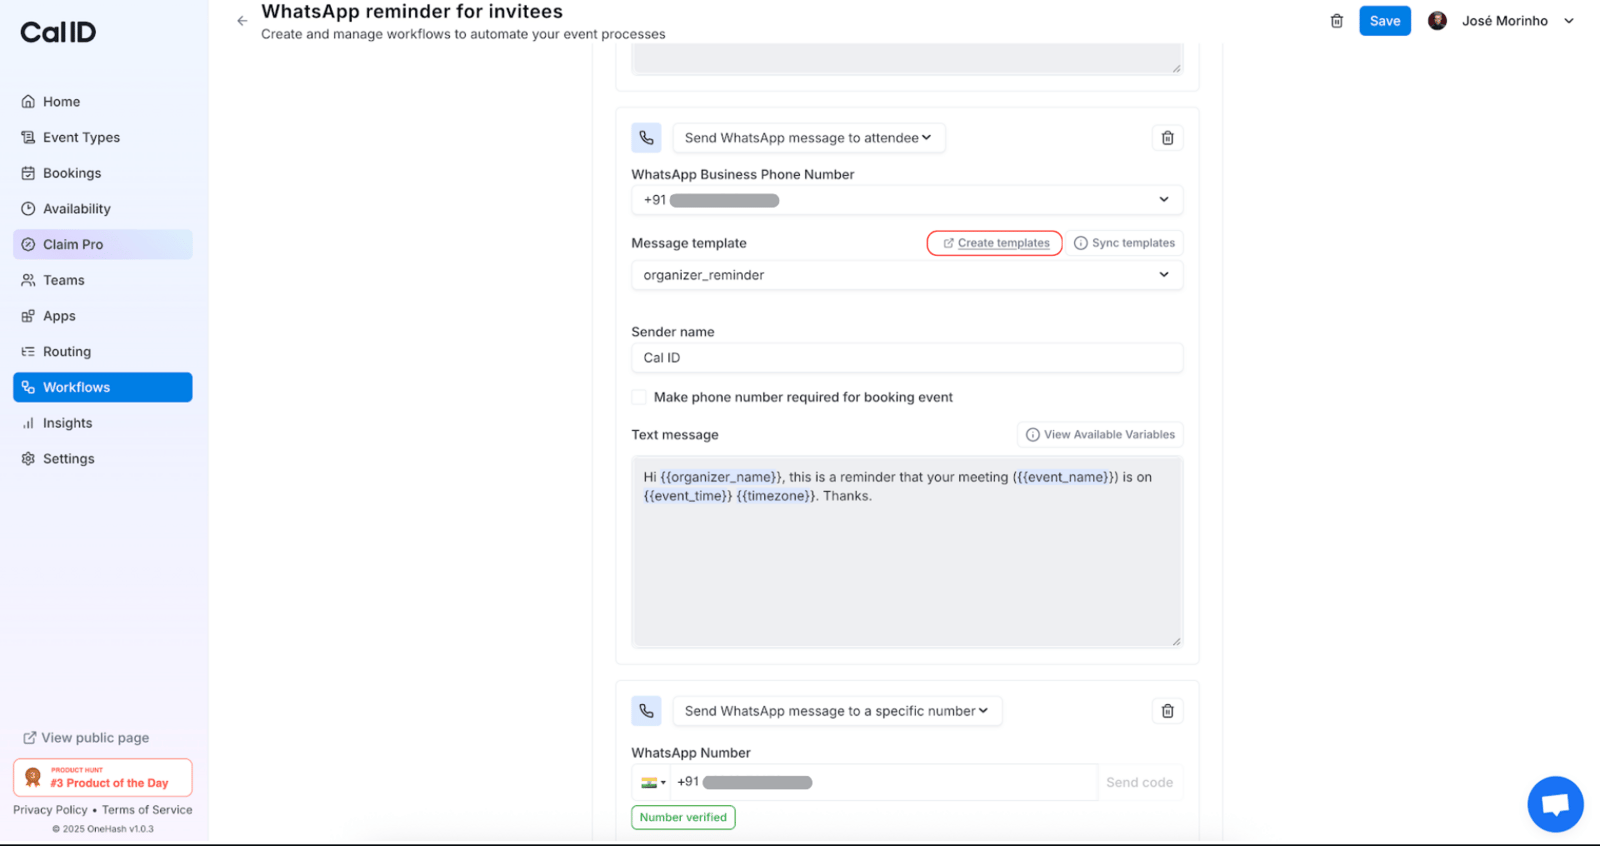 WhatsApp Business is connected and attached to your workflow. Reminders will now be sent from your own business number.
## Next steps
Link a WhatsApp Business app already installed on your phone.
Set up a new business portfolio and WhatsApp Business account in Meta.
## Related topics
- [Connect with WhatsApp Business App](/docs/workflows/connect-whatsapp-app.md)
- [Create New WhatsApp Business Account](/docs/workflows/create-whatsapp-account.md)
- [Workflows Setup to Cal ID](/docs/workflows/overview.md)
- [Customizing Your Workflow Messages](/docs/workflows/custom-messages.md)
- [Monitoring Notification Delivery with Workflow Status](/docs/bookings/workflow-status.md)
WhatsApp Business is connected and attached to your workflow. Reminders will now be sent from your own business number.
## Next steps
Link a WhatsApp Business app already installed on your phone.
Set up a new business portfolio and WhatsApp Business account in Meta.
## Related topics
- [Connect with WhatsApp Business App](/docs/workflows/connect-whatsapp-app.md)
- [Create New WhatsApp Business Account](/docs/workflows/create-whatsapp-account.md)
- [Workflows Setup to Cal ID](/docs/workflows/overview.md)
- [Customizing Your Workflow Messages](/docs/workflows/custom-messages.md)
- [Monitoring Notification Delivery with Workflow Status](/docs/bookings/workflow-status.md)