

Requirements
To check your license, go to Settings → Subscription, scroll to the Add-ons section, and find AI Notetaker to confirm it’s active and how many licenses are assigned.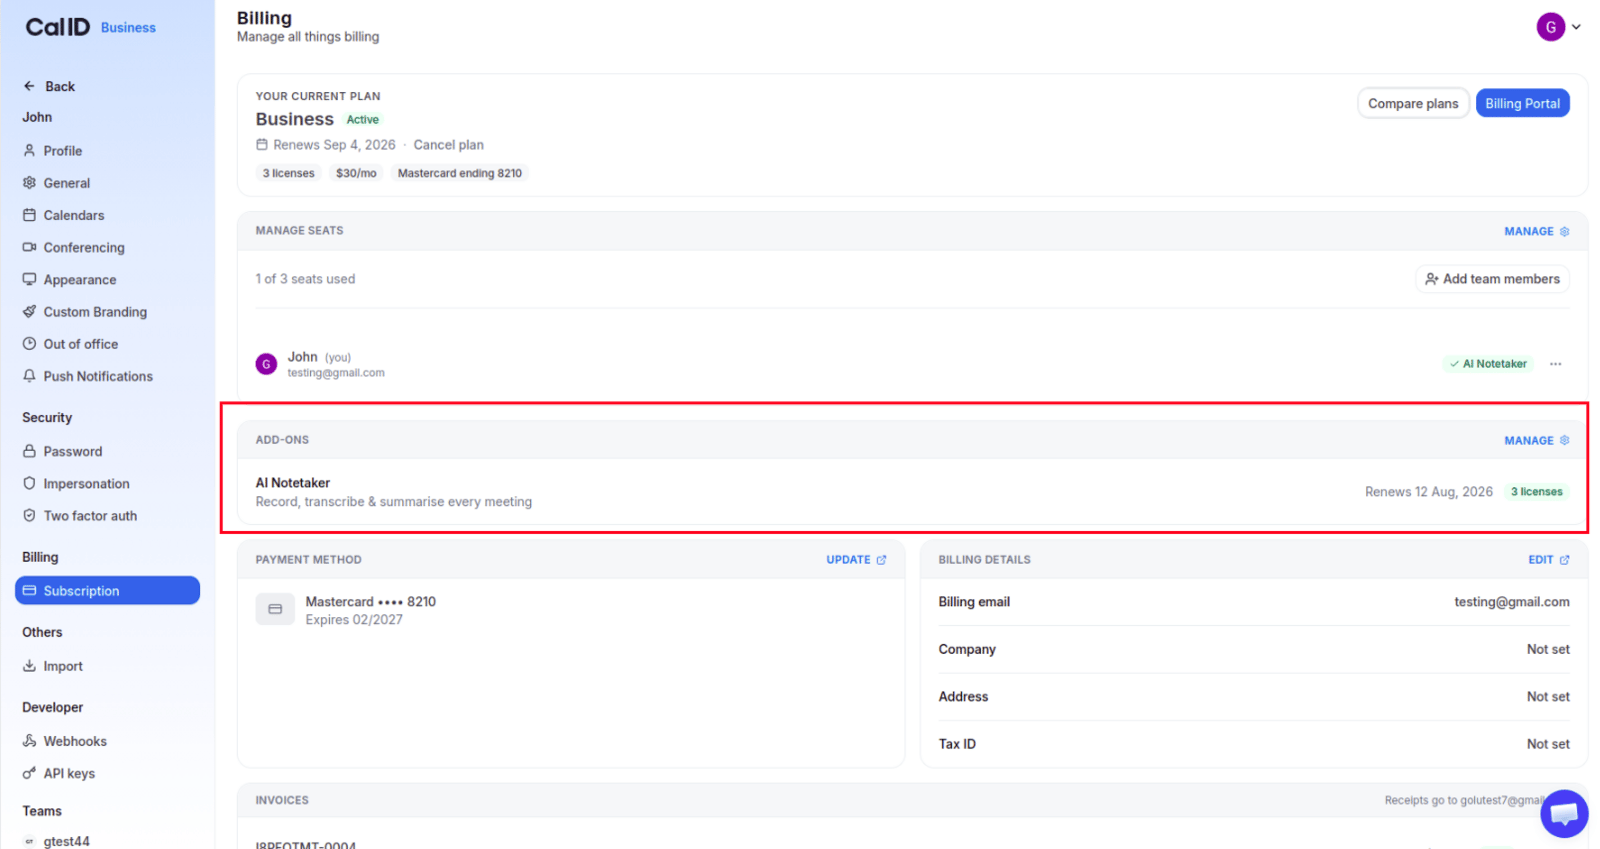
Confirming your AI Notetaker licence
How it works
1
The notetaker joins
For a supported meeting, AI Notetaker joins and waits in the lobby until the host admits it.
2
It records
Once admitted, it records the meeting and captures the conversation.
3
It processes
After the meeting ends, Cal ID processes the recording, generates a speaker-labeled transcript, and creates the AI summary.
4
You review
The finished meeting — recording, transcript, summary, key points, decisions, action items, and chapters — appears on the AI Notetaker page.
Open AI Notetaker
Sign in to Cal ID and click AI Notetaker in the left navigation menu. The dashboard has three tabs.
Finding recordings, the bot, and settings
Meetings tab
The Meetings tab stores every meeting AI Notetaker records. Each card shows the title, date, time, platform, and current status. Use the search bar to find a meeting by title or keyword, then click it to open the summary, transcript, and recording.
Browsing your past recordings
Meeting statuses
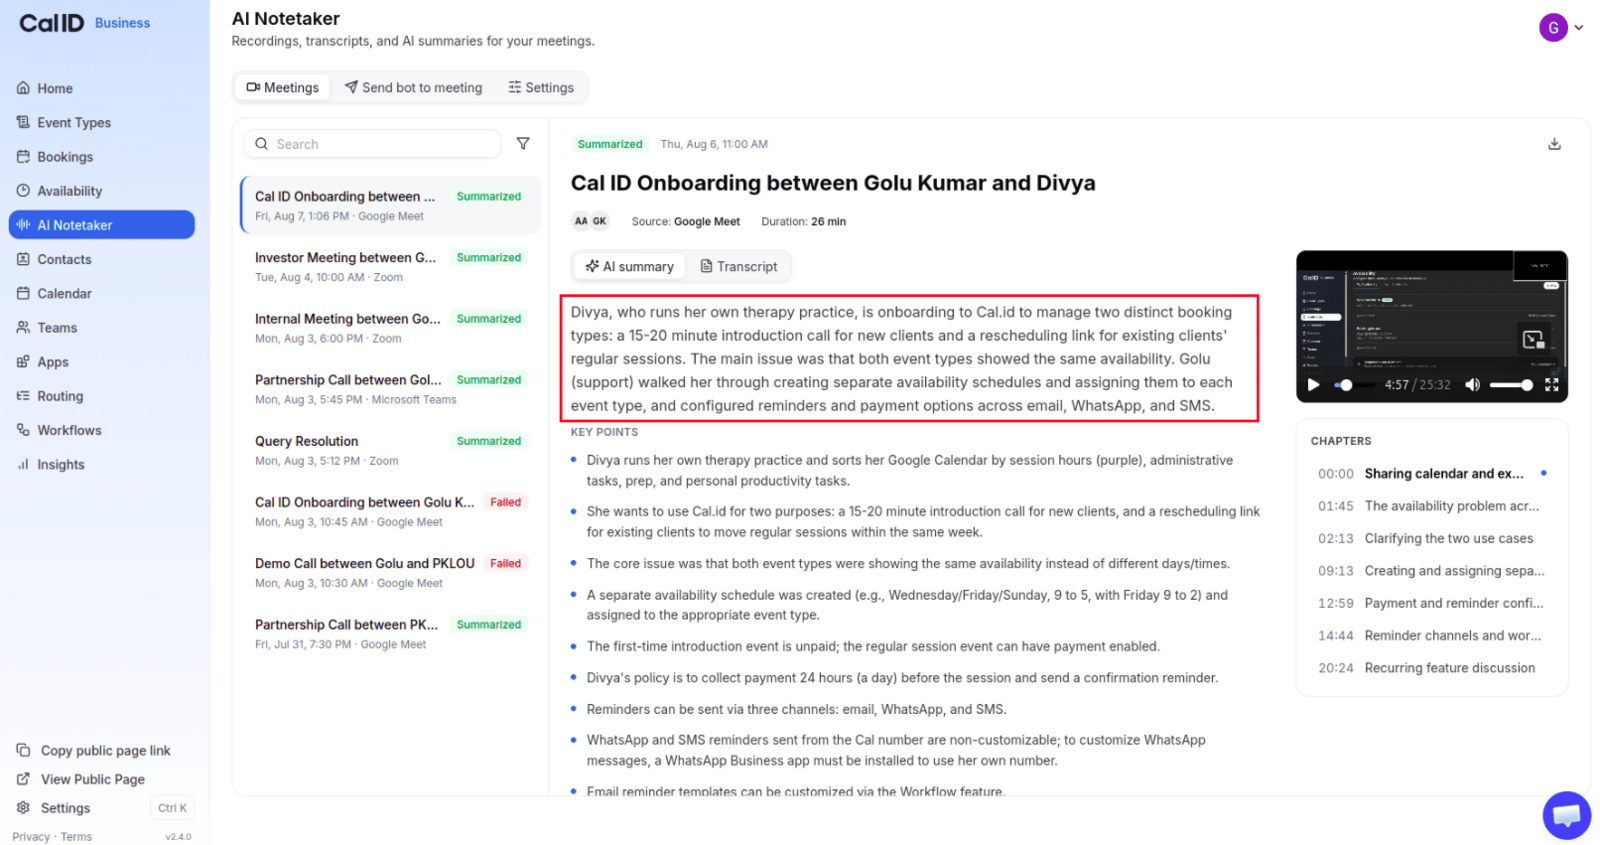
Reading what a call covered
Send the notetaker to a meeting
Send Bot to Meeting invites AI Notetaker to a meeting you didn’t book through Cal ID — useful for meetings scheduled elsewhere or created by someone else.1
Open the tab
Open AI Notetaker and click the Send Bot to Meeting tab.
2
Paste the link
Paste the meeting link (Google Meet, Zoom, or Microsoft Teams) into the field.
3
Send
Click Send Notetaker. It prepares to join at the meeting time.
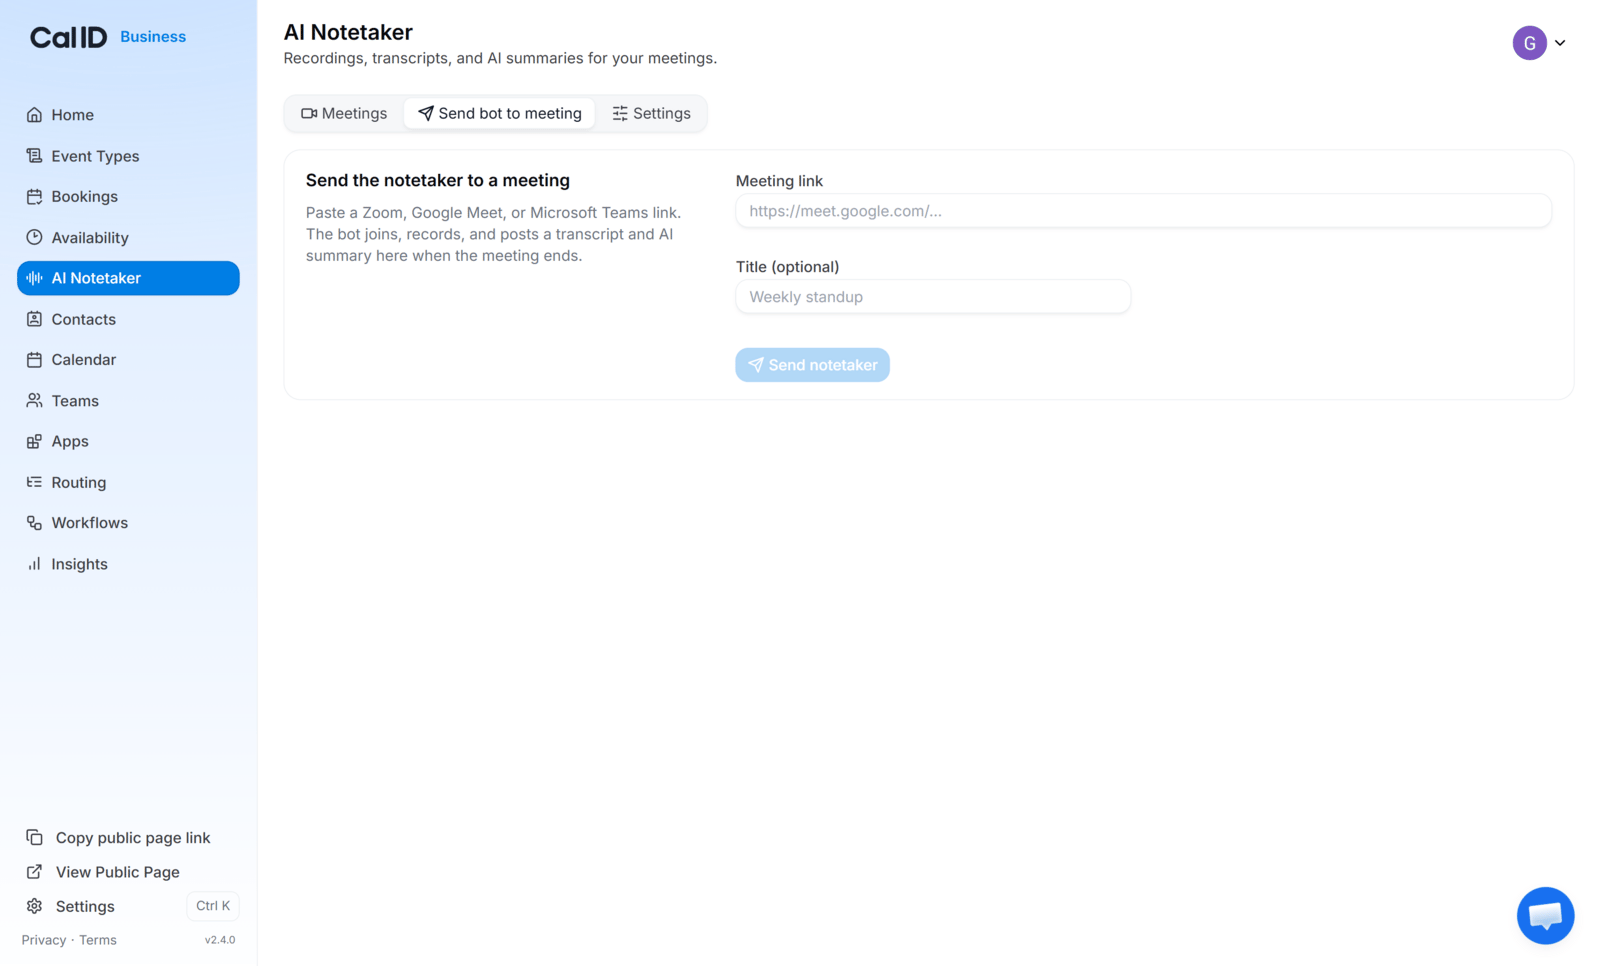
Inviting the bot to an outside meeting
Settings
The Settings page controls how the notetaker behaves before, during, and after meetings.- Recording hours this month — the total meeting time recorded this month (for example, 2.5 hrs), updated automatically.
- Automatically join my booked meetings — when on, the notetaker joins eligible meetings without being invited each time.
- Which meetings — appears only when auto-join is on: All my booked meetings, or Only bookings made through Cal ID (recommended).
- Announce the notetaker and Announcement message — show a custom message to attendees when it joins.
- Bot name and Bot profile picture — customize the display name and avatar (PNG, JPG, or SVG; a 16:9 image works best).
- Meeting language — the language used for transcription.
- Email me the summary / Email attendees the summary — send the AI summary to the organizer and, optionally, the attendees after processing.
- Delete recordings after — retention: Keep forever, 30 days, 90 days, 6 months, or 1 year.
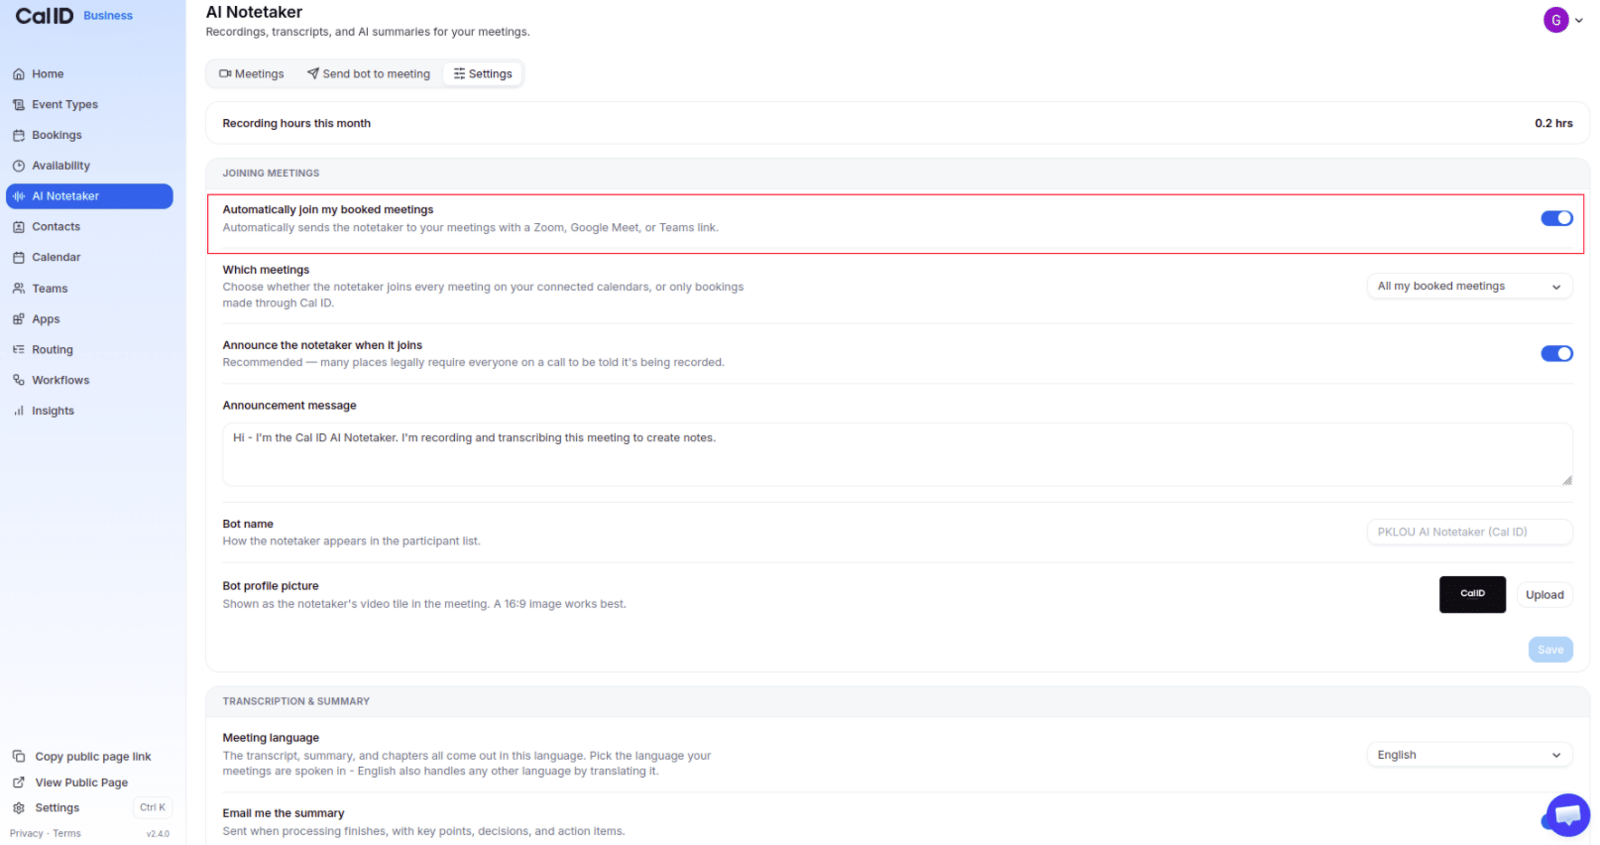
Choosing which meetings get recorded
Recommended settings
Best practices
- Admit the notetaker as soon as it joins, and tell the host in advance that it will request access.
- Let the meeting finish and processing complete before expecting a transcript.
- Use descriptive meeting titles so they’re easy to search later.
Get the most from the notetaker
Subscription & pricing
See how the AI Notetaker add-on is licensed and priced.
Connect Google Calendar
Connect the calendar that schedules the meetings you record.
Connect Zoom
Add Zoom as a meeting location for your event types.
Browse the App Store
Discover the other apps you can connect to Cal ID.