Personalize your Cal ID workflow reminders with custom sender names, dynamic subject lines, and booking variables so every message feels on-brand.
A custom template gives you full creative control over how your reminders and notifications look. The Default Template is great for a quick setup, but switching to a Custom Template unlocks personalized sender names, dynamic subject lines, and booking variables so every message feels on-brand.
Go to the Message template field and select Custom from the dropdown. This unlocks editing for the Sender Name, Subject, and Email Body.
Switching to a custom template
2
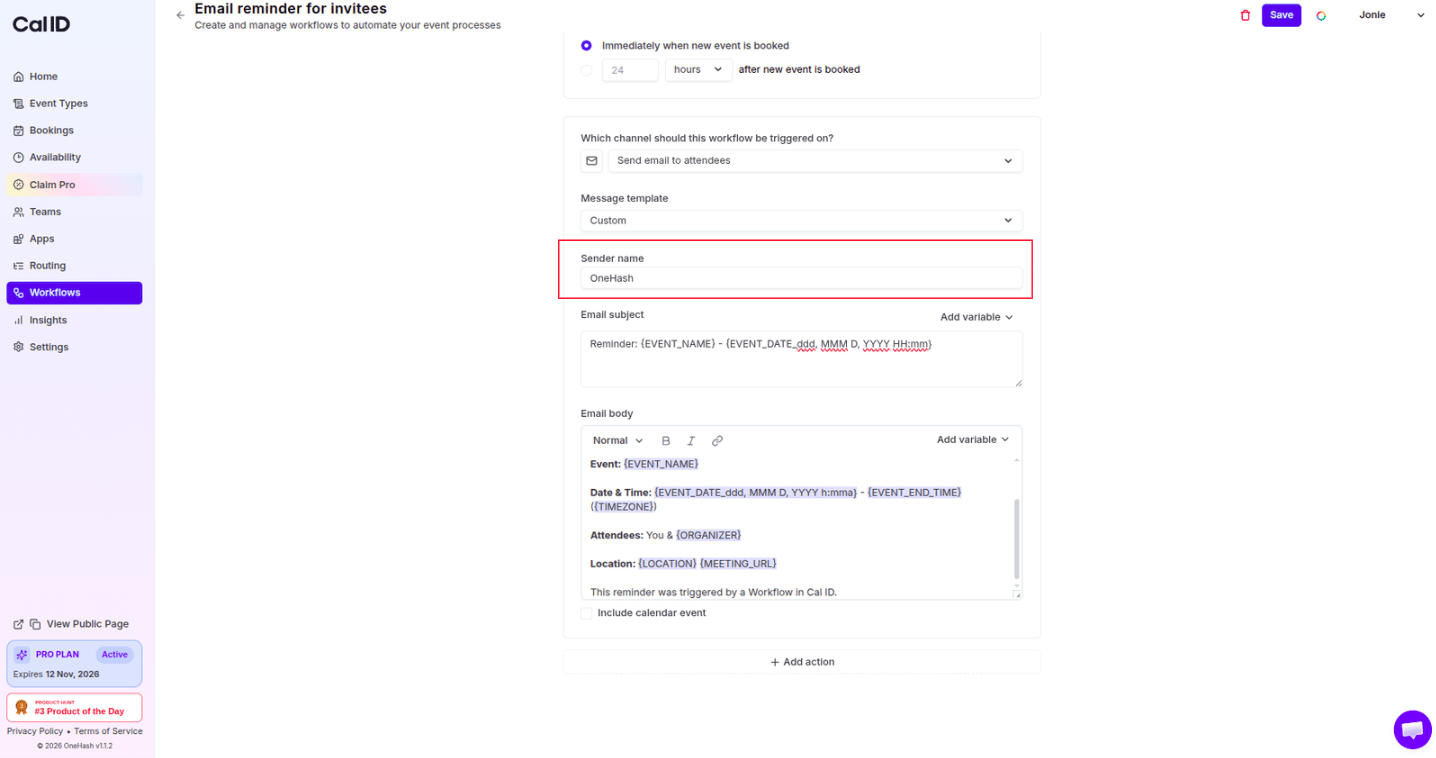
Set the sender identity
With a custom template you aren’t stuck with a generic “Cal ID” name. Change the Sender Name to your own name, your company’s name, or a specific department to build trust with your attendees.
Making messages come from you
3
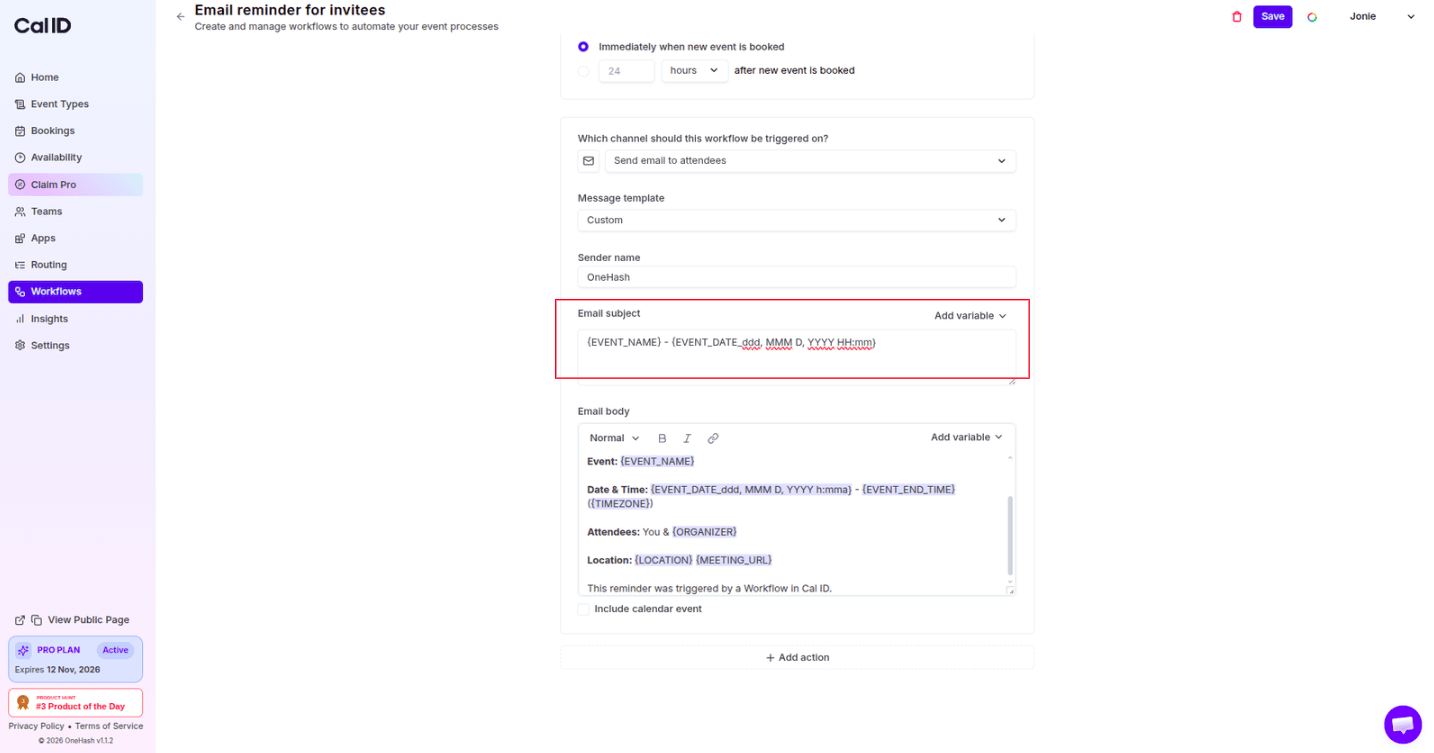
Craft a dynamic subject line
The subject line is the first thing attendees see. Write a catchy, relevant Custom Subject from scratch, and use the Add variable dropdown to drop in values like the {EVENT_NAME} or {ATTENDEE} name so it stands out in a crowded inbox.
Personalizing the subject with booking data
4
Use variables in the body
To keep every email personal and accurate, use the Add variable dropdown in the Subject and Email Body sections. Each token below is replaced with real booking data when the message is sent.
Variable
Inserts
{EVENT_NAME}
The title of the meeting
{EVENT_DATE}
The formatted date of the session
{MEETING_URL}
The link for your video call (Zoom, Google Meet, etc.)
{LOCATION}
The physical address or meeting details
{ATTENDEE}
Full name of the attendee
{ATTENDEE_FIRST_NAME}
First name of the attendee
{ATTENDEE_LAST_NAME}
Last name of the attendee
{CANCEL_URL}
URL for cancelling the meeting
{ORGANIZER_NAME}
Name of the organizer
{RESCHEDULE_URL}
URL for rescheduling the meeting
{ATTENDEE_TIMEZONE}
Timezone of the attendee
You can’t customize the template of an SMS workflow.