Automate reminders and follow-up notifications by attaching Email, SMS, or WhatsApp workflows to your Cal ID event types with configurable triggers.
Workflows let you automate the messages around a booking so you never have to send a reminder or follow-up by hand. Attach a workflow to any event type to send Email, SMS, or WhatsApp reminders before a meeting starts, cutting no-shows, or to send follow-ups after it ends, such as a feedback survey, extra details, or a simple thank-you note.Each workflow is built from a single trigger (the event that starts it) and one or more actions (the notifications it sends).
Log in to your Cal ID account, then click Workflows in the left sidebar.From here you can use a default template for Email, SMS, or WhatsApp, or build a custom template with your own variables. To start a custom template, click + Add Custom.
Picking a template to start from
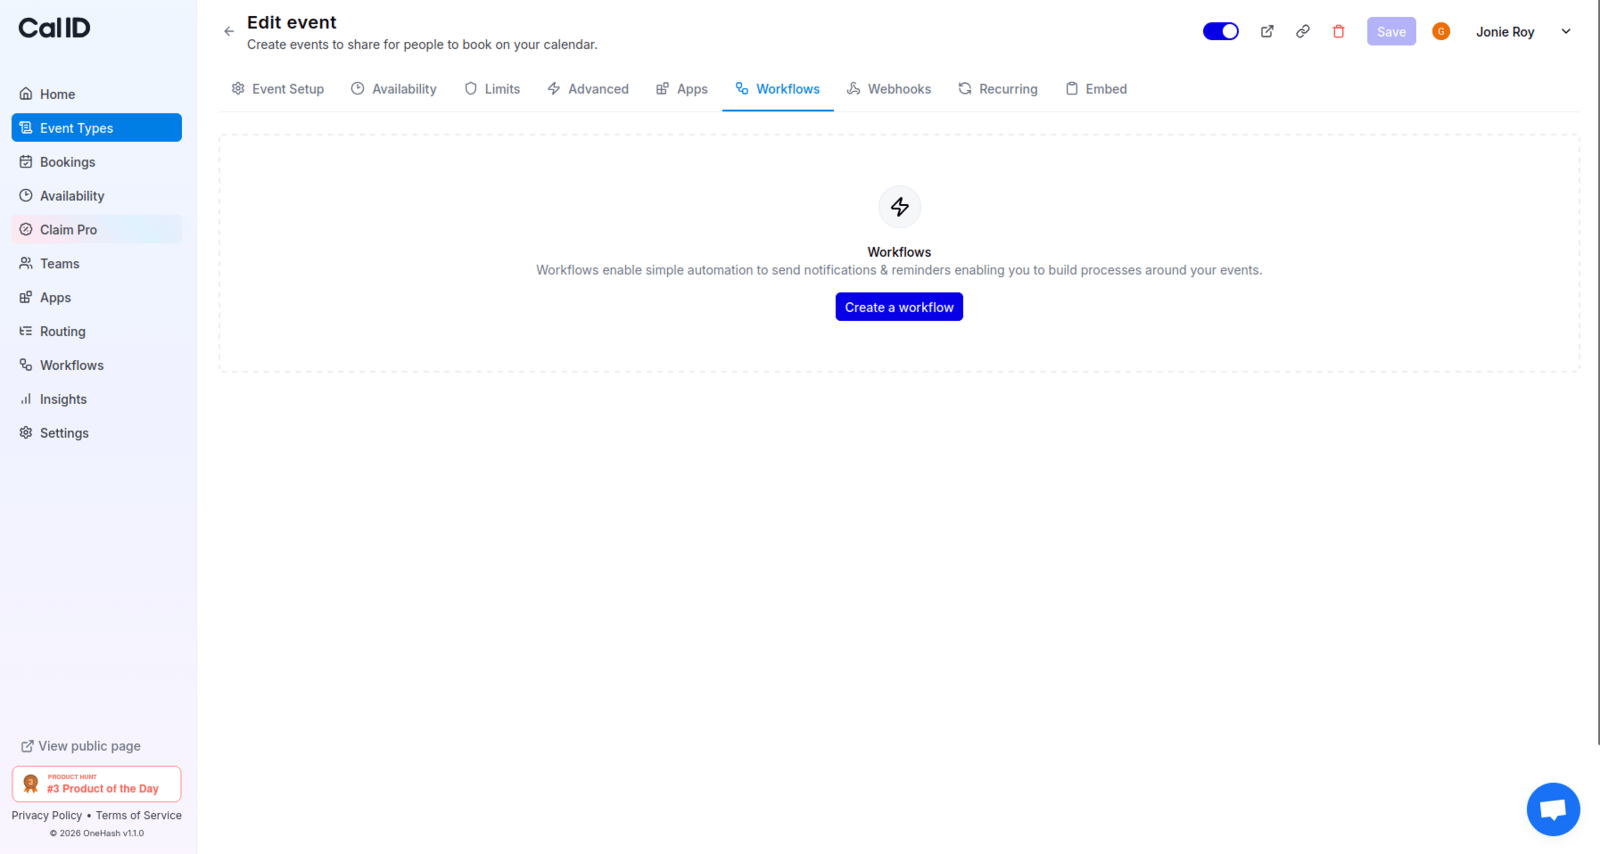
You can also start a workflow directly from an event type: Event type → Workflows → Create a workflow.
Starting a workflow from an event type
2
Name and assign the workflow
Before adding any logic, identify what this workflow is for:
Name your workflow: Give it a clear title (for example, “My 24-Hour Reminder”).
Select event types: Check the boxes for the specific meetings this workflow should apply to.
Deciding what this workflow covers
3
Choose a trigger
The trigger is the event that starts the automation. Pick one from the dropdown:
Trigger
Fires when
Before event starts
A set number of minutes, hours, or days before the event begins
Event is cancelled
A booking is cancelled
New event booked
A new booking is created
After event ends
A set number of minutes, hours, or days after the event ends
Event is rescheduled
A booking is rescheduled
Deciding when the workflow fires
4
Add an action
The action decides how you reach out. An action is a designated notification type, for example a reminder to an attendee, a specific phone number, or an email address. Pick one from the dropdown:
Action
Sends to
Send email to host
The meeting host
Send email to attendee
The booker
Send SMS to attendee
The booker
Send SMS to a specific number
A fixed phone number you enter
Send WhatsApp message to attendee
The booker
Send WhatsApp message to a specific number
A fixed WhatsApp number you enter
Deciding how you reach out
When everything looks right, save the workflow.
Your workflow is live. Cal ID will now send the message automatically whenever the trigger fires on the assigned event types.
You can use the default template for your messages, or switch to a custom template and add your own inputs as variables. For a full walkthrough, see Customizing your workflow.
Insert dynamic text into your messages using variables. Each one is replaced with real booking data when the message is sent.
Variable
Description
{EVENT_NAME}
The title or name of the scheduled event
{EVENT_DATE}
The date when the event is scheduled
{EVENT_TIME}
The start time of the event
{EVENT_END_TIME}
The end time of the event
{TIMEZONE}
The timezone of the person receiving the message
{LOCATION}
The location of the event
{ORGANIZER_NAME}
The organizer’s (host’s) name
{ATTENDEE}
Full name of the attendee (the booker)
{ATTENDEE_FIRST_NAME}
First name of the attendee
{ATTENDEE_LAST_NAME}
Last name of the attendee
{ATTENDEE_EMAIL}
The email address of the event attendee
{ADDITIONAL_NOTES}
Any additional notes or comments for the event
{MEETING_URL}
The URL to join the meeting or event
{CANCEL_URL}
The URL to cancel the event
{RESCHEDULE_URL}
The URL to reschedule the event
{RATING_URL}
The URL for attendees to rate the event
{NO_SHOW_URL}
The URL to report a no-show for the event
{ATTENDEE_TIMEZONE}
The timezone of the attendee
{START_TIME_TZ_BOOKER}
The event start time converted to the booker’s timezone
{END_TIME_TZ_BOOKER}
The event end time converted to the booker’s timezone
{EVENT_TYPE_NAME}
The title or name of the event type
If the location is a video conferencing app, {LOCATION} resolves to ‘Zoom’ or ‘Google Meet’ and {MEETING_URL} is the actual link to the meeting. If the location is not a video conferencing app, {MEETING_URL} is empty.
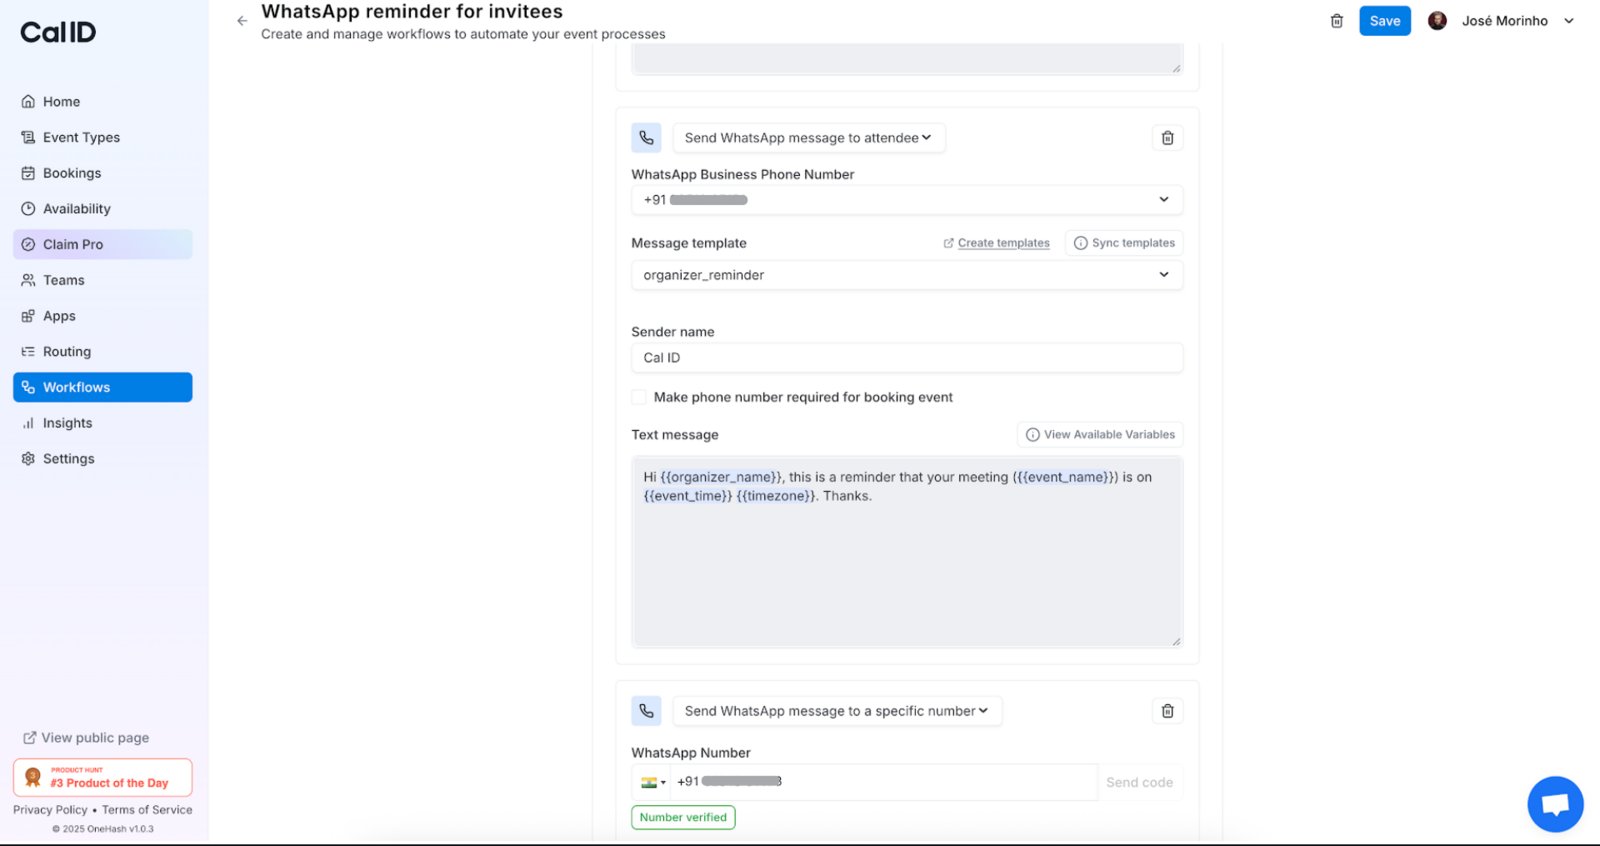
If you choose Action = WhatsApp, the message is sent by default from the Cal ID WhatsApp number. To send from your own WhatsApp number, integrate WhatsApp Business from the Cal ID App Store. See Integrate WhatsApp Business for the full setup.Once WhatsApp Business is integrated:
1
Create or edit a workflow
Open the workflow you want to use, or start a new one.
2
Select a WhatsApp action
Choose an action related to WhatsApp.
3
Choose your number and template
Select your WhatsApp Business phone number, then pick an approved WhatsApp template (created and approved in Meta).
4
Save the workflow
Save your changes.
Sending from your own WhatsApp number
Once setup is complete, WhatsApp messages are sent from your selected number to the attendee or to the specific WhatsApp number.