

Why use this setup?
- Host large groups: Allow multiple attendees to join a single session at once.
- Lock in a specific time: Ensure the event only happens when you want it to, without showing other daily availability.
- Control attendance: Set a maximum capacity for your webinar or discussion.
How to set it up
A locked group event comes from three settings working together: Offer seats (capacity), Limit future bookings (the date), and a Date Override (the exact time). Set all three and every booking funnels into one slot.
Enable group seating
1
Navigate to Event Types
Navigate to the Event Types tab in your dashboard.
2
Edit the event
Select the event you want to use and click Edit.
3
Go to the Advanced tab
Go to the Advanced tab.
4
Toggle Offer seats on
Toggle Offer seats to ON.
5
Set capacity
Enter the number of attendees allowed (e.g., 50 seats).
Pick the date
1
Find Limit future bookings
In the Limits tab, find Limit future bookings.
2
Choose the event date
Choose the specific date or the date range of your event. This hides all other days on your calendar so bookers only see the event day.
Set the exact time slot
1
Open the Availability tab
Go to the Availability tab for that specific event type and click Edit.
2
Add a Date Override
Add a Date Override for the day of your event.
3
Set the start and end time
Select the date on the calendar and set your specific start and end time (e.g., 3:00 PM to 4:00 PM).
4
Add more slots (optional)
If you want to host multiple sessions on the same day (for example, one at 10:00 AM and another at 4:00 PM), set the Date Override accordingly by adding multiple time ranges for that date.
5
Save
Click Save.
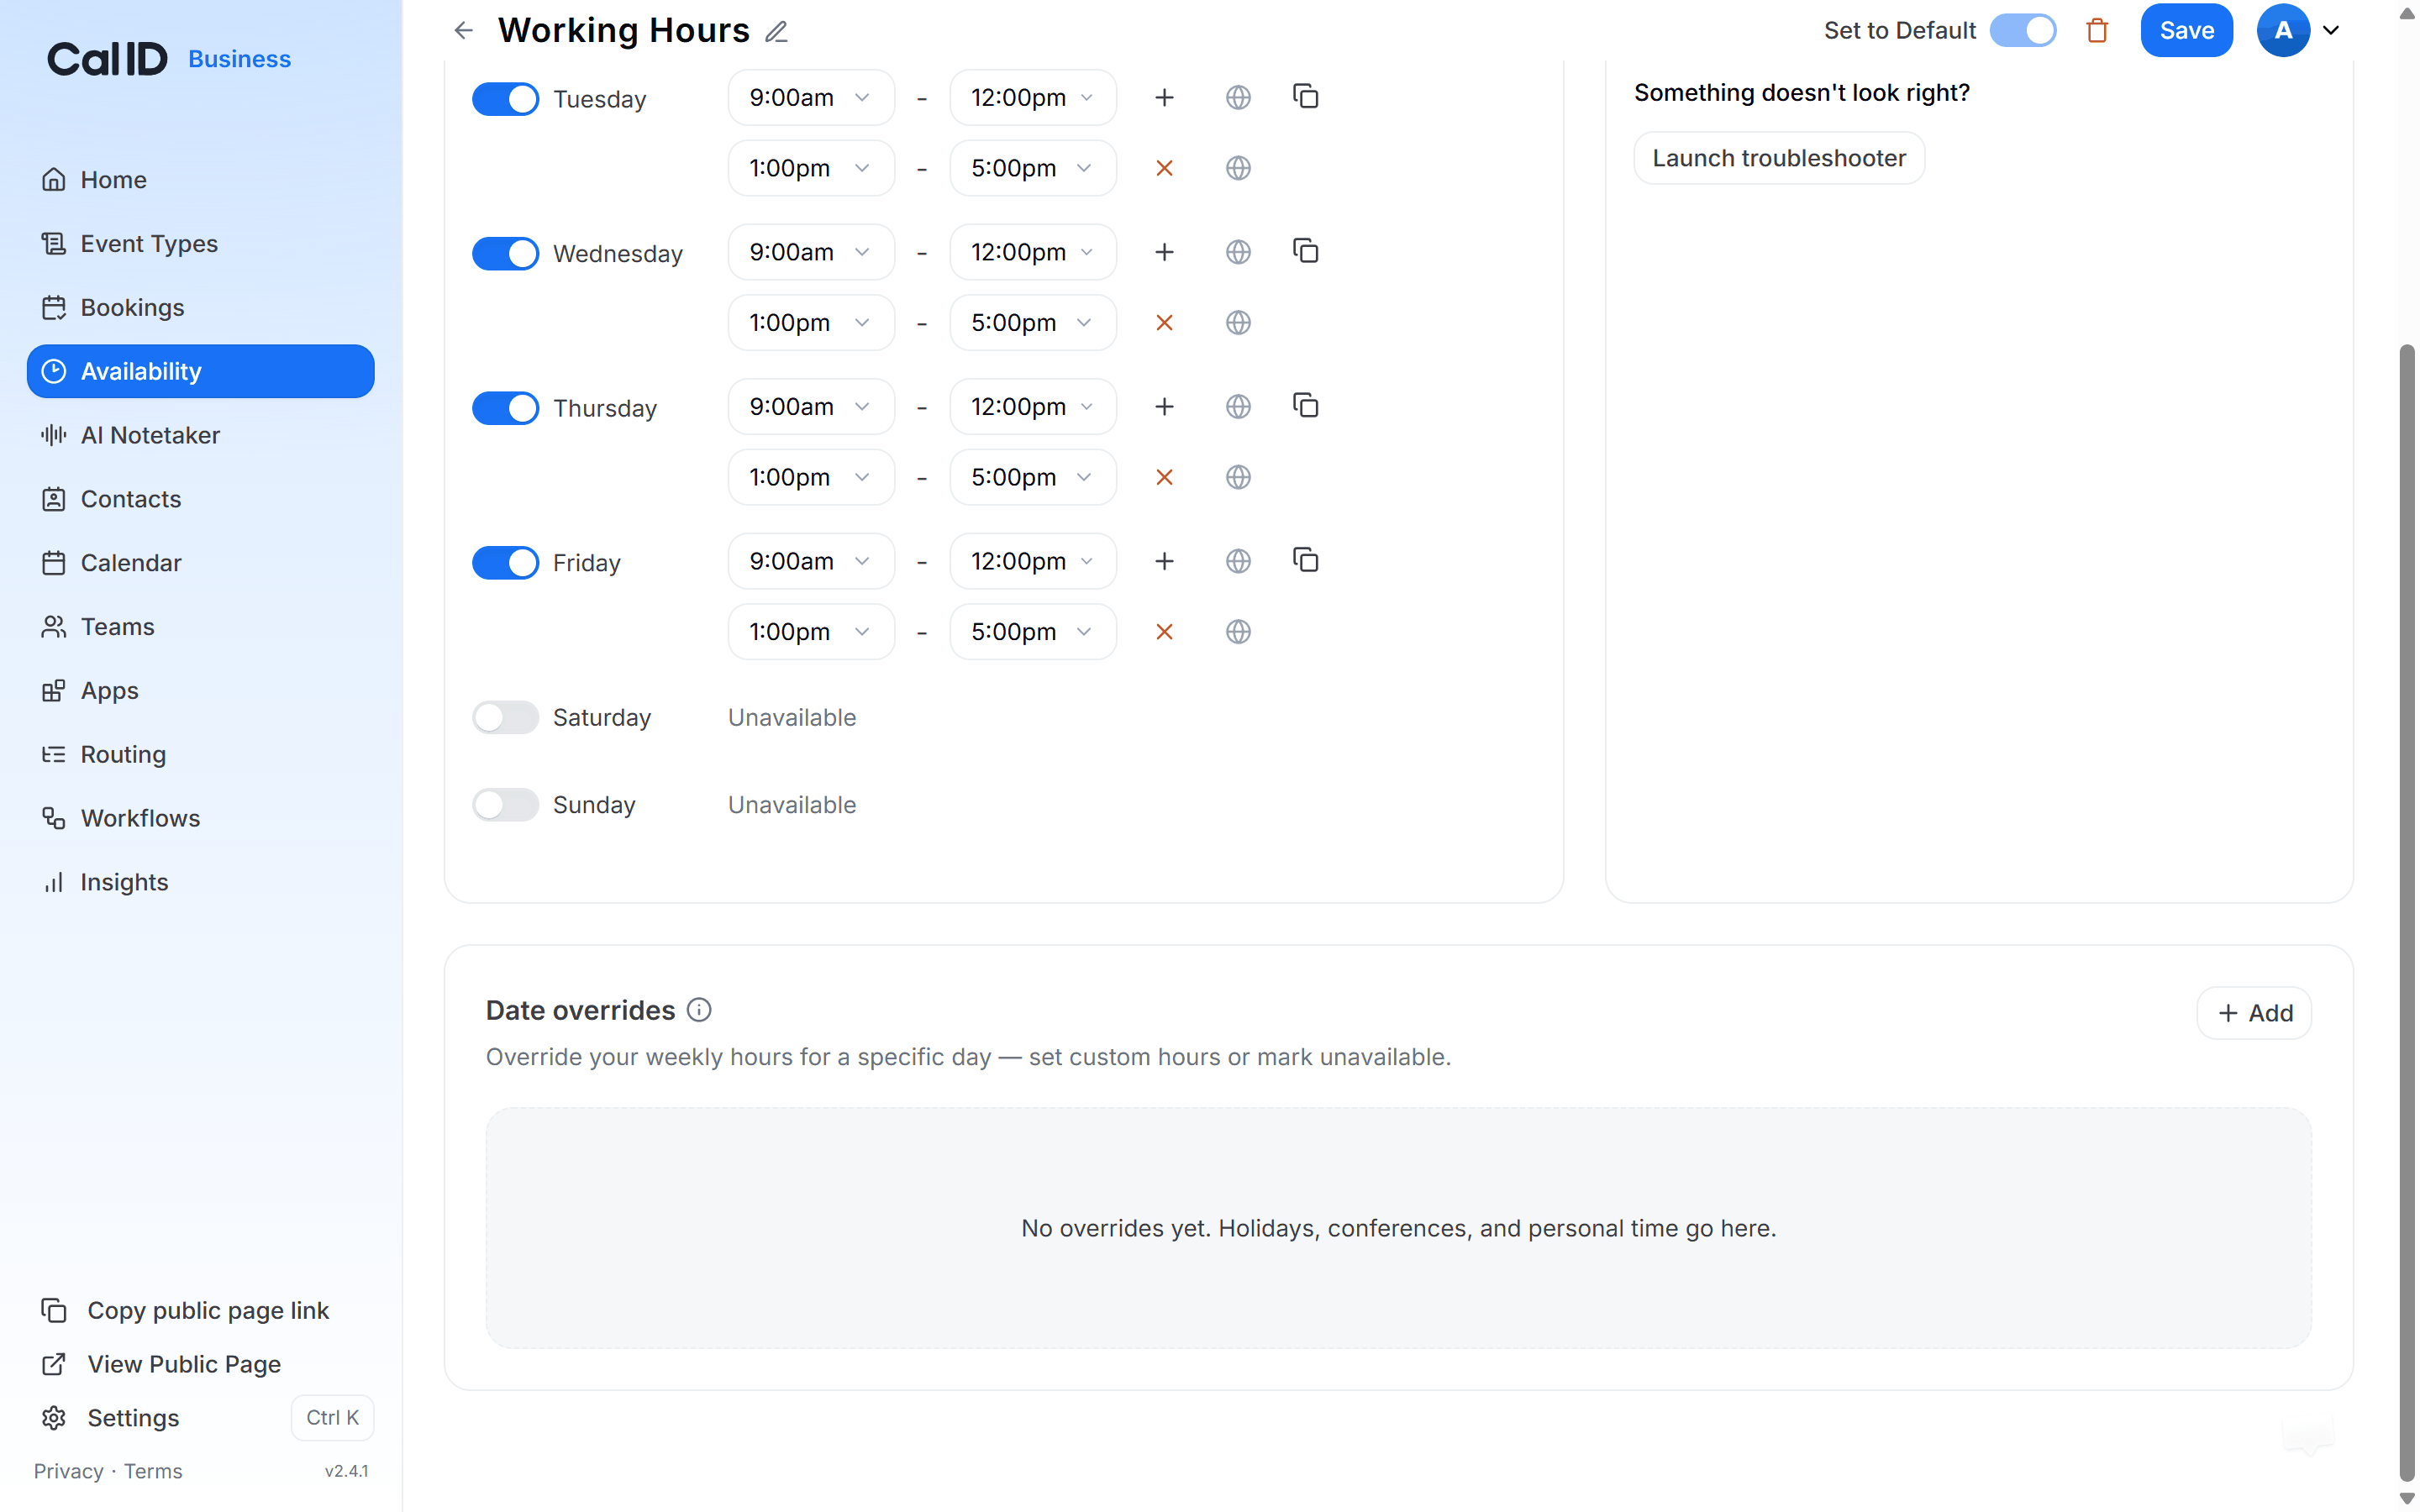
Pinning the session to one time
How it works & looks for the booker
- Limited calendar view: When the booker opens your link, they will see most dates “greyed out”. Only the specific date(s) you chose in Limit future bookings will be clickable.
- Specific time slots: After selecting the date, the booker will see only the specific time slots you created via the Date Override (e.g., 10:00 AM or 4:00 PM).
- Seat availability: The booking page may show how many seats are remaining, helping to create a sense of urgency for the event.
- Confirmation: Once they book, they receive a confirmation for that exact time, and the “seat count” for that slot automatically decreases by one.
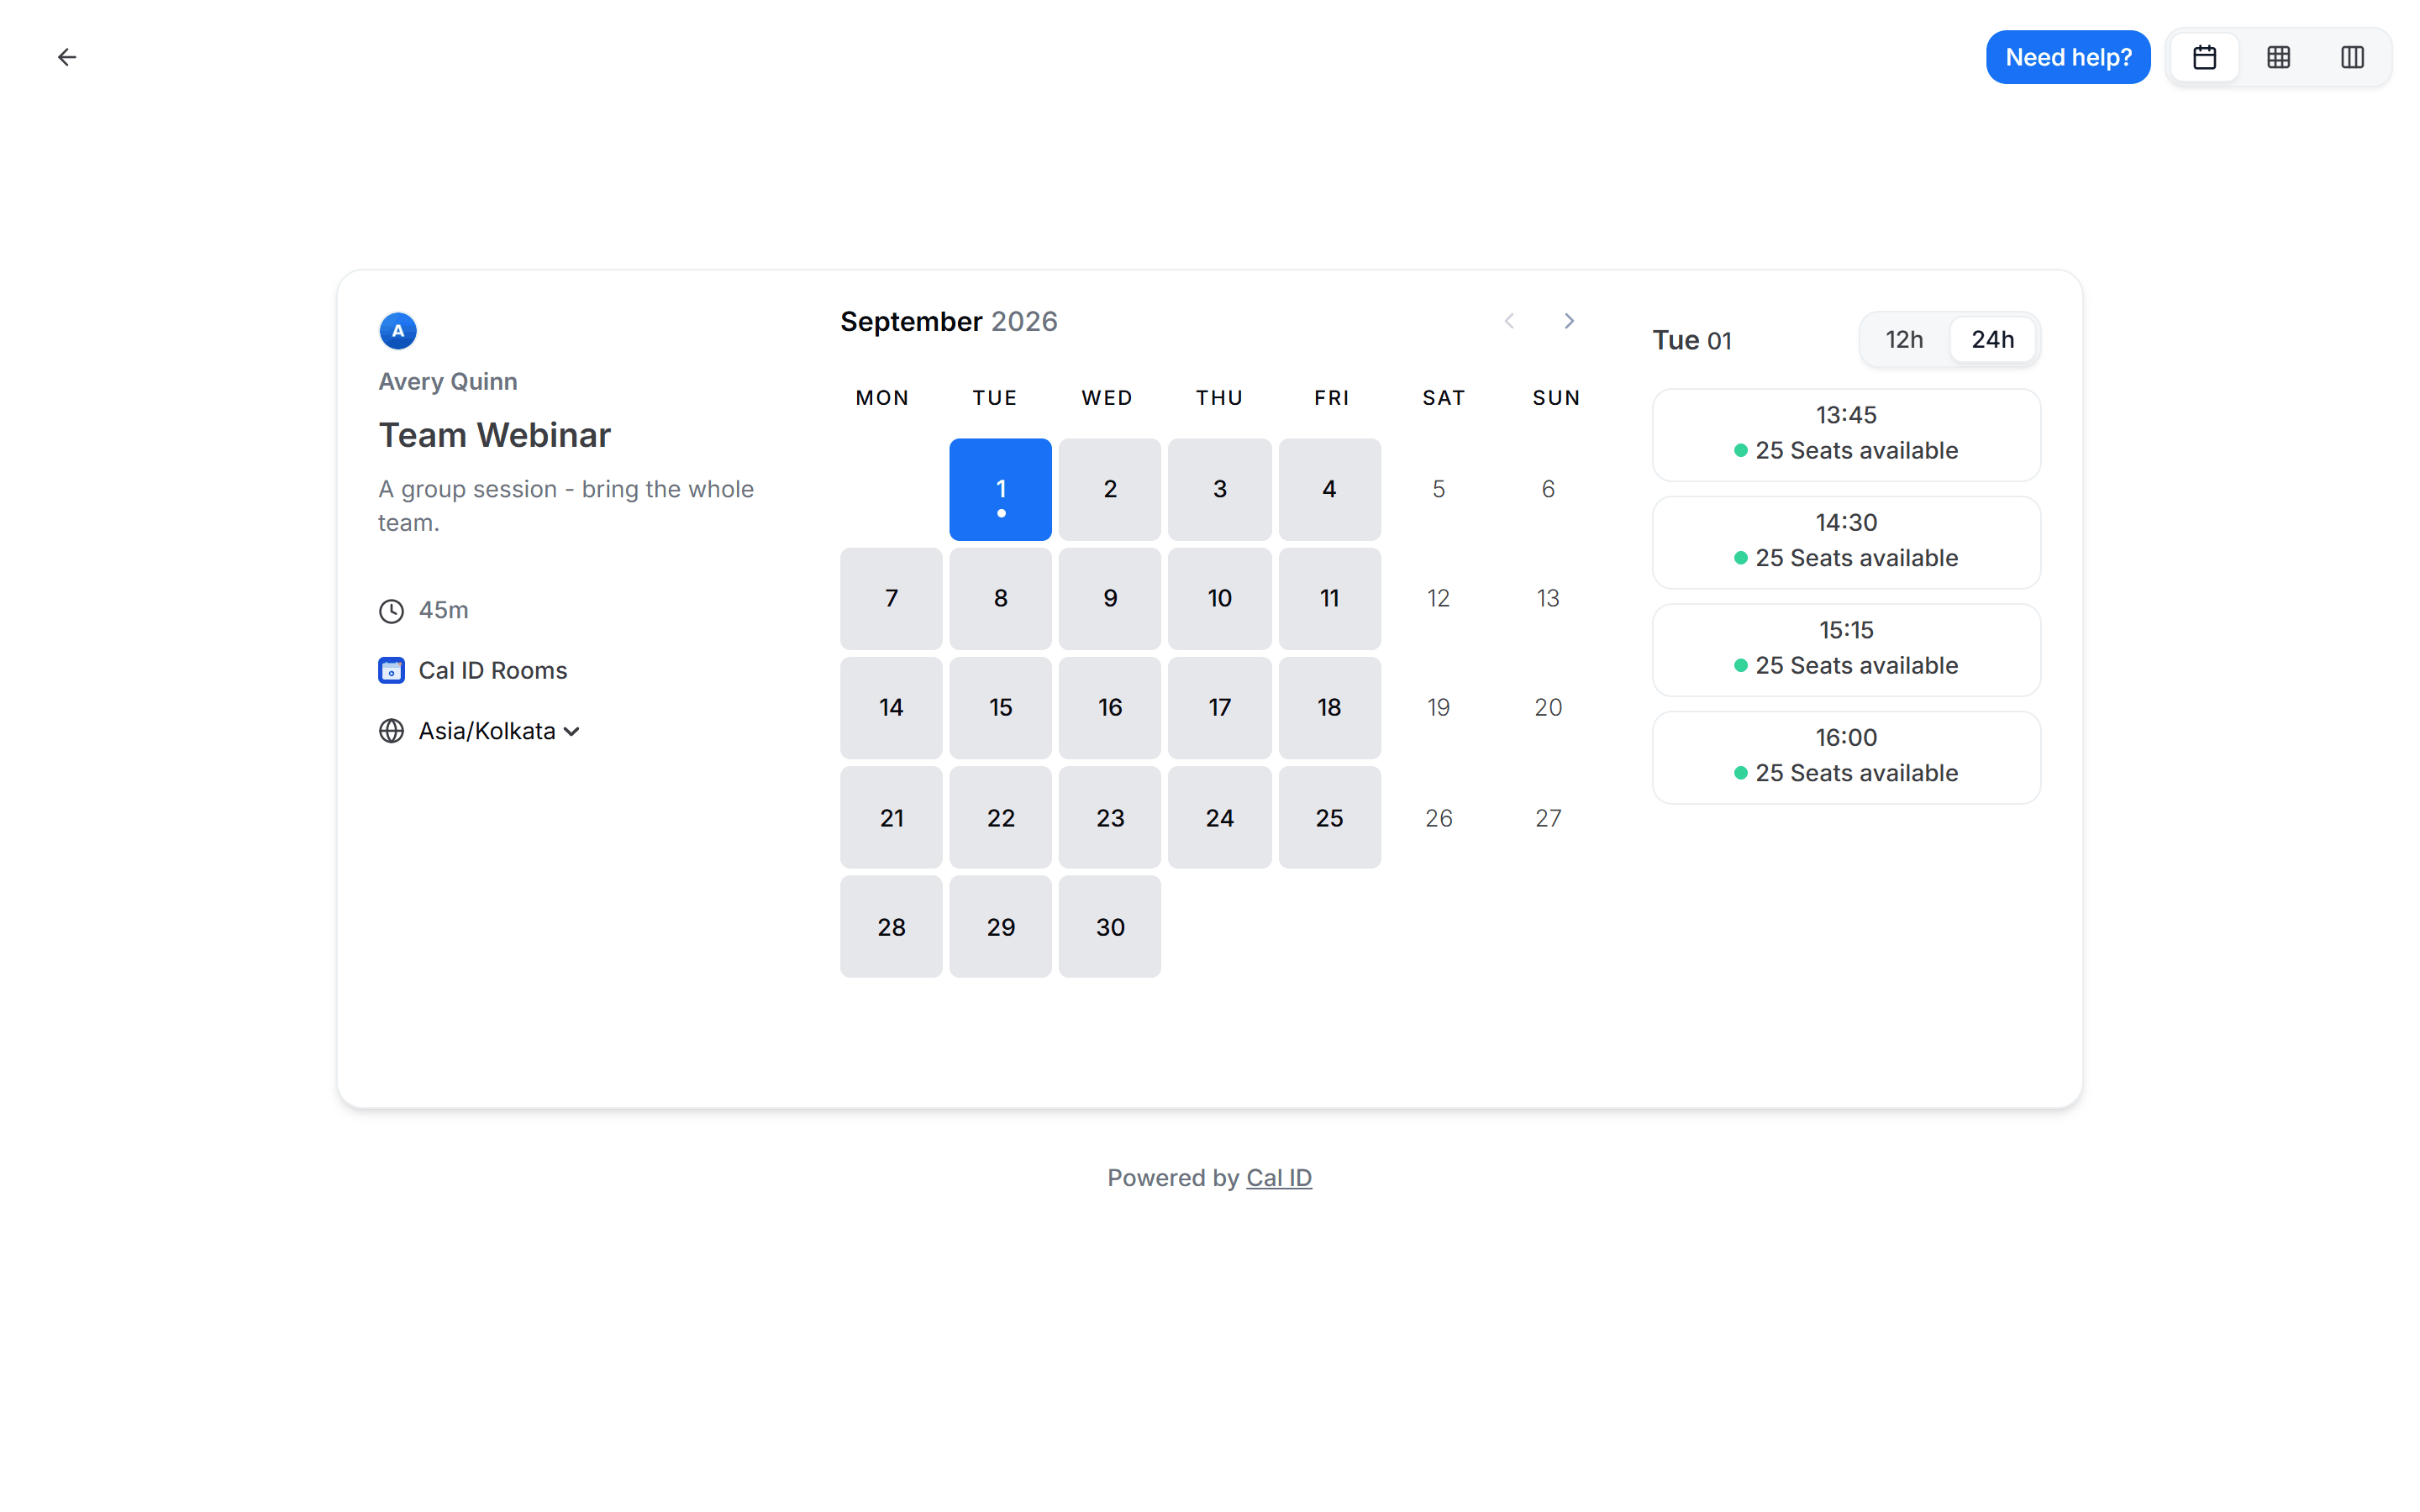
Funnelling everyone into one slot
Other multi-attendee formats
Offer Seats
Fine-tune capacity, seat visibility, and how attendees share a slot.
Recurring Events
Turn a one-time session into a repeating series attendees can subscribe to.