

Steps to create a webhook for an event type
1
Access Event Types
Log in to your Cal ID account and navigate to the Event Types tab in your dashboard.
2
Edit event type
Locate the specific event type you want to track, click the three dots on its card, and select Edit.
3
Open the Webhooks tab
Within the event editor, click on the Webhooks tab at the top of the page.
4
Add new webhook
Click the + Create button.
5
Configure webhook details
- Subscriber URL: Paste the listener URL provided by the application you are sending data to (e.g., Zapier, Pipedream, or your own server).
- Secret (optional but recommended): Enter a secret key to verify that the payload is authentic and has not been tampered with.
- Event triggers: Select the specific events that will trigger this webhook, such as Booking Created, Booking Rescheduled, or Booking Cancelled.
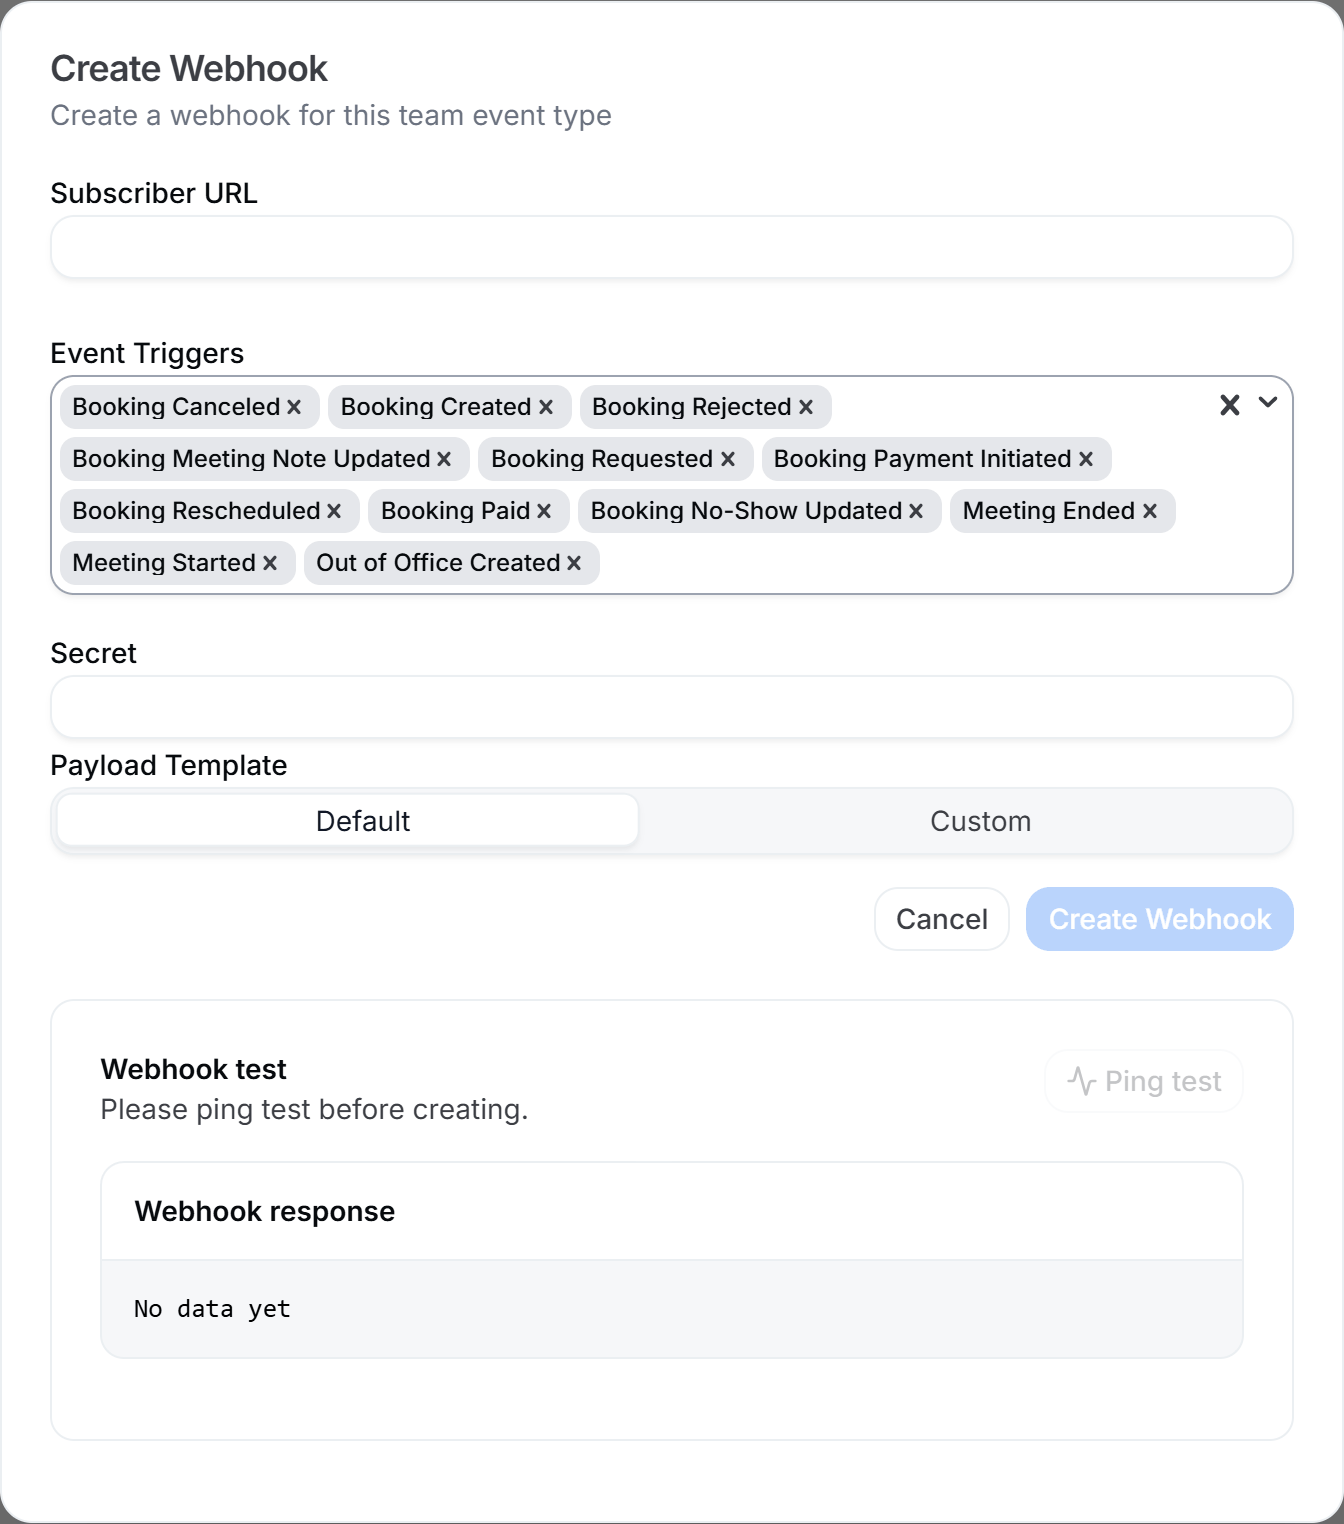
Pointing the webhook at your app
6
Save
Click the Create Webhook button to activate the webhook.
Important considerations
- Scopes: Event-type level webhooks trigger only for that specific event. To track every event across your account or a team, create a webhook at the User or Team level instead. To do that, visit Webhook in Cal ID.
- Team managed events: For team-managed events, it is highly recommended to create the webhook directly on the parent event type within the team dashboard to ensure it captures all bookings.
- Custom payloads: You can customize the data structure sent to your URL by using custom payload templates.
More webhook and integration options
Webhook Events Reference
See the full list of webhook triggers and their JSON payload schemas.
Webhooks in Cal ID
Create user- or team-level webhooks that fire across every event.
Enable Apps
Turn installed apps on or off for a specific event type.
Embed Your Booking Link
Add your booking link directly to your website.