Collect important files from your guests by adding an Attachment question to your Cal ID booking page. It’s perfect for gathering resumes, intake forms, or project briefs before a meeting begins — you can require the upload or leave it optional.

Why use attachments?

  • Be prepared: Review a guest’s resume or document before the meeting starts so you’re ready to discuss it.
  • Professional workflow: Gives your booking process a high-end, organized feel for things like job interviews or coaching sessions.

How to set it up

1

Open the Advanced tab

Go to your Event Types, click Edit on the event you want to change, and open the Advanced tab.
2

Add a question

Scroll down to the Booking questions section and click + Add a question.
The Add a question button in the Booking questions section
3

Select the Attachment input type

In the Input type dropdown, select Attachment.
4

Fill in the details

  • Identifier: A short name for the system (e.g., “Resume” or “Upload Project Brief”).
  • Label: The text your guest will see (e.g., “Attach-the-document”).
  • Required: Select Yes if the guest must upload a file to finish booking.
Configuring the Attachment question details
5

Add and save

Click Add, then click Save at the top of the page.
Saving the event type with the new attachment question

How it works for the booker

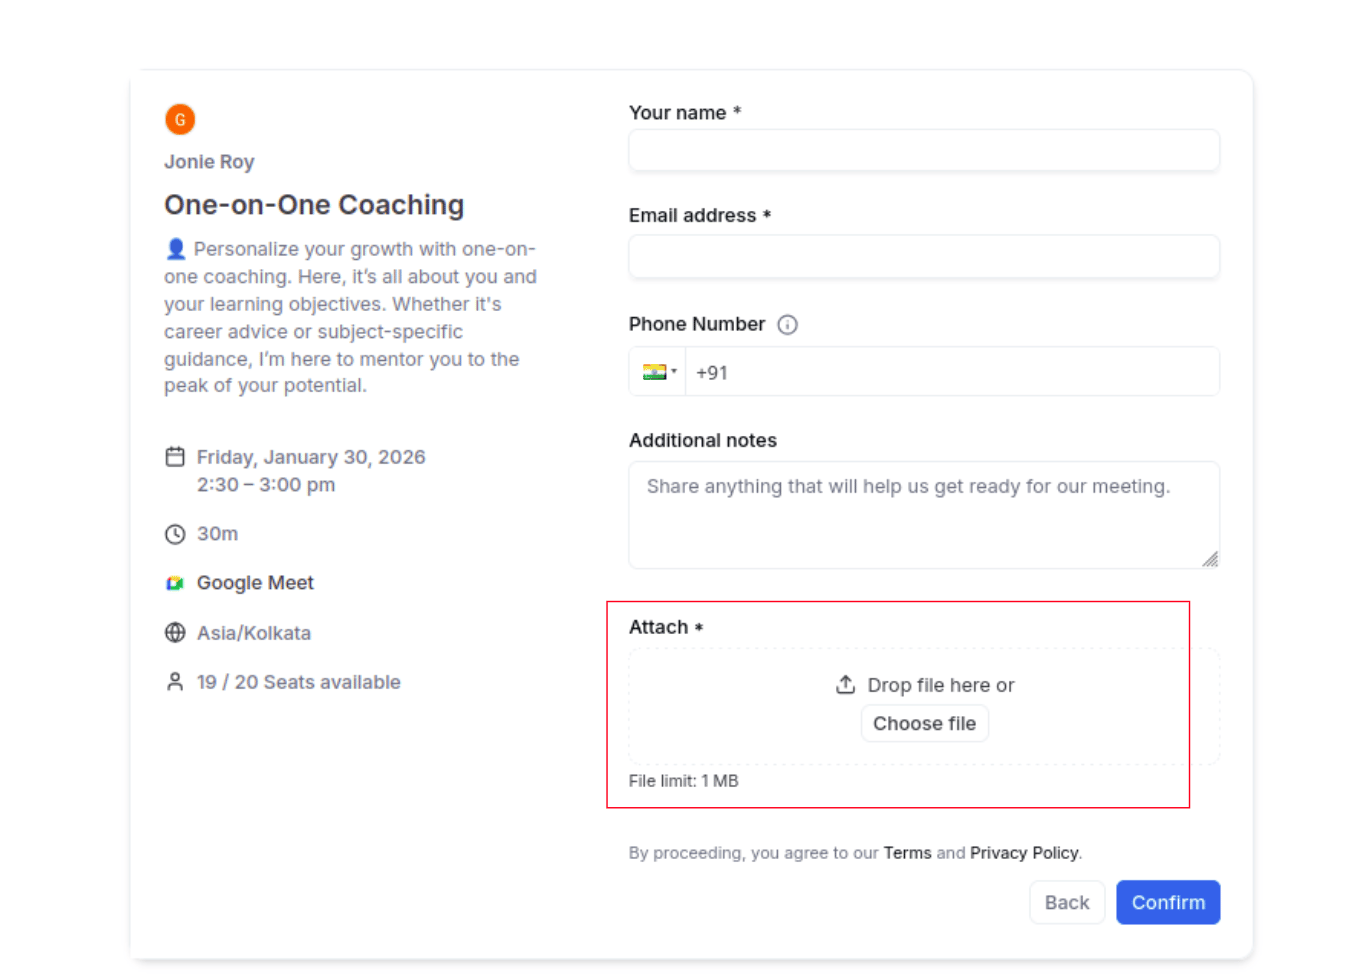
  • Upload field: On the booking page, the guest sees a “Drop file here or Choose file” box under your question.
The file upload box on the booking page
  • File selection: Guests can drag a file into the box or select one from their computer.
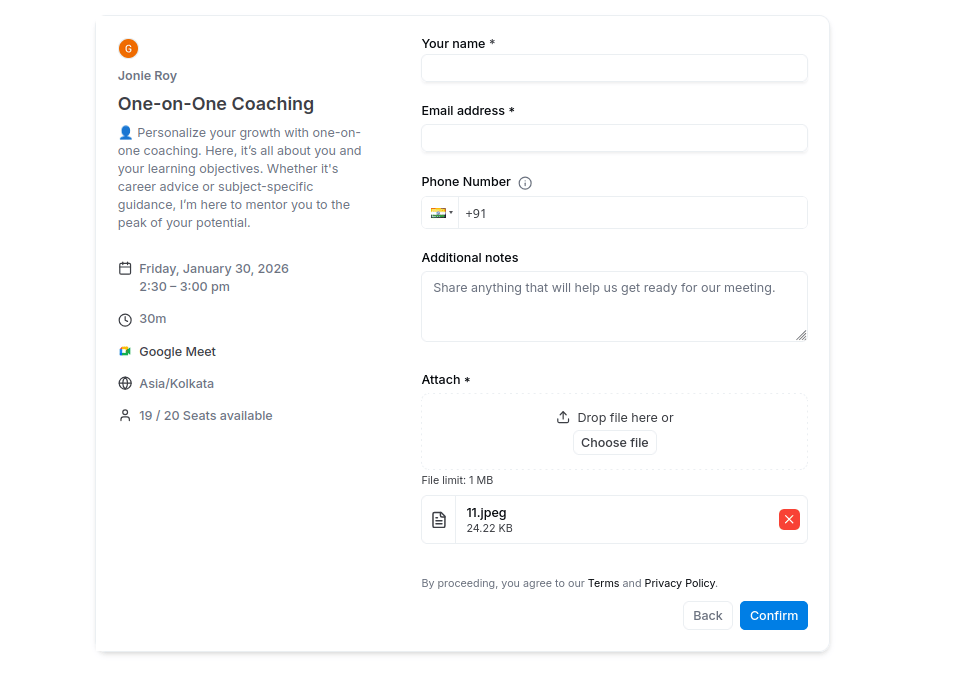
  • Visual feedback: Once uploaded, the guest sees the file name and size before clicking Confirm.
The uploaded file name and size shown to the booker

Where to find the files

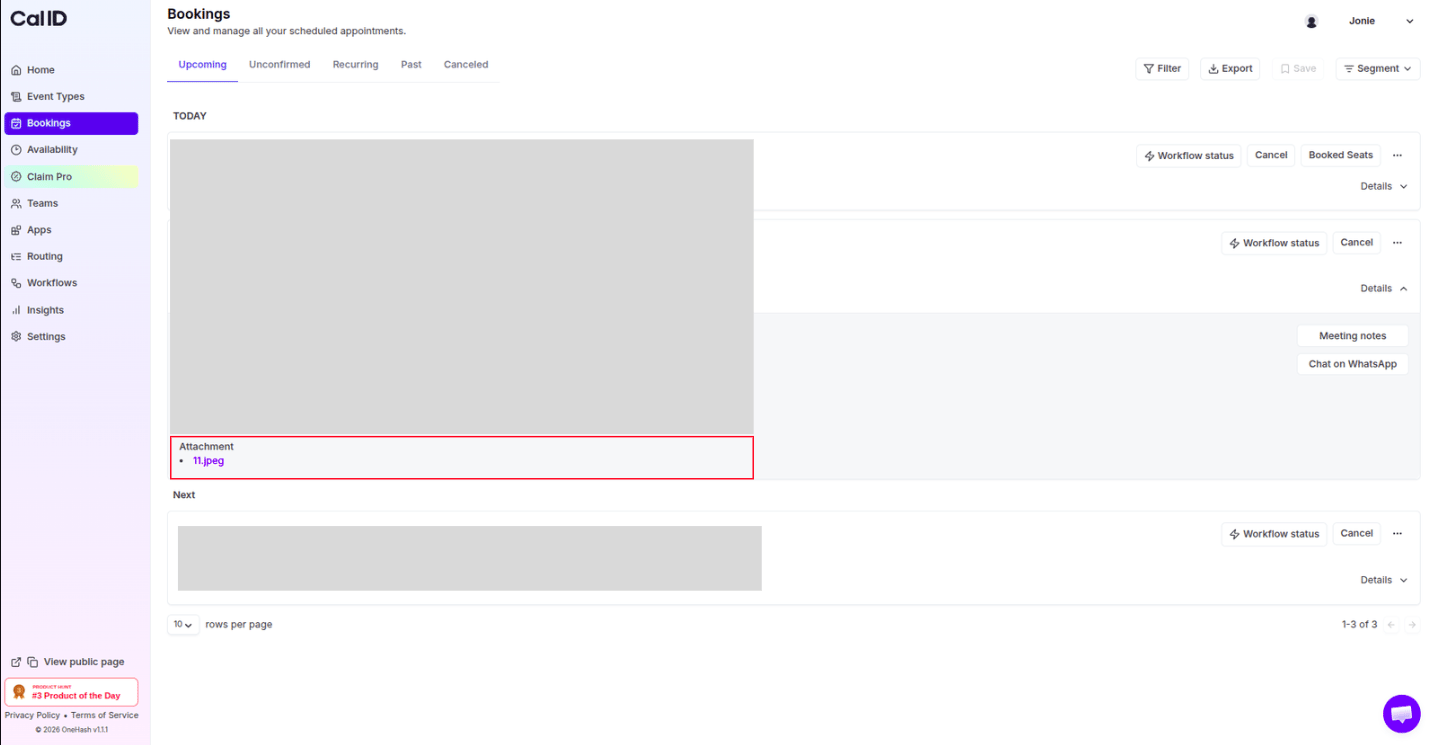
Once a booking is completed, you don’t need to check your email to find the file. Go to the Bookings tab in your Cal ID sidebar and click that specific booking to view and download the attached file.
Viewing and downloading an attached file from the Bookings tab

Next steps

Add pre-booking questions

Explore every input type and build your full intake form.

Hide & prefill questions

Pre-fill known data and hide internal-only fields with URL parameters.