

Customizing time-slot intervals
This feature allows you to decide if bookers see slots every 15 minutes, every 30 minutes, or at larger gaps. This is independent of your meeting duration. For example, you can have a 30-minute meeting but only allow it to start at the top of every hour.Why use time-slot intervals?
- Clean calendar look: Avoid a cluttered booking page by offering fewer, well-spaced start times.
- Standardized start times: Force meetings to start at consistent times (like 9:00, 9:30, 10:00) rather than random times like 9:15 or 10:45.
- Better scheduling control: By setting larger intervals, you can ensure your day follows a specific block-based structure.
How to set it up
1
Go to Event Types
Click on Event Types in the left sidebar.
2
Select an event
Click on the specific event you want to edit.
3
Navigate to Limits
Click on the Limits tab at the top of the event editor.
4
Find Time-slot intervals
Locate the dropdown menu on the right side of the screen labeled Time-slot intervals.
5
Choose your interval
- Select from the list of options (e.g., 15, 30, or 60 minutes).
- If you leave this blank, the system will typically use the event’s duration as the interval.
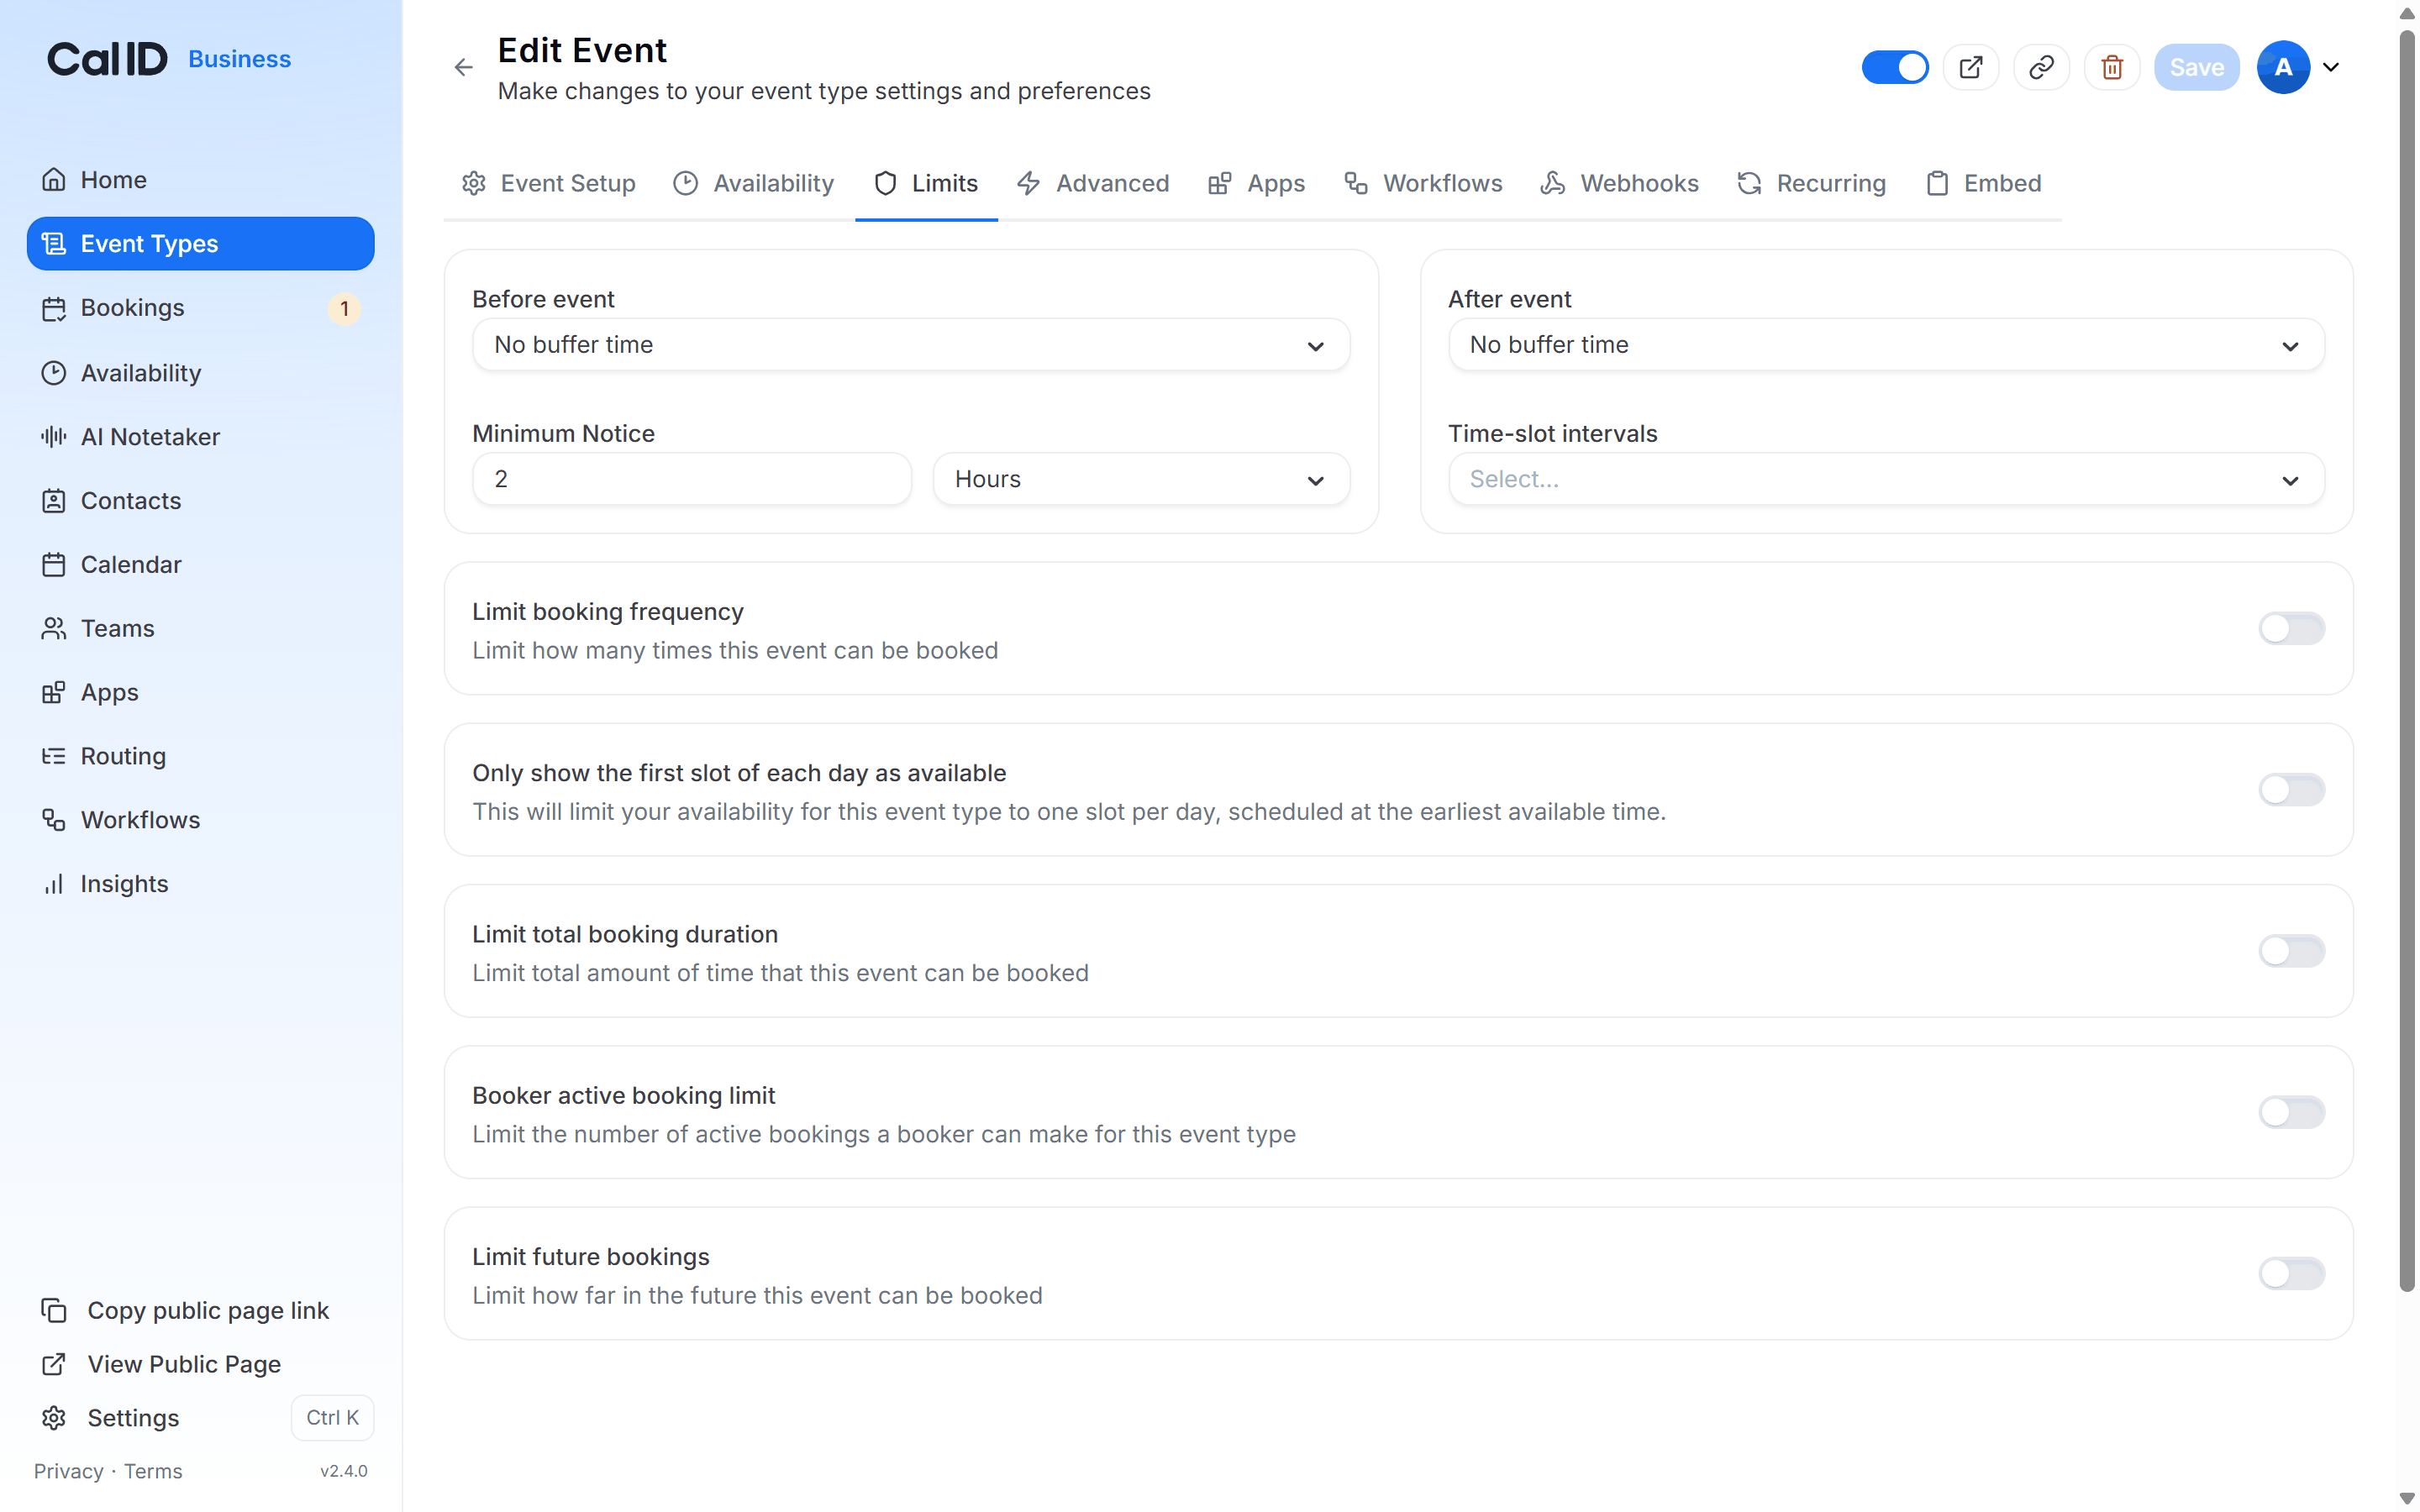
Spacing out your start times
6
Save
Click the Save button in the top right corner.
How it looks for the booker
The interval you choose sets the spacing between the start times a booker can pick:
The system will only show intervals that fit within your Availability Schedule and don’t conflict with other bookings.
Related slot and duration settings
Buffers Between Events
Add padding before or after meetings for prep and wrap-up.
Set Multiple Durations
Offer several meeting lengths within a single event type.
First Slot Only
Show bookers only the earliest open slot each day.
Limit Booking Frequency
Cap how many bookings you take per day, week, or month.