Event types are reusable meeting templates, like a “15-minute intro” or a “60-minute deep dive,” that let guests book the right amount of time with you without any manual back-and-forth. Set them up once and share the link anywhere.

What are event types?

Each event type is a pre-set meeting template you can share with anyone, fully customizable down to its name, URL, and duration.
  • Customizable settings: Create as many as you need, each with its own unique availability and location (like Zoom or Google Meet and many more).
  • Smart availability: When someone views your booking link, they only see slots where you are truly free. Cal ID automatically checks your integrated calendar for conflicts to prevent double-booking.
  • Professional examples: An HR professional might have a “Job Interview” (30 min) and a “Performance Review” (60 min), each with different settings.

How to create your event type

1

Start the new event

Log in to your Cal ID account and navigate to the Event Types page, then click the + New button in the top right corner.
New event button
2

Choose the account type

  • Personal Event: Set this up so people can book time directly with you.
  • Team Event: If you are part of a team, you can create an event type for that.
If you aren’t in a team, the event will automatically be added to your personal account.
Choose account type
3

Fill in the basic setup

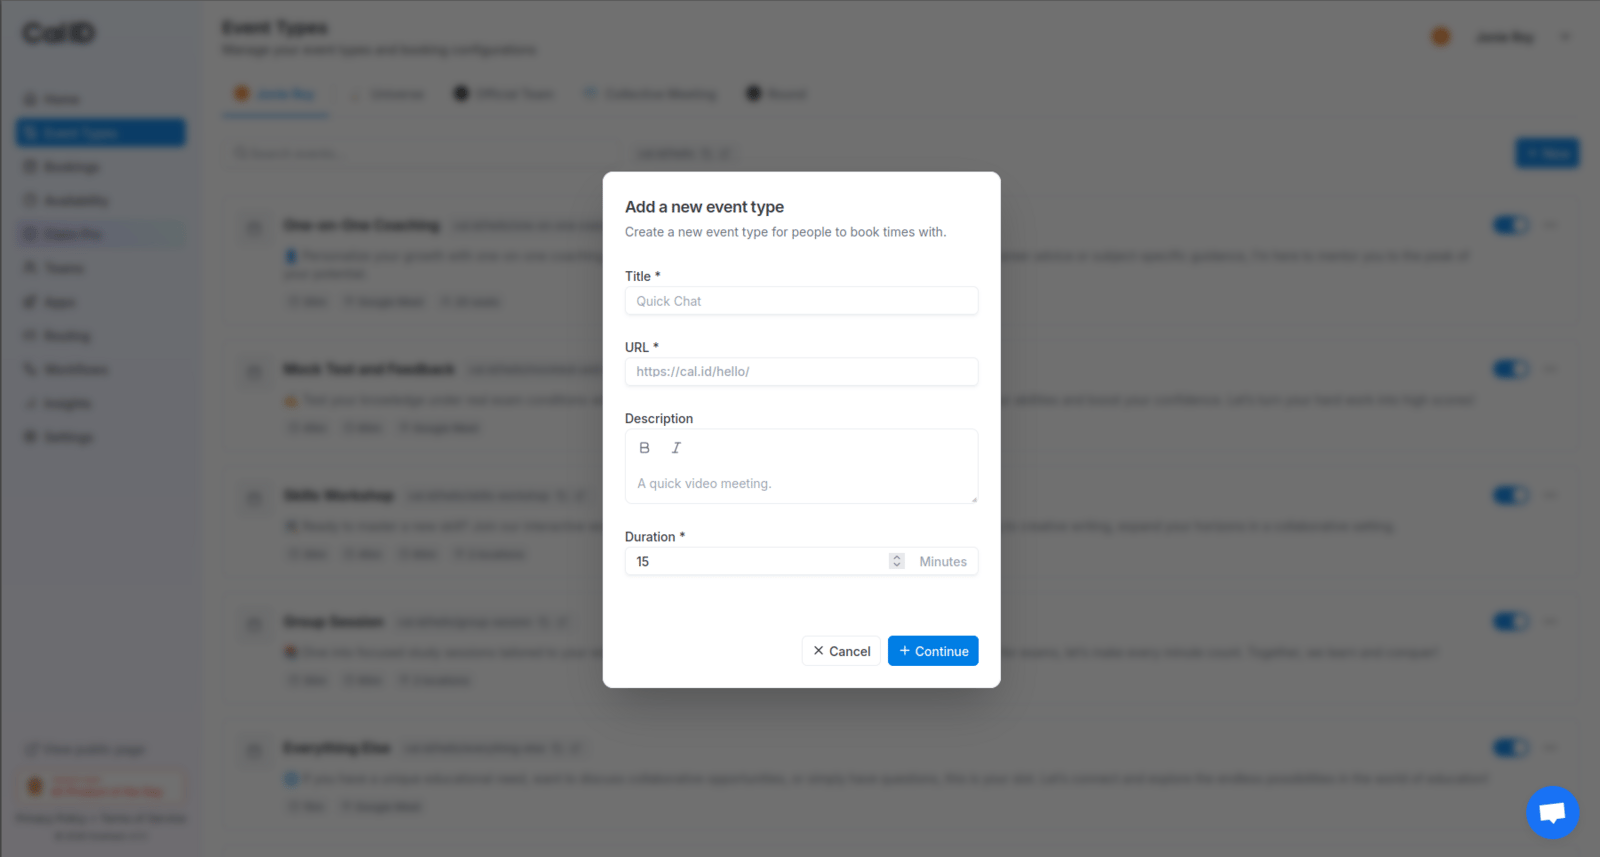
A pop-up will appear where you fill in the core details:
  • Title: Give your event a name (e.g., “Consultation”). This title automatically becomes part of the URL, but you can change it if you wish.
  • Description: Briefly explain what the meeting is for. This is shown to the booker on your public page.
  • Duration: Select how long the meeting will last (e.g., 15, 30, or 60 minutes).
Add new event type pop-up
4

Fine-tune the advanced configuration

After clicking Continue, a detailed page opens where you can fine-tune your event:
  • Event Setup: Edit your title, description, and location.
  • Availability: Set specific hours for this event type.
  • Limits & Buffers: Add extra time before or after meetings to give yourself a break.
  • Advanced: Adjust advanced settings.
  • Workflows: Set workflows for notifications and reminders.
  • Recurring: Set for repetitive bookings.
  • Embed: Get the embed code.

Preview your booking page

Before sharing your link, you can easily see exactly what your Booker will see. There are two simple ways to view the preview:
On your main dashboard, click on the External Link icon (square with an arrow) next to your event URL to open the live booking page in a new tab.
External link preview icon

Key benefits

  • Saves Time: No more “Are you free at 2 PM?” emails.
  • Flexibility: Switch events on or off with a single toggle.
  • Easy Sharing: Each event has its own unique link that you can send via email or embed on your website.

Next steps

Set the location

Choose where your meeting happens, from Zoom and Google Meet to in-person.

Add buffers

Give yourself breathing room before and after each meeting.

Ask booking questions

Collect the details you need from guests when they book.