Embed your Cal ID booking link directly on your website so clients can book meetings without ever leaving your page using inline, popup, or floating widgets.
Embed your Cal ID booking link directly in your website so clients can book without leaving your page. You choose how it appears — inline, as a floating button, as a pop-up, or as an email link — and the booking grid resizes to fit desktop, tablet, and mobile screens.
Follow these steps to generate and use your unique embed code.
1
Access your event settings
Log in to your Cal ID account.
Navigate to the Event Types tab from your dashboard.
Find the specific event you want to embed (e.g., “15-Minute Discovery Call”).
Click the three dots (…) on the right side of the event card and select Edit.
2
Open the Embed menu
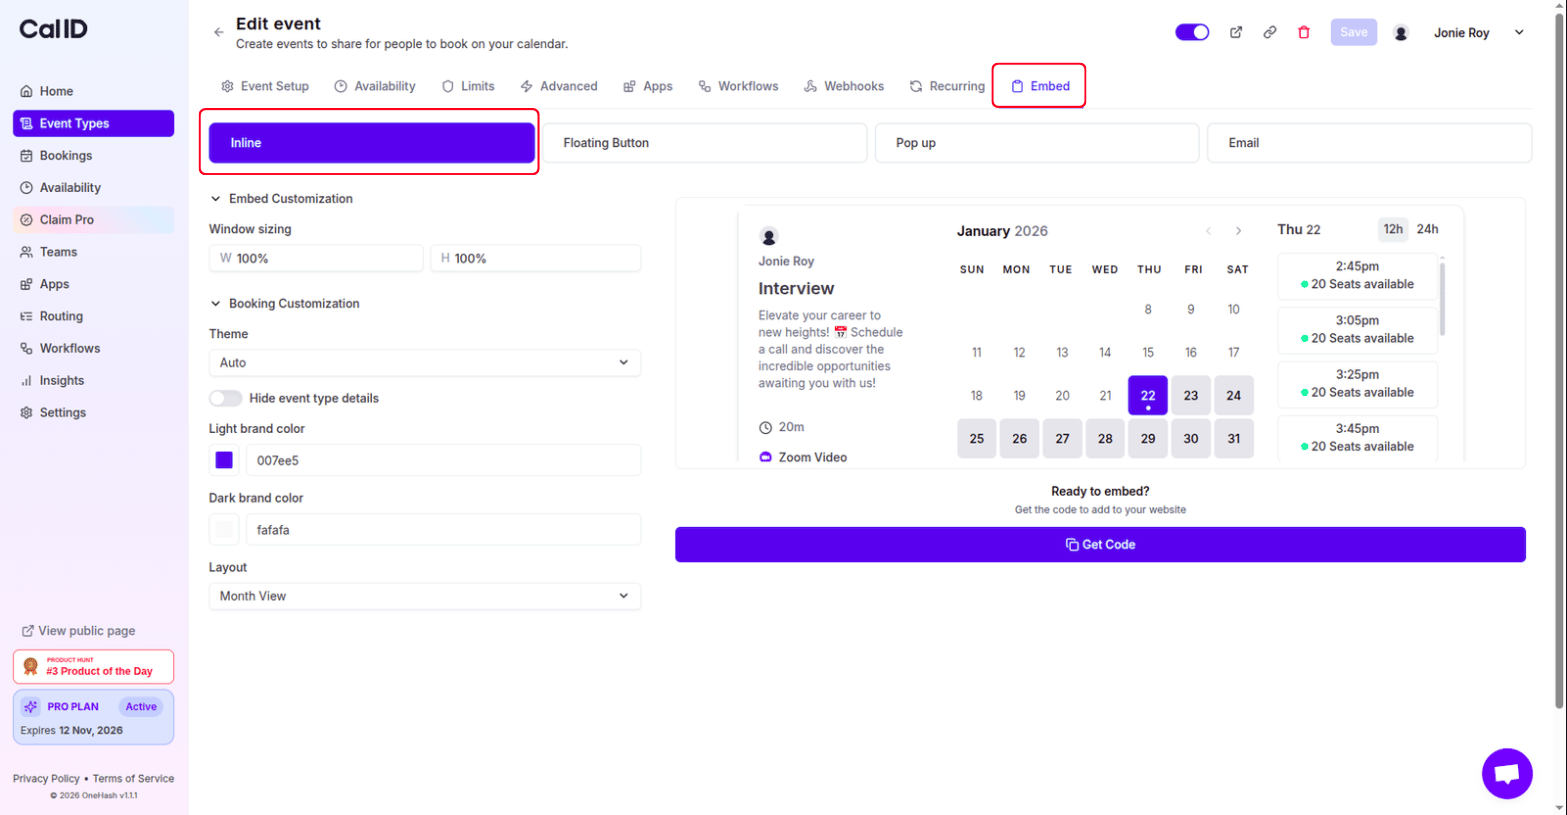
Inside the event editor, click on the Embed tab, then choose one of the four ways to display your calendar:
Inline
Floating Button
Pop-up
Email
Embeds the full scheduling calendar directly into your webpage content.
Picking the inline embed layout
Adds a persistent button (e.g., “Book a Meeting”) that stays in the corner of your website.
Triggers a scheduling window when a booker clicks a specific link or button you create.
Generates a snippet or link optimized for your email signature or marketing campaigns.
3
Customize the look (optional)
On the left side of the Embed screen, you will find a Settings panel. Use this to:
Change colors to match your brand.
Adjust the button text.
Modify the visibility settings.
4
Copy and paste the code
Once you have selected and styled your embed, click the Get Code button.
Copy the code provided.
Paste the code into the header or the HTML section of your website.
Multiple embeds on one page: You can place more than one scheduler on a single page — for example, a “15-Minute Intro Call” and a “60-Minute Technical Consultation” side by side. Each embed works independently, so visitors pick the meeting that fits their needs.